Children's Vanity Set with Pivoting Mirrors and Drawer


Finding a well-made children’s vanity is tough—most are flimsy, overpriced, or made of cheap materials. I wanted something sturdy and timeless, so I built my own!
This vanity is designed to be an heirloom, built from solid wood to last for generations. It features a fixed center mirror with pivoting side mirrors, a storage drawer for accessories, and a matching stool. Whether for dress-up or daily use, it’s a beautiful and durable addition to any child’s room.
An instant download PDF plan set that includes 26 pages of step-by-step instructions and 17 pages of 1:1 printable templates is available for this project. It includes everything you need to build your own vanity, such as a materials list, cut list, part list, hardware list, and five 1:1 printable templates. The highly detailed part list contains the ID, quantity, final dimensions, and location of all parts, making it easy for you to purchase and organize your materials. Additionally, the plan set features detailed diagrams of each section and step of the vanity, complete with dimensions, labels, and notes to guide you through the process.
I have also created a step-by-step summary video of this project on YouTube if you’re more of a visual learner!
With all of that out of the way, let’s build a vanity!
Supplies


All you need are five 8-foot boards between 3" and 6" wide. I used poplar for one build and maple for another—any decent hardwood will do. Add a couple of 2’x2’ plywood panels and a 2’x4’ sheet of MDF for templates.
The hardware list includes a piano hinge, drawer slides, mirror glass, picture framing points, a drawer knob, eight plastic feet, spray adhesive, edge banding, and your choice of paint or stain. Screws and brad nails hold it all together. Every part is listed in the plans with exact sizes and recommendations—no guesswork needed.
Table and Stool Tops
Many of the following descriptions will mention part names. These are the parts referenced from the plan set.


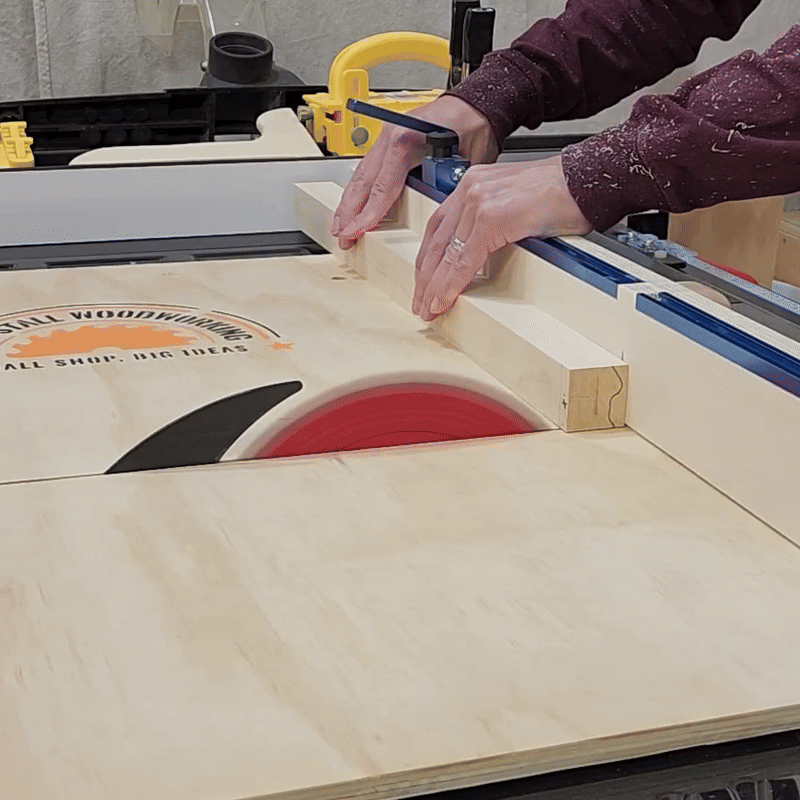
Start by ripping the boards for the vanity top (Part A) and stool top (Part I) to width, following the dimensions in the plans. Crosscut them a little long—extra wiggle room never hurts when you’re tracing templates later. I used #10 biscuits to keep everything lined up, then edge glued the boards into panels. Clamp it up, wipe the glue squeeze-out, and let it set.

Print the tabletop template from the plans and double-check the calibration square—every printer has its own ideas about what "100%" means. Once the size checks out, tape the pages together, cut out the shape, and glue it to a piece of 1/2" MDF. I used spray adhesive and a J-roller to make sure it stuck down nice and flat.


With the templates glued down, I cut out the shape on the bandsaw, staying just outside the line. Then I cleaned it up with a sander, sneaking right up to the edge. These templates set the shape for the vanity and stool tops, so take your time and make them clean. Don’t have a bandsaw? A jigsaw and a bit of patience with a hand sander will work just fine too.

I traced the MDF templates onto the solid wood panels, then rough cut them with a jigsaw, staying about 1/8" outside the line. This doesn’t need to be perfect—it’s just to get close before template routing.


I used hot glue to attach the MDF templates to the solid wood panels—just a few dabs to keep them from slipping during routing. Don’t go overboard, since you’ll need to pop them off and sand the surface later (whoops). Double-sided tape works too if you prefer less cleanup. For the routing, I used a 1/2" flush trim compression bit in the router table. Work with the grain, and you’ll get a clean, crisp edge that no bandsaw (at least in my hands) could match.
Leave the MDF template on the vanity top, we’ll need it until the end of the project.


To wrap up the vanity top, start by drilling pilot holes through the five marked locations on top—these will guide the screws when you drill from below. Next, drill four 3/8" dowel holes. It’s helpful to drill pilot holes first so the larger bit has a starting point. Finally, flip the top over and drill the #8 countersinks from below, using the pilot holes as your reference.
Stool Frame


For the stool legs (part H), I traced and rough cut, then hot glued the MDF template it to the wood. I used the same flush trim routing process to achieve a clean edge.


To make the stool aprons, I gang cut the 45-degree ends to ensure they’re the same size. Just keep in mind that J and K are different lengths.


Each apron piece will be attached to the stool top with tabletop fasteners, which allow for wood expansion and contraction. First, cut grooves for the fasteners. I used a biscuit joiner, but a table saw can also be used to cut a slit along the aprons.

To glue up the frame, I made a simple jig from double-laminated plywood with a 3/4” wide by 1/2” deep rabbet in the center. It serves two purposes: providing a pressure point for the strap clamp and setting back 1/2" from the aprons to ensure an even reveal. I couldn’t believe how well this worked!


The four part Rs reinforce the leg-apron connection. Cut them a bit long and trim them down to ensure a snug fit against both the apron and the leg. Drill a countersunk hole in the center and two at 45-degree angles for three screws per brace. Be sure to pre-drill to avoid splitting the wood. I used a plug cutter to make plugs, glued them in, and trimmed them flush. A little wood filler, and the seams disappear!

For the final stool step, drill the pilot holes for the tabletop fasteners. Pull them back about 1/8" from the groove, mark the center, and use a center punch to help guide the drill. No need to add screws yet—wait until the wood is finished.
Vanity Legs


For the table legs, start by crosscutting the 1”x4”x8’ board into quarters and ripping those in half to give yourself extra material. 1 1/2” x 22 1/4” is our final dimension, but we’re not quite there yet.
Next, overlap each half slightly—this creates a reference edge to run along the table saw fence. Apply liberal glue evenly, then use a brad nailer to tack the pieces into place. The brads help keep the leg halves from sliding around when you apply clamp pressure. Finally, clamp everything down to set the glue.

Trim the legs to size by riding one protruding edge along the fence, then flipping. Since my miter saw station isn’t long enough, I clamped a stop block to the table saw fence and used the crosscut sled to ensure all four legs were the same length. This method keeps everything precise—no wobbly table here!


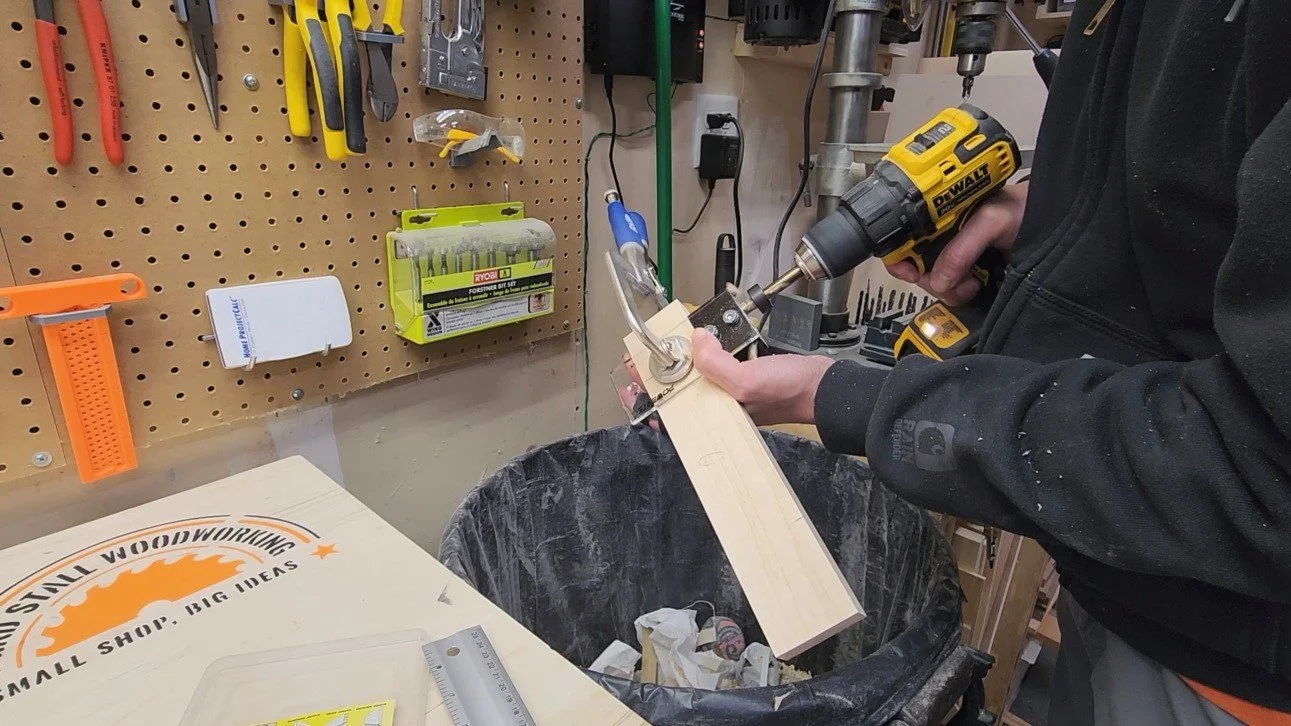
I made a simple taper jig from scrap sheet goods and a toggle clamp. After marking the taper line on the leg, I lined it up with the jig and added blocks to keep it aligned for the rest of the legs. The toggle clamp holds the leg in place, keeping my hands safe. Cut one side, rotate the leg, and cut the other to achieve a 1" x 1" taper at the bottom, tapering up 12".
Vanity Frame

With the legs done, I cut the aprons (B, C, D, E) and the drawer slide supports (G). D and E are left as one solid board on purpose—E becomes the drawer front later, and keeping it intact ensures an even reveal in the next step.

To get an even, square gap around the drawer front, I focused on making parts D exactly 3 ¾". I set a flip stop on the table saw sled at that size, then cut one end off the solid D/E board. The saw blade removes about ⅛", which becomes the reveal. Flip the board end for end and cut off the other part D. Now everything lines up perfectly when reassembled.

I cut biscuit slots for the tabletop fasteners that will attach the frame to the top. Check the plan page for exact placement—you’ll want to make sure each one is accessible from below during final assembly. A quick dry fit and some pencil marks go a long way here.

The aprons get attached to the legs with pocket holes—dowels or Dominos would work too if that’s your thing. Just be sure to mark everything out first so the screws don’t end up colliding inside the legs. A little planning saves a lot of headaches.

Should look something like this. Take a moment to mark all the parts so the legs end up in the right spots—it’s surprisingly easy to mix things up during assembly. Don’t ask me how I know.


The first image shows a simple jig I made from plywood and 1/2" MDF to guarantee a consistent 1/2" apron setback. Clamp it to the leg and apron to keep things aligned while gluing and screwing. A right-angle drill attachment helps in tight spots. I used a clamp as a spreader to drop in parts G, the drawer slide supports. In the last image, a 15 1/2" x 12” spacer ensures they’re square—critical if you want the drawer to slide smoothly.
Drawer

Before cutting your drawer parts, triple-check the opening. Subtract the thickness of your drawer slides—usually 1/2" each, so 1" total. Getting this right now saves you from a drawer that binds later. Once cut, apply edge banding to the top edges with an iron, press it down with a j-roller, trim it flush, and hit it with some sandpaper for a clean finish.

I’ve never found a need to overthink drawers—brad nails and glue do the job just fine. Use right angle clamps to keep everything square while you tack it together. Simple, sturdy, and it won’t fall apart when you open it.

To attach the drawer slides, use sandpaper as a spacer from the front edge to ensure the drawer shuts flush and snug. Mark the screw locations with an awl to keep the screws from wandering. Also, be sure to check the screws that come with your slides—some may be meant for 3/4" material, and we’re using 1/2” plywood.


Lay the frame down on a flat surface (I used the vanity top) and clamp a scrap board across the front to hold the drawer in position with the drawer front flush. Once everything is aligned, remove the scrap board and drawer, then mark the final location for the drawer slides. This ensures perfect placement for when the drawer is closed.

Clamp a scrap wood support to the bottom to hold the slide in place while you line up the front with your pencil mark. Once it’s aligned, screw in the drawer slides and test the fit. Make sure everything slides smoothly before moving on!

Line up the drawer front with an even reveal, positioning it just slightly below the top of part D to avoid rubbing on the table top in the future. Attach the front using two 1” #8 screws through countersunk holes in drawer.
Mirror Frames

Rip parts L and O (tops) and N and P (stiles) wider than their final dimensions—we’ll trim them down after assembly for a perfect fit. Crosscut parts L, M, O, and Q (stiles) to length now. Parts Q and M (bottoms) can be ripped to final width. Gang cut the four P’s and both N’s together to keep everything consistent and square.

Here you can see the frame parts laid out with the MDF routing templates on top. The rails extend past the sides on purpose—the tops were ripped wider than needed so we can template route them flush. If you don’t have a table saw sled, you can go ahead and crosscut everything to final length now.
I also cut MDF rectangles to match the final opening size and used them to mark out the dowel centerlines—this keeps everything aligned and consistent.


A simple dowel jig works great for connecting the rails and stiles—here I’m using 3/8” dowels, two per joint. Set the jig to drill just over halfway into each piece. For the top rail (part L), make sure the dowels are far enough from where the curves will be cut so they don’t peek through (don’t ask me how I know). It helps to trace the template on parts L and O ahead of time.

I found the center of the top rail and measured out from there to mark my final width. This kept the curve centered and ensured both sides were symmetrical. Then I trimmed to size on the crosscut sled. The same operation is repeated on the side mirror frames. Now we know all of the sides are perpendicular to one another, referenced off of the bottom.


You know the drill: MDF template, trace, rough cut, glue to frame, template route.

Next up, routing the rabbet for the mirror glass and backer panel. Using a 3/8” rabbeting bit, sneak up on the depth until your backer board and mirror glass drop in, leaving about 3/16” for the frame clips. For me, it was just under 1/2” deep. If you haven’t purchased your backer board and mirror glass yet, I recommend getting them or knowing the exact size (stop asking me how I know).

The rounded corners are removed with a marking knife and chisel.
Frame Attachment

Remember when I said to leave the template on the vanity top? This is why. Lining the frame center up with the guides positions it perfectly. Right angle clamps make sure it's vertical and secure for the next step.

Drill 3/8” dowel holes with a stop collar through the pre-drilled holes from earlier into the frame. Ensure the stop collar is set to the correct depth, just over 2" to account for the 1/2" MDF.

Using an angle grinder or hacksaw, cut the piano hinge to size. Exact size isn’t critical—just enough to cover end to end, around 13 1/2”. Try to keep an even distance between screw holes. And hey, don’t judge the shop shoes. They’re just shop shoes!

Note that parts Q are 1/8” narrower than the center, M, to allow the side mirrors to swing freely without dragging on the tabletop. The piano hinge is bumped up just over 1/8” on the center mirror to account for this. Use a self-centering drill bit to ensure the alignment is spot on.

Time for a full dry fit. Remove the MDF template from the tabletop. A couple of dowels hold the mirror in place (no glue), and a couple of screws in the hinges ensure the fit is right. Don’t overdo it with the screws, as you don’t want to strip the holes. I also drilled the hole for the knob. This is your last chance to make any adjustments to the fit before finishing!

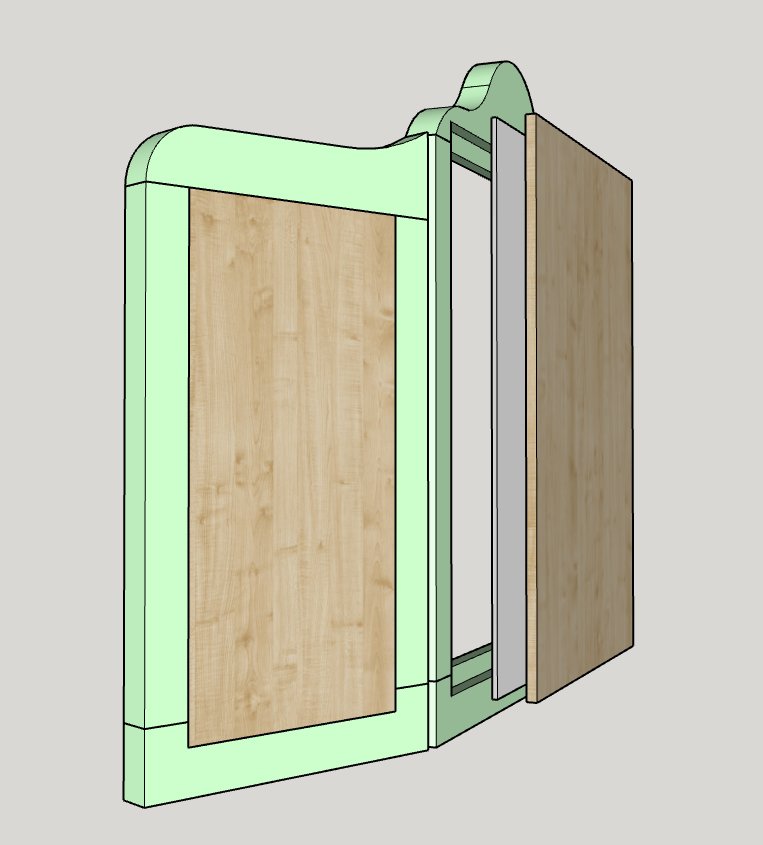
Cut your 3/16” plywood backers to size, then take those panels to a hardware store and ask them to cut 1/8” mirror glass based on those dimensions. Trust me, have a pro cut your mirror glass. I used to do it myself, and it’s a real pain. I found it’s actually CHEAPER to go to places like Ace Hardware and have them do it for you in about 5 minutes!
We’ll wait until after the finishing is complete to fasten these to the mirror frames.
Finishing


Drill a pilot hole somewhere inconspicuous that will never be visible. Add J-hooks to hang from clothes hangers, then hang it from the ceiling. I use an HVLP spray gun, and it’s the best I’ve ever used. If you’re on the fence, just buy it. Start with a bare wood primer; I’ve been using Acrylic Alkyd Interior/Exterior Enamel Undercoater. Then apply multiple coats of topcoat. I used semi-gloss cabinet, door & trim enamel. I’ve tested a lot of primer and paint combinations with this gun, and I’ve found that with about a teaspoon of water mixed well, this combo works great and has become my go-to. It’s also on the cheaper side of paint but performs better than some higher-end options I’ve tried.

Whether painting or staining the top and frames, we want to do them separately. I didn’t do this on the first one I built and ended up with a paint line between the parts that drives me crazy. I used blue tape to outline the perimeter of where the frame will sit. Then, I applied green tape between the blue so I could "block off" that area when I stained and poly’d the top. I also taped off the bottom of the center frame before painting. This gives a clean face and ensures there’s a place for the glue to adhere to during final assembly.

I pre-stained both tabletops with an oil-based conditioner and applied a natural colored stain. This step helps to enhance the wood's natural color while providing a solid foundation for the top coat.

I applied oil-based polyurethane to the drawer, table top, stool top, and backer panels, using multiple coats. I left the protective tape on the table top until after this step. A total of 3-4 coats were applied to the tops and bottoms. Between each coat, I sanded with high grit sandpaper and wiped everything clean with a tack cloth.
Final Assembly


Almost there! Screw in the stool top fasteners and install the stool and vanity feet. These feet are a must in my opinion—they protect the stool from chipping when being slid around and won’t scratch your floor. To install, predrill and pound them in with a rubber mallet. Note that a regular hammer will shatter the plastic.

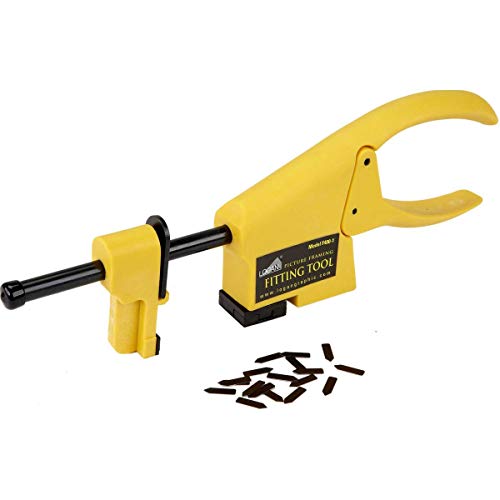
I used a picture framing tool to lock the glass and backer in. I marked out some even spacing, totaling six "flex points," which are the metal tabs that are driven into the frame. Tape was added to protect the finish. It's a really handy tool to have around.


After removing the tape from the tabletop, I added glue, the dowels, and drove the screws in from the bottom. Be sure to pre-drill into the frame. I used right angle clamps during this portion to keep everything square until dry.
The remainder of the piano hinge screws wrap up the frame portion.

Reinstall the drawer slides and drawer handle. The table top fasteners are all screwed in from below.
This was definitely one of the more challenging projects I’ve taken on, but those are always the ones I look back on the most fondly. The complexity and attention to detail really pushed me, but in the end, it was worth every bit of effort. This piece will be a cherished item for generations to come, something that will stand the test of time and carry with it all the craftsmanship and care that went into its creation. Sometimes the most difficult projects are the ones that bring the most satisfaction when you see the final result.
Thanks for reading and feel free to email me or message me on Instagram if you have any questions while building one of your own!
Tools and Items Used in This Project
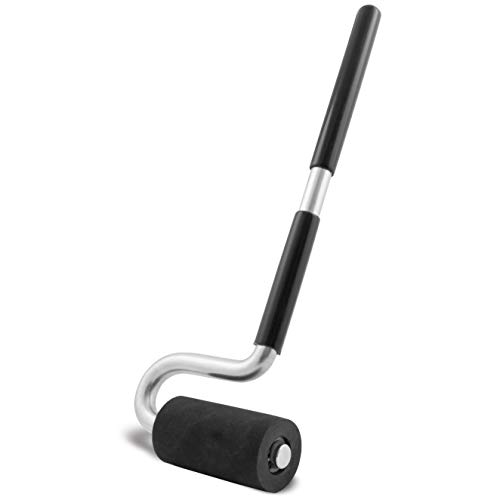
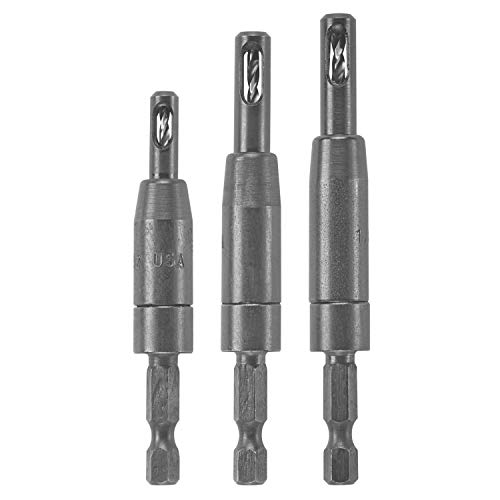
Project specific items


Templating and routing tools


Helpful tools and accessories


Consumables