Litter Box Cabinet

The corner of the laundry room seemed like a logical place for a litter box; out of they way and hidden in the corner. The space between the wall and washer is a bit awkward here, just begging for a cabinet, so I built a litter box cabinet!
The frustrating thing about the litter box sitting in the open corner was the way my cat would end up covering the floor with litter from jumping in and out. The solution was to incorporate a storage cabinet with space below to enclose the box and room on top for a laundry basket. The room is also a mudroom off the garage and it's nice to have somewhere to toss dirty laundry quick.

As usual, I took the dimensions of the area and components and designed the model in Sketchup then cut all pieces to size.

The litter box cabinet was actually the very first project I built when I moved in. I built it with little more than my table saw and miter saw. I also wasn't documenting anything at this time so this is the only picture of the construction that I have. It is built out of a birch plywood box and a poplar frame. I used rabbets and dadoes for all the cabinet joints which was a fun experience as I had never done it before.

The doors were the toughest part of the build. I used the tongue and groove style with an inset panel similar to the concept above. At this point in my shops life there was no router table, so it was all done on the table saw which worked just fine.
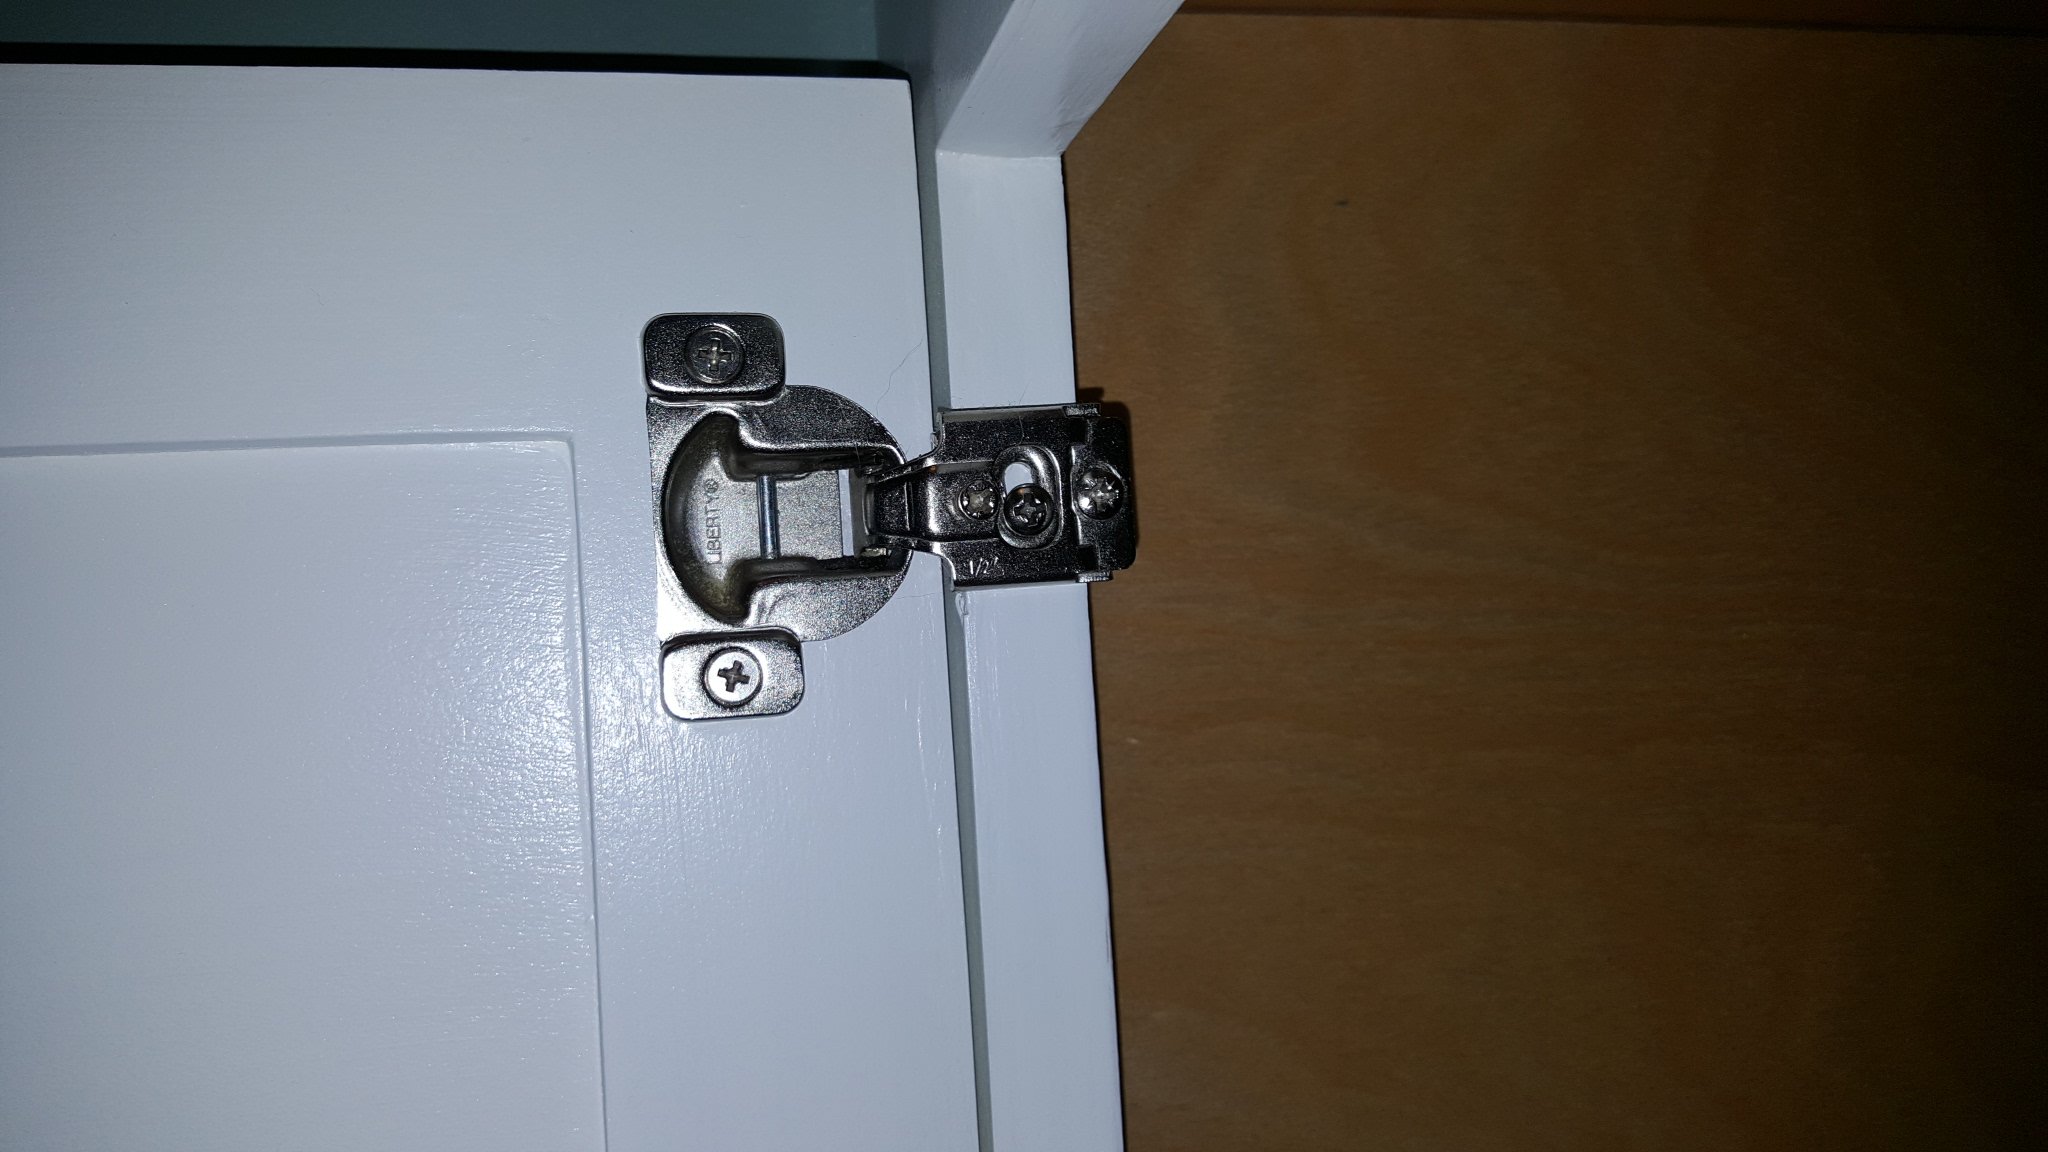
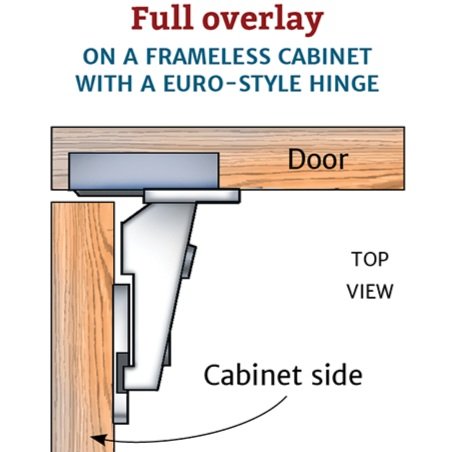
I chose to use a European style frameless hinge on the cabinet doors. These allow a clean frame with no visible hinge and an overhang. Most kitchen cabinets will have these hinges and I liked the idea. It was a little more involved than simply screwing a hinge on as I had to bore accurate holes in the frames and doors with a forstner bit but I really like the way they turned out.

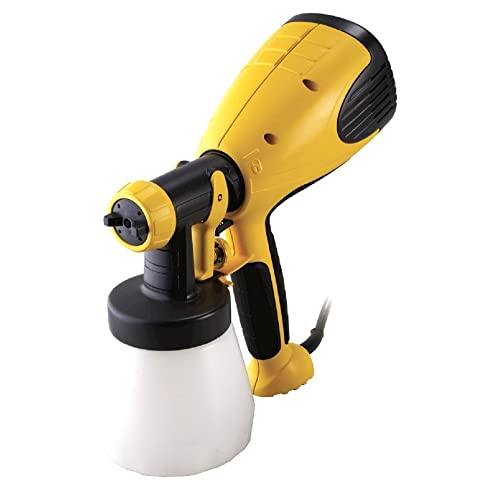
This paint gun was probably the best tool I've purchased. It makes painting a smooth and clean finish a breeze. I set up a paint area in the basement and sprayed a couple coats of primer followed by a couple coats of an off white latex paint. The paint gun leaves professional looking results.
The inside of the litter box cabinet was finished with multiple coats of Polycrilic, a water based polyurethane which hardens to a nice glossy finish. This goes on smooth with a foam brush, sanding in between coats.
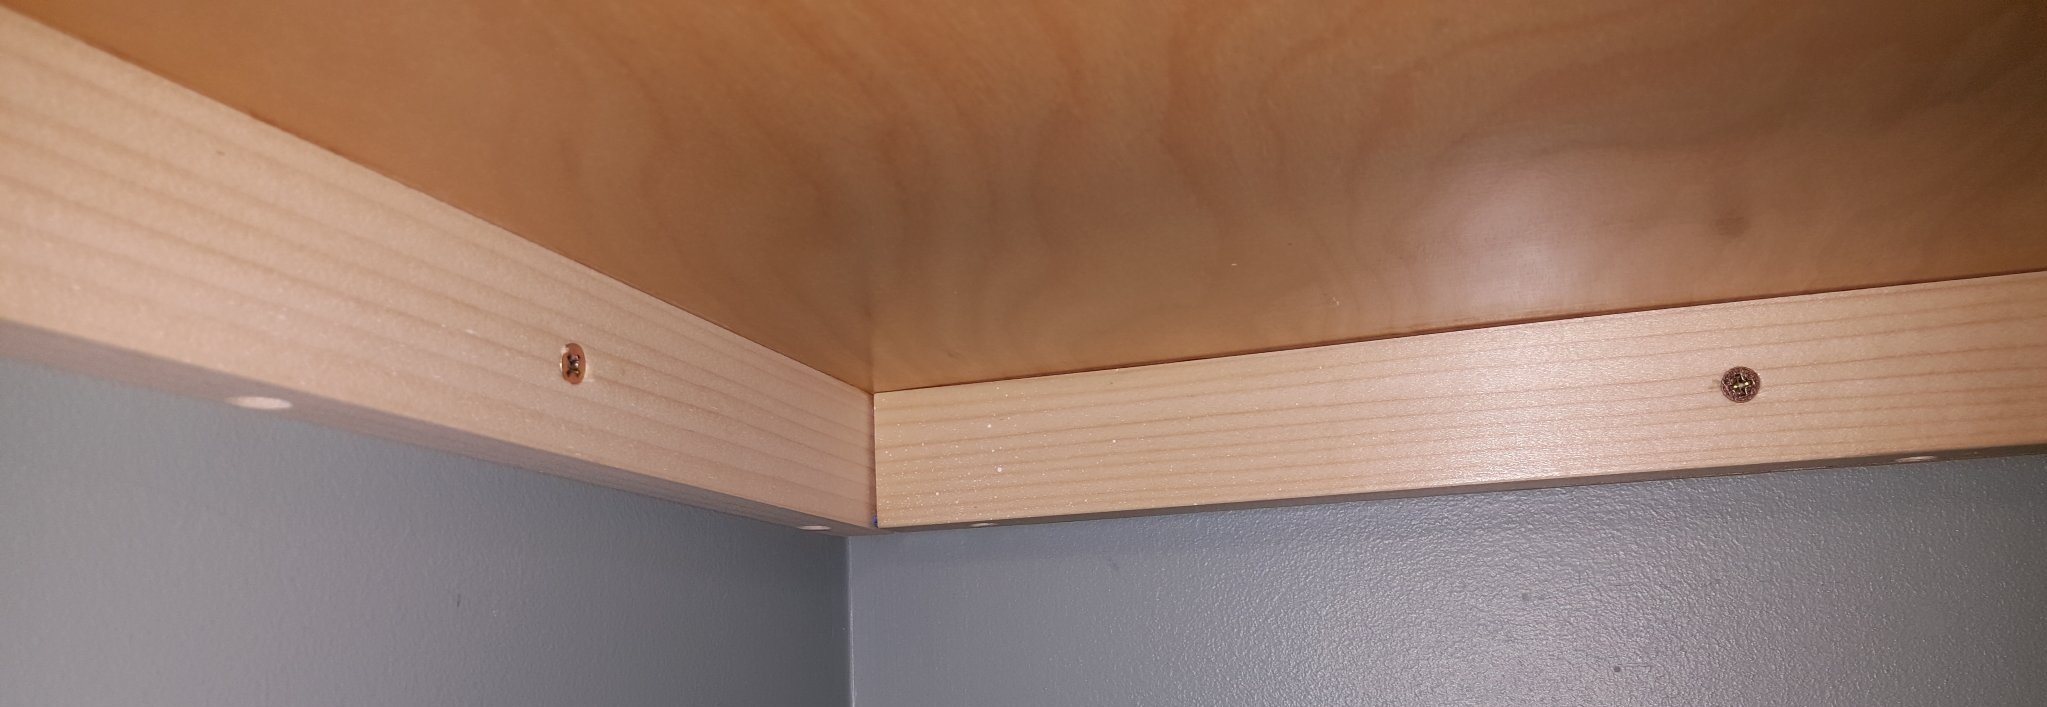
The cabinet is installed on the wall with some supports screwed to the studs through the drywall then set on top and drove in from below leaving no visible supports or screw heads.
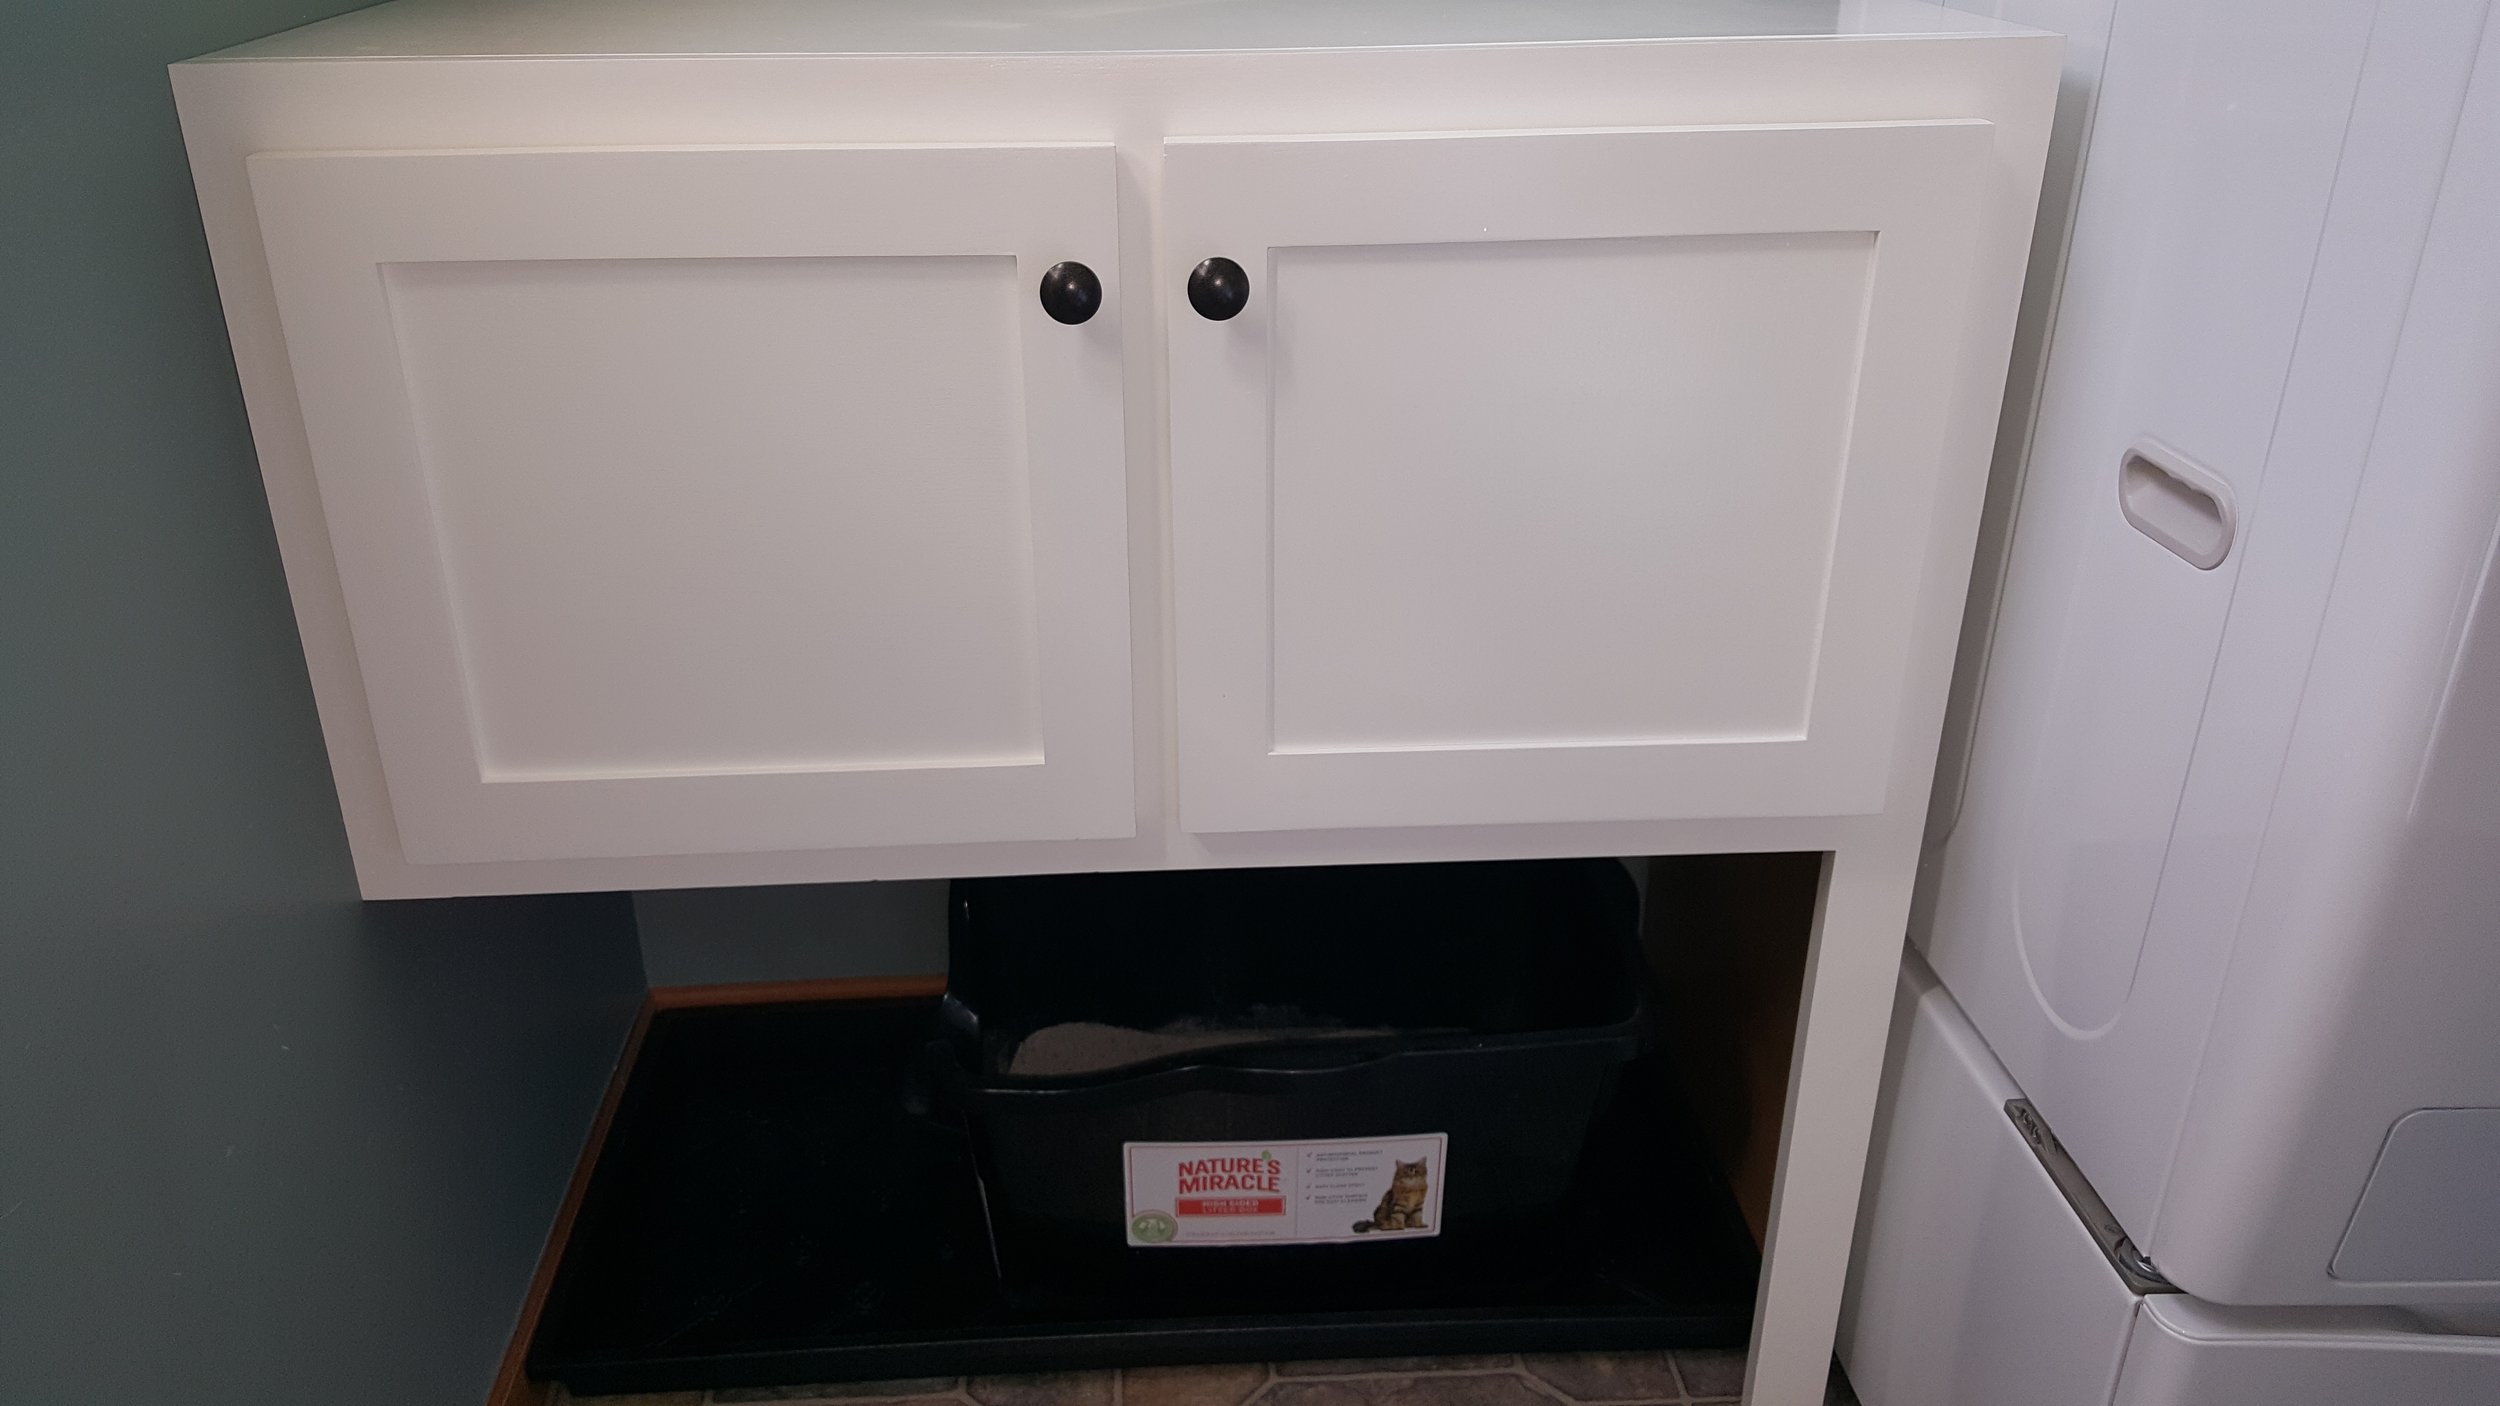
I added a couple of handles and cabinet bumpers so it has a soft close.


Underneath the cabinet is a dowel rod on brackets which supports a curtain on curtain clip rings to slide back and forth when the box needs to be cleaned. A towel is currently a placeholder until matching window curtains are found. You can see here that the cabinet is being used to store winter hats and gloves.

Below the box is a boot tray which fits snugly to catch any extra litter that may fall out. There is also an LED light above the box to make cleaning easier to see.

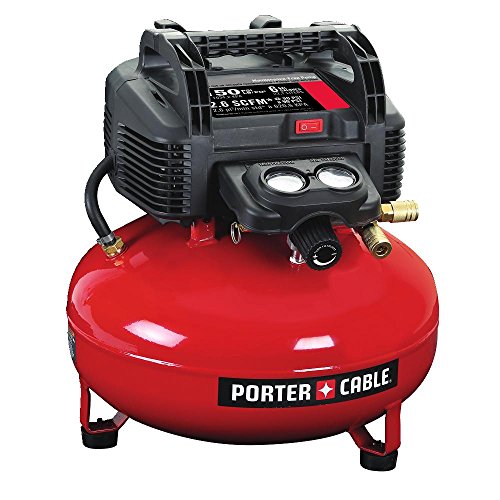
Using some of the leftover wood from the face frame, I made two trim pieces, matching the size of the frame rails. Adding these makes the cabinet seem like it was meant to be there, not just an afterthought. I attached the trim with some long 2 1/2" brad nails in the nail gun. Having a portable air compressor came in handy here.

Once attached I used some drywall spackle to fill the small brad nail holes and render them invisible.
This litter box cabinet really turned out well for my furniture grade woodworking project. It gave me the confidence to build the other projects I've posted previously and the projects to come. It was also rewarding to build a functional piece that looks like it was meant to be there.
Tools and items used in the project
Power tools and accessories


Project specific items