
Folding Lego Table with Hidden Storage

Finding a Lego table that’s both sturdy and space-saving can be a challenge. Most are bulky, made from particleboard, or lack practical storage. I wanted something that could handle hours of play, store away when needed, and actually organize the mountain of bricks. So I built my own.
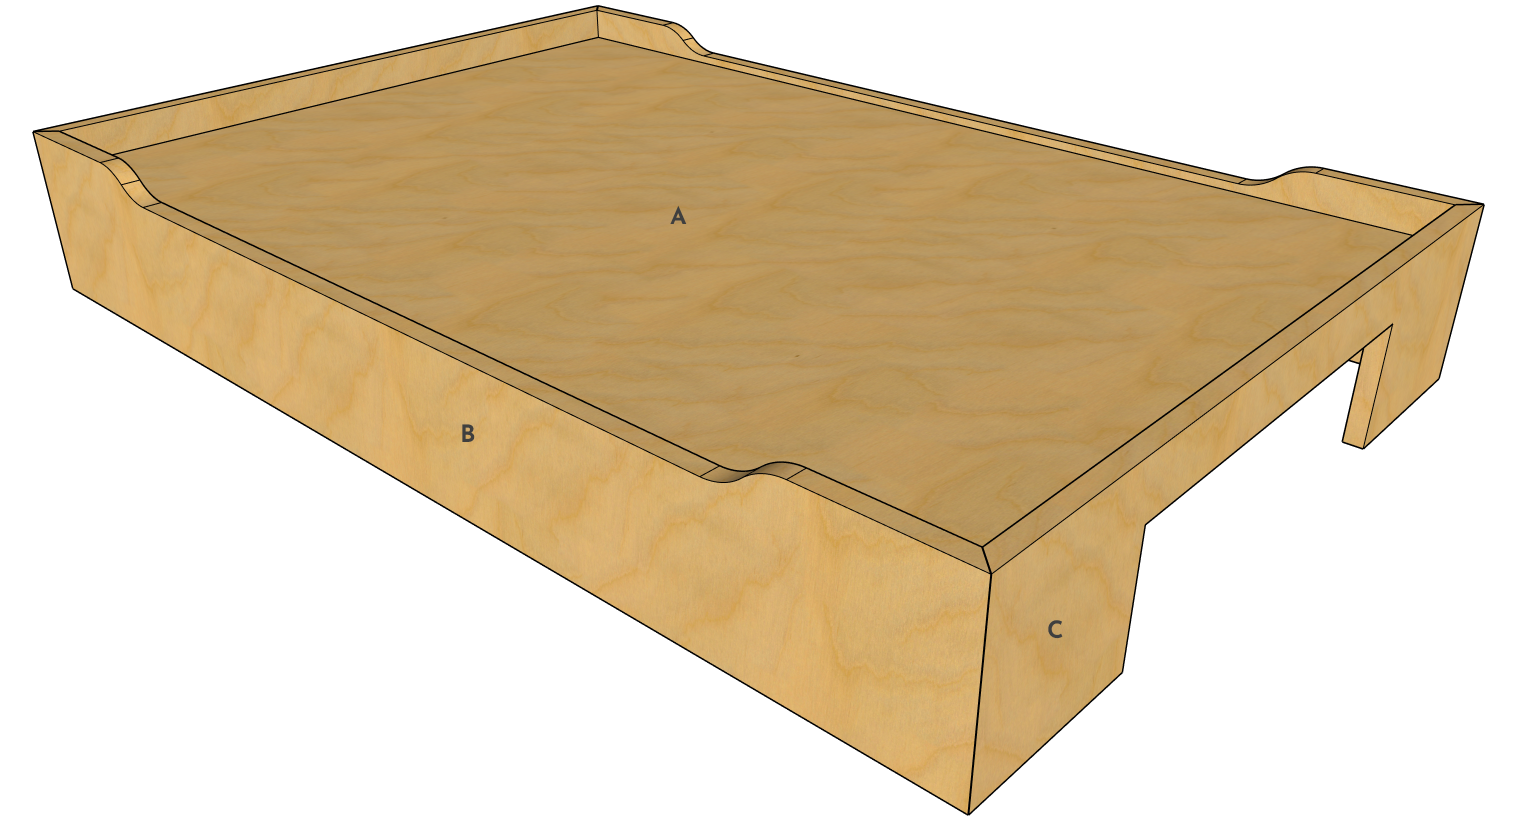
This custom Lego table is made from a single 4'x4' sheet of 1/2" plywood and designed with kids (and parents) in mind. The top holds four standard Lego base plates, offering a large play surface. Underneath, two sliding storage tubs keep bricks off the floor and easy to reach. When not in use, the folding legs allow the entire table to store flat against a wall or in a closet. It measures 32” wide by 15 1/2" tall and 21” deep.
A downloadable PDF plan set is available for this project, featuring 18 highly detailed pages that walk you through the build step by step. The plans include a full materials list, cut list, part list, hardware recommendations, precise dimensions for every component, and 1:1 printable templates. Visual diagrams accompany each step to make the process clear and approachable. Whether you're new to woodworking or a seasoned builder, this Lego table makes for a rewarding and functional project.
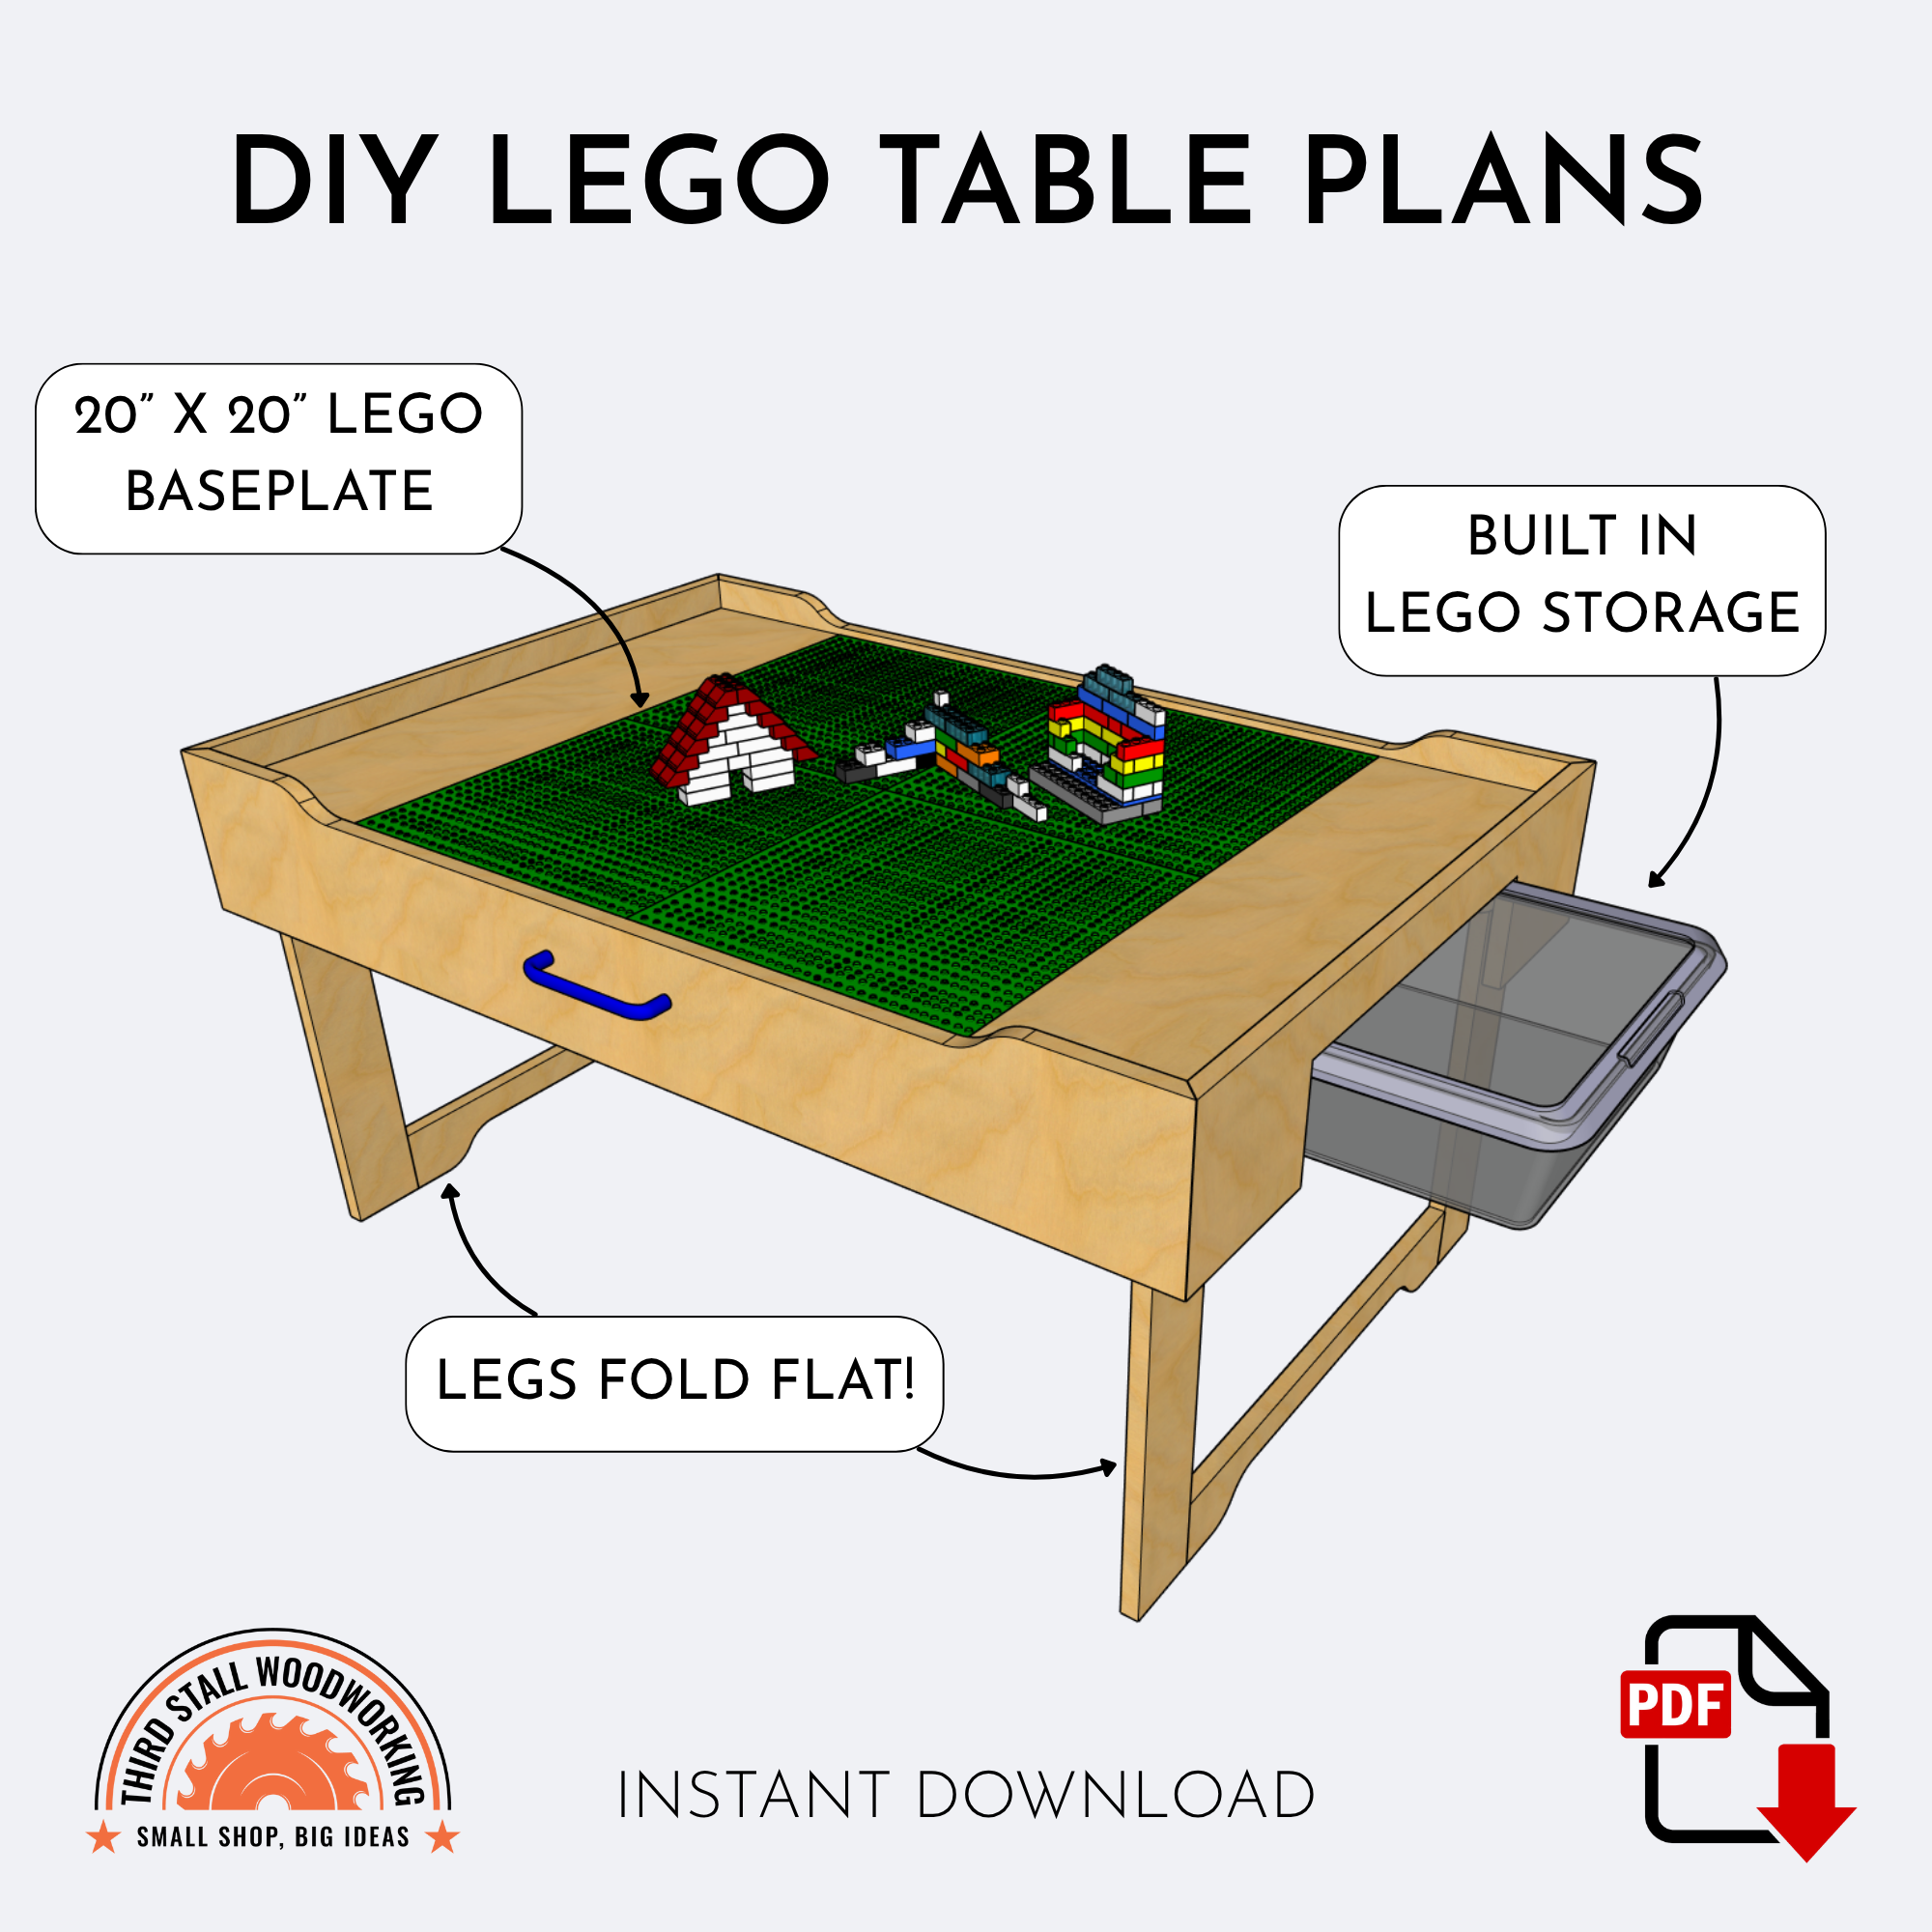
This instant download PDF includes 18 pages of detailed instructions and diagrams to help you build a folding LEGO table with storage tubs. It features a 20" x 20" LEGO play surface made from four standard base plates, slide-out storage for bricks, and foldable legs that make it easy to tuck away when not in use. Whether you're short on space or just want a convenient way to keep playtime organized, this project makes a fun and practical addition to any playroom.
Important!A step-by-step YouTube video and full build article are available for this project.
Features:
20" x 20" LEGO-compatible surface using standard base plates.
Two built-in slide-out tubs to store bricks and minifigs.
Fold-flat design for easy storage when not in use.
Compact, lightweight, and sturdy enough for everyday play.
Plan Set Contents:
Lumber List – Everything needed in one trip to the store.
Hardware & Consumables List – Includes hinges, handle, tubs, and glue.
Tool & Supply List – What was used during the build.
Parts List – Includes ID, quantity, final dimensions, and placement.
Board Layout Diagrams – Helps you cut efficiently and maximize material.
Step-by-Step Diagrams – Clear visuals with labels and build notes.
1:1 Printable Templates – Full-size templates for curved parts.
Please contact me if you have any questions before or after purchase!
Note: This purchase is for a digital PDF which will be available as a download. Plans are not mailed.
I have also created a step-by-step summary video of this project on YouTube if you’re more of a visual learner!
With all of that out of the way, let’s build a LEGO table!
Supplies


Below are the main supplies I used for this build. Links and details of these items are in the Shopping List section of the plans as well as linked at the end of the article.
One 4'x4' sheet of 1/2" plywood
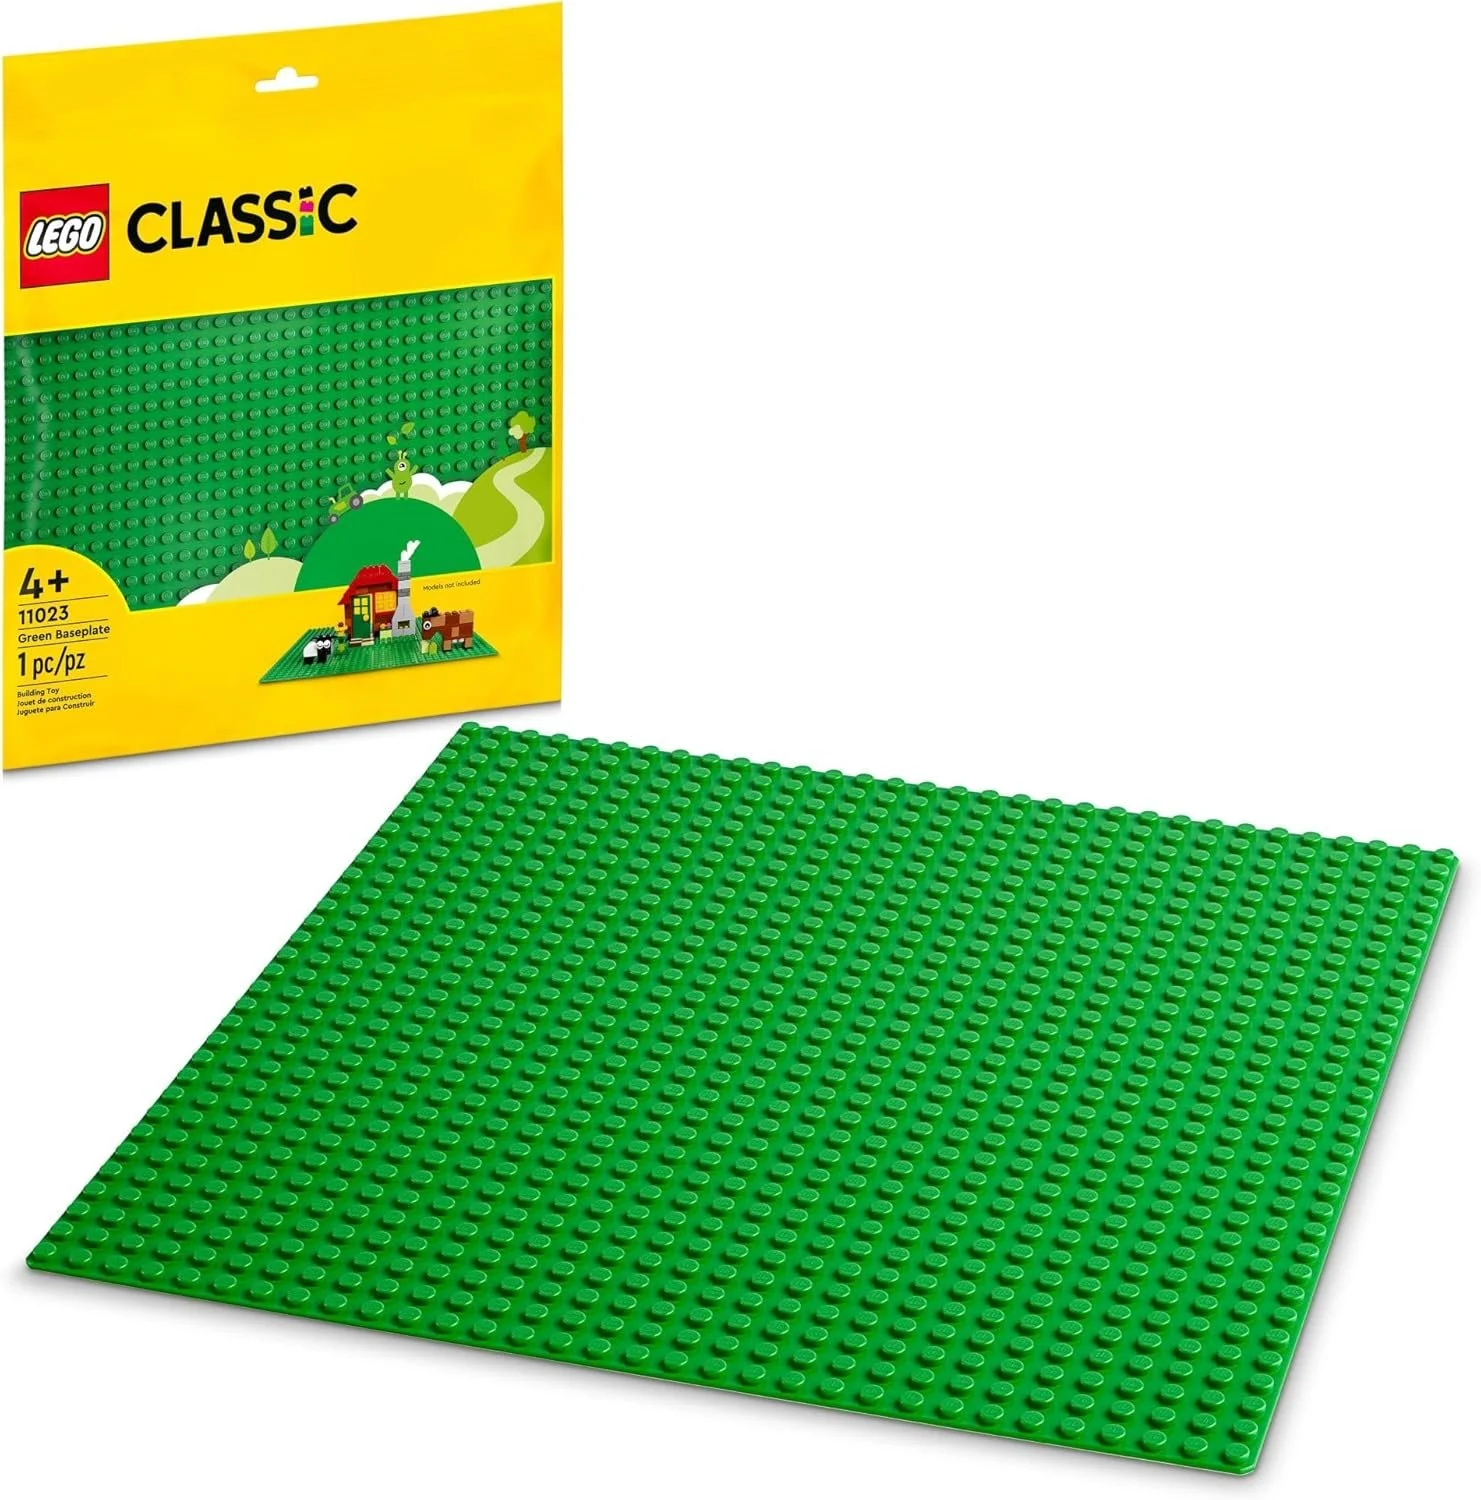
This is the main material for the entire table. I used the best-quality sheet I could find to ensure a smooth surface and clean edges.Four 32x32 Lego base plates
These cover the entire tabletop surface and line up edge to edge.Two Sterilite Large storage tubs
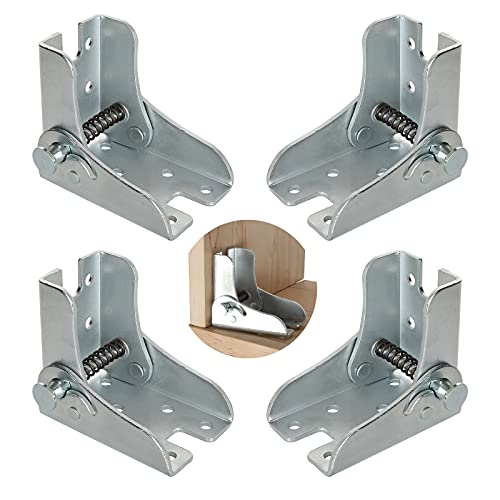
Size: 14" x 11" x 3 1/4". These fit snugly underneath and slide out easily.Four locking hinges
Used to fold the legs flat against the underside when storing the table.One handle
Makes it easier to carry or pull the folded table from storage.Liquid Nails Fuze*It
For permanently attaching the base plates to the tabletop. It holds strong and doesn’t melt the plastic.
The Frame
Many of the following descriptions will mention part names. These are the parts referenced from the plan set.
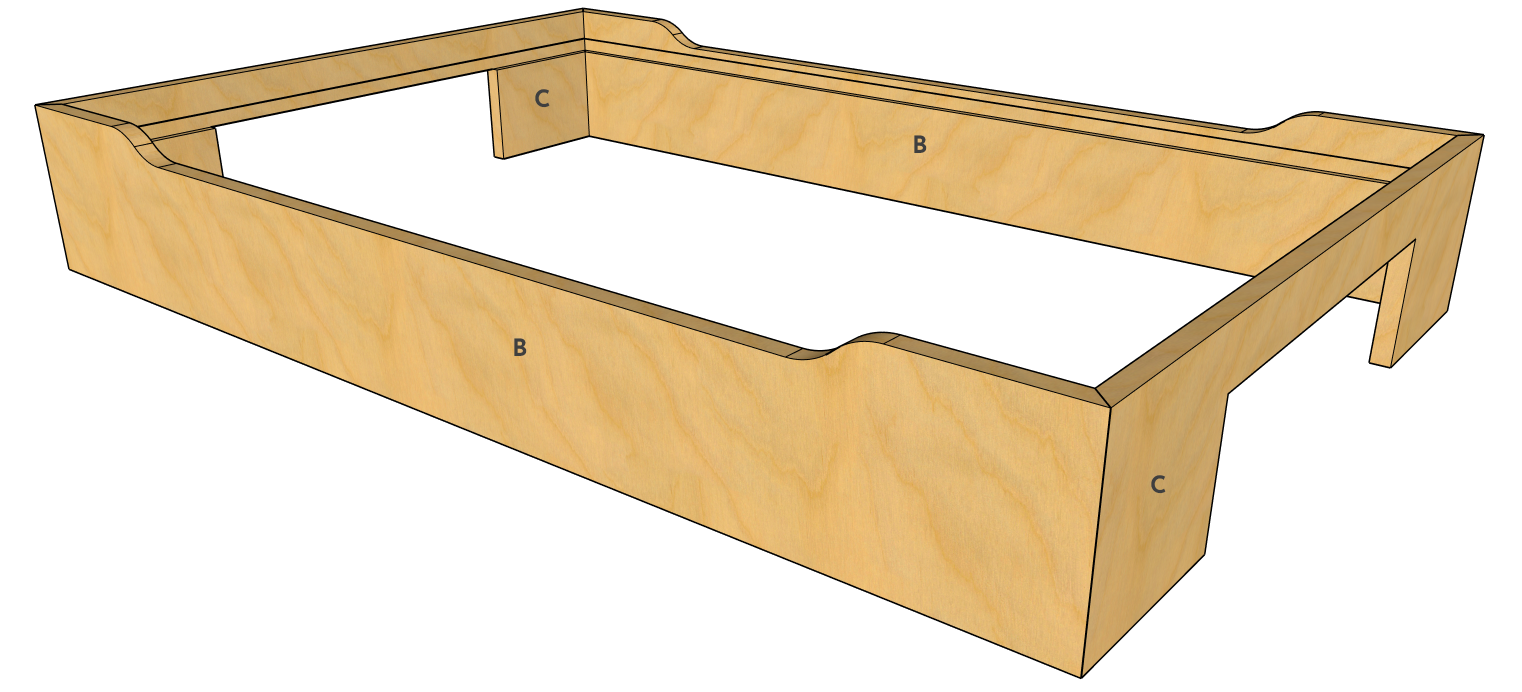

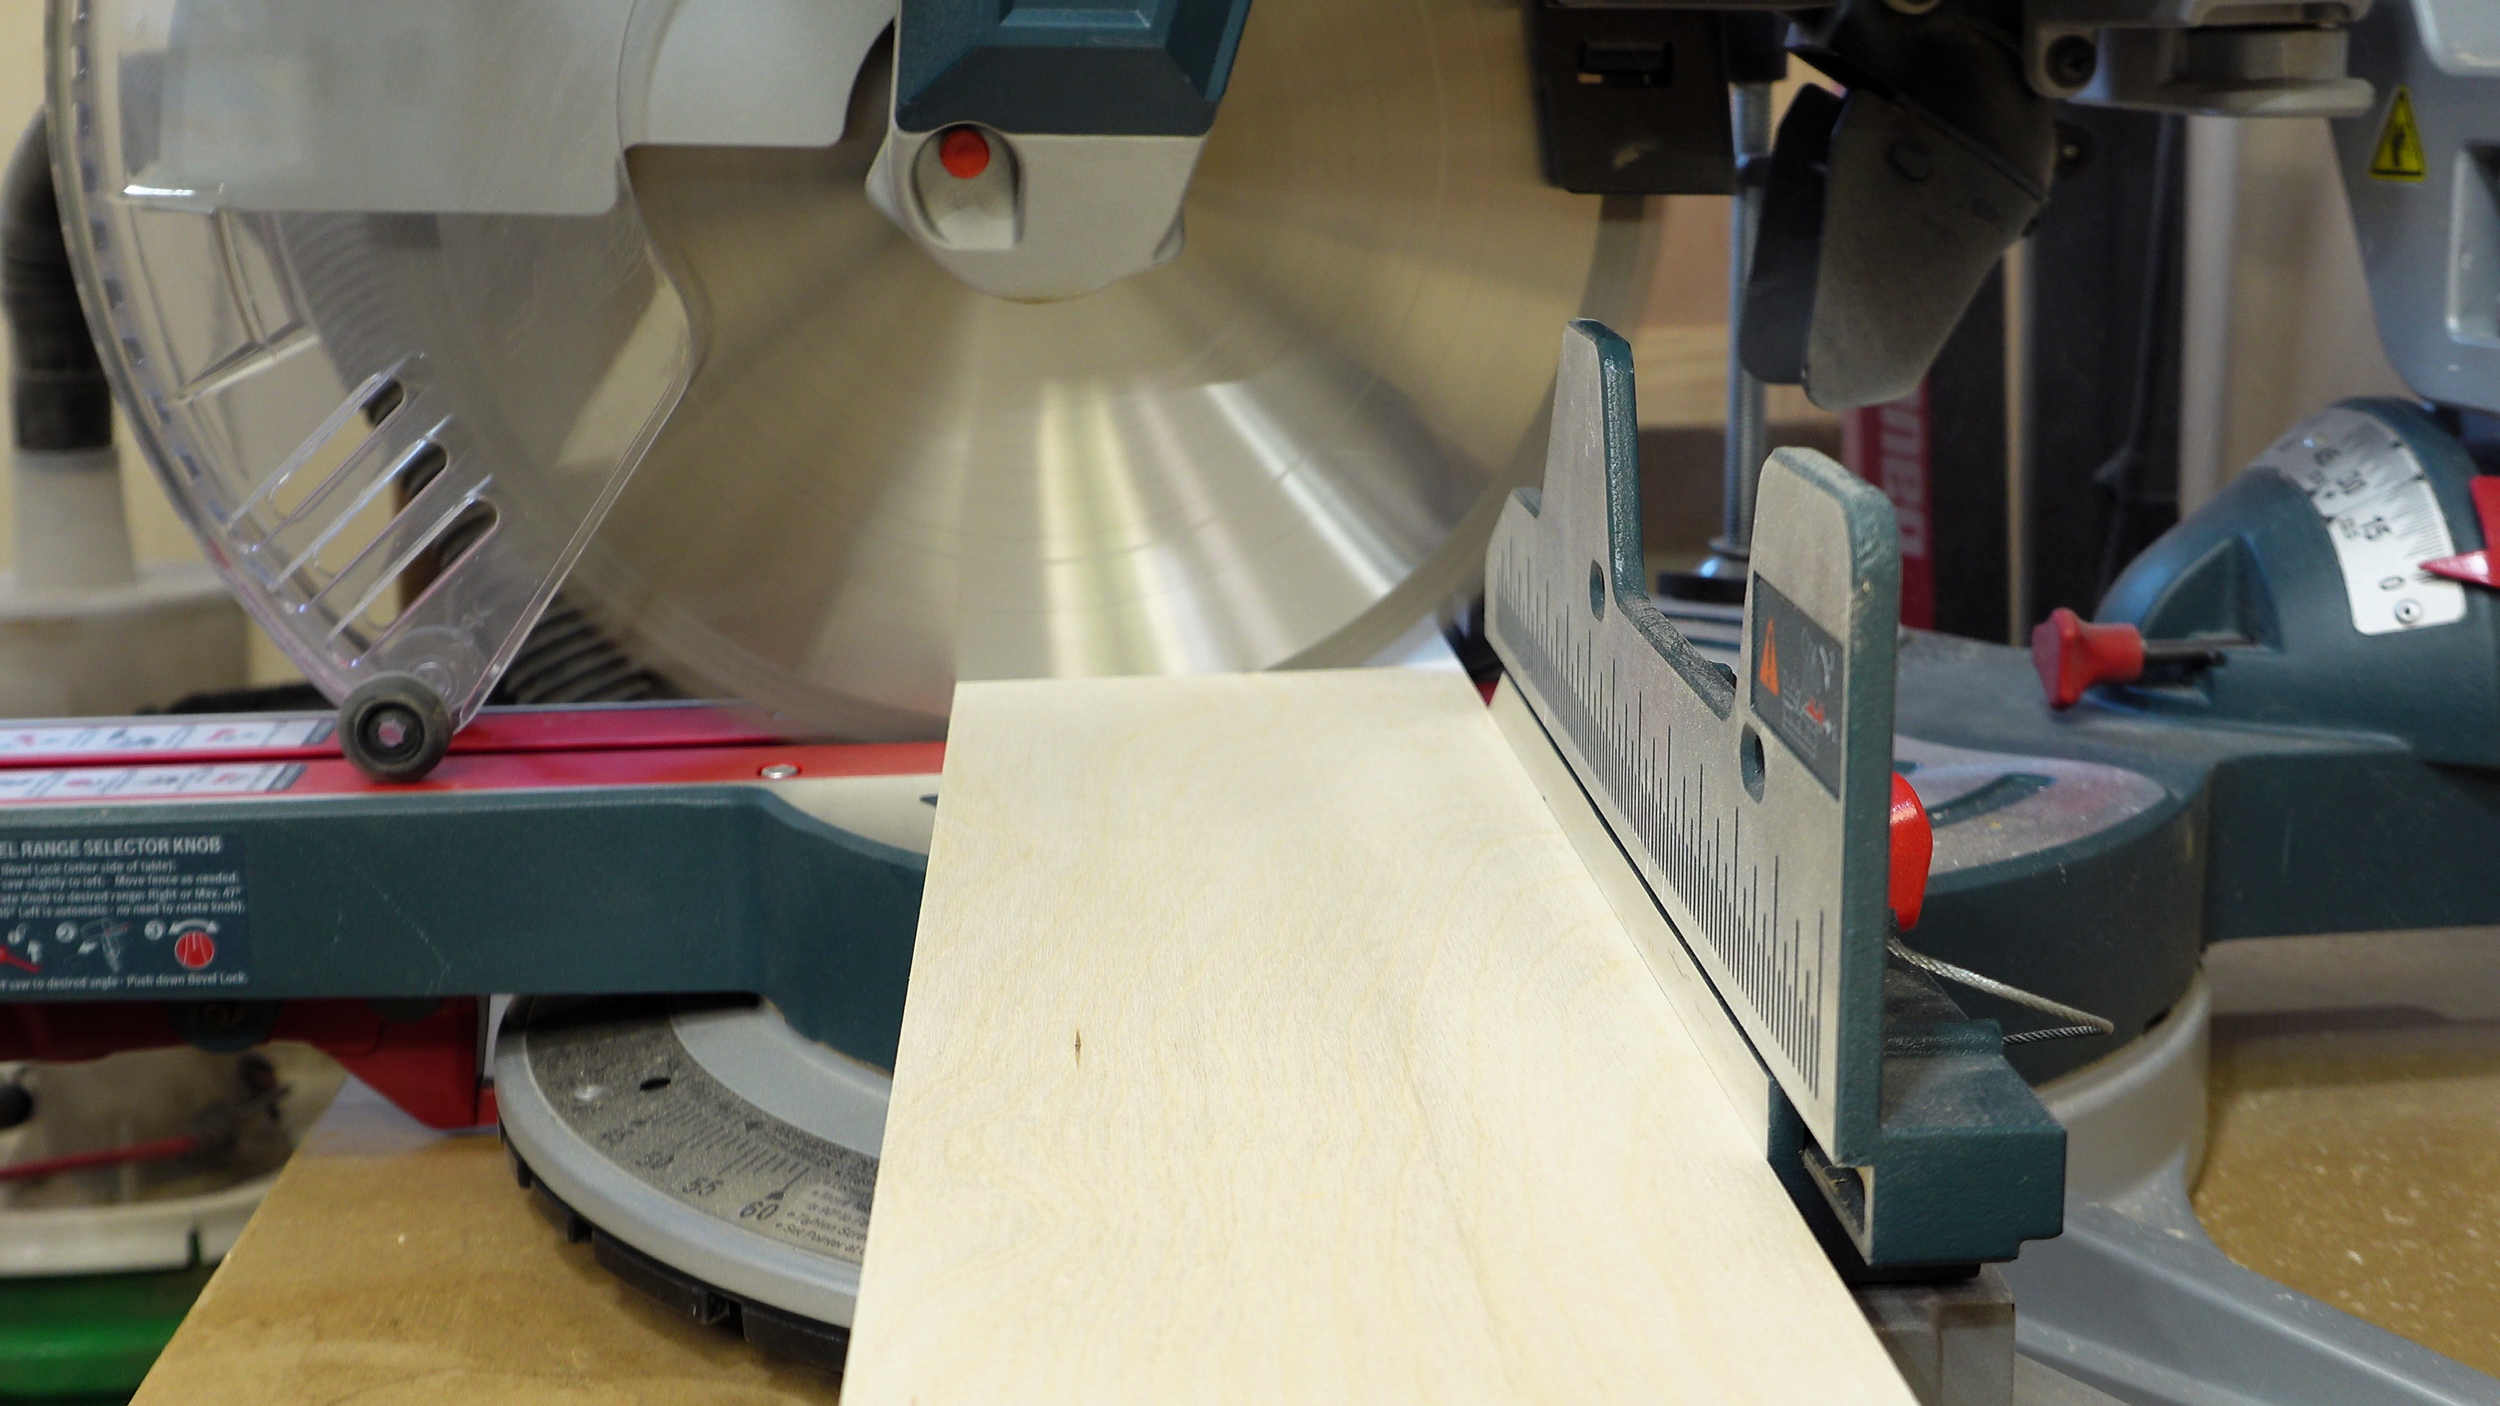
I work in a small shop, so breaking down sheet goods right away is important. I started by ripping all the parts to their final width, everything from A through I. The frame pieces will eventually need 45 degree miters, so for now they’re crosscut heavy and left long. After ripping, I labeled each part and set the non-frame pieces aside.

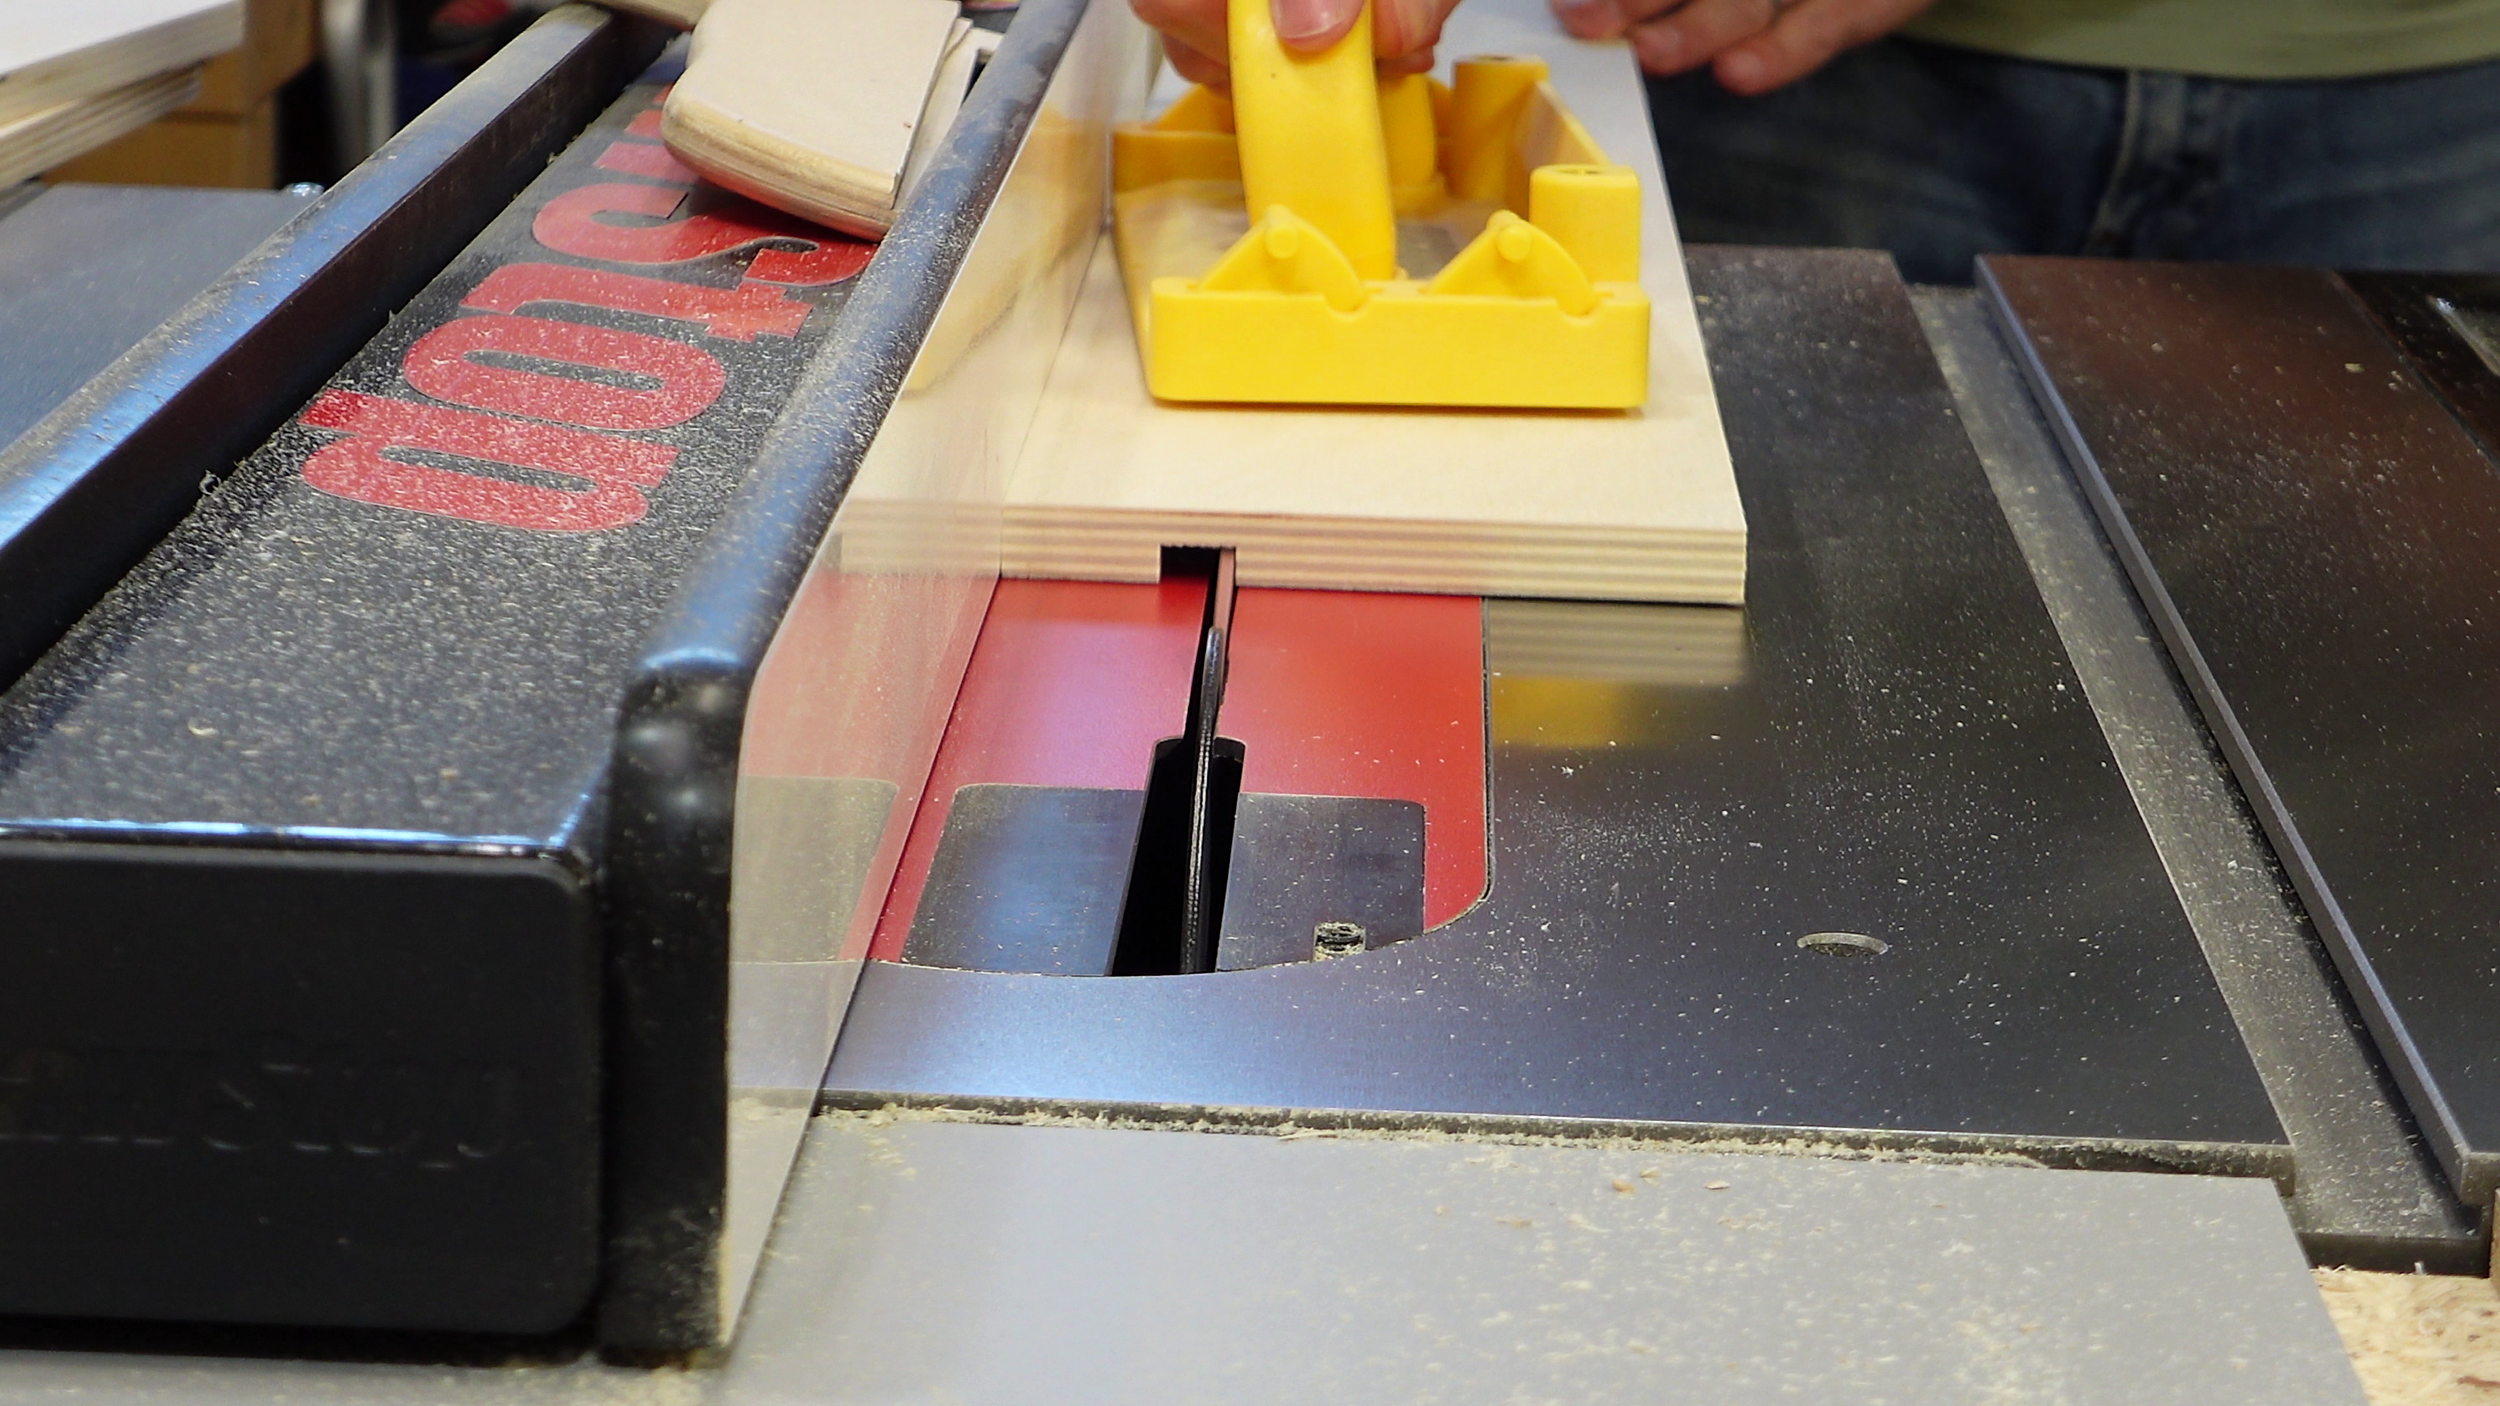
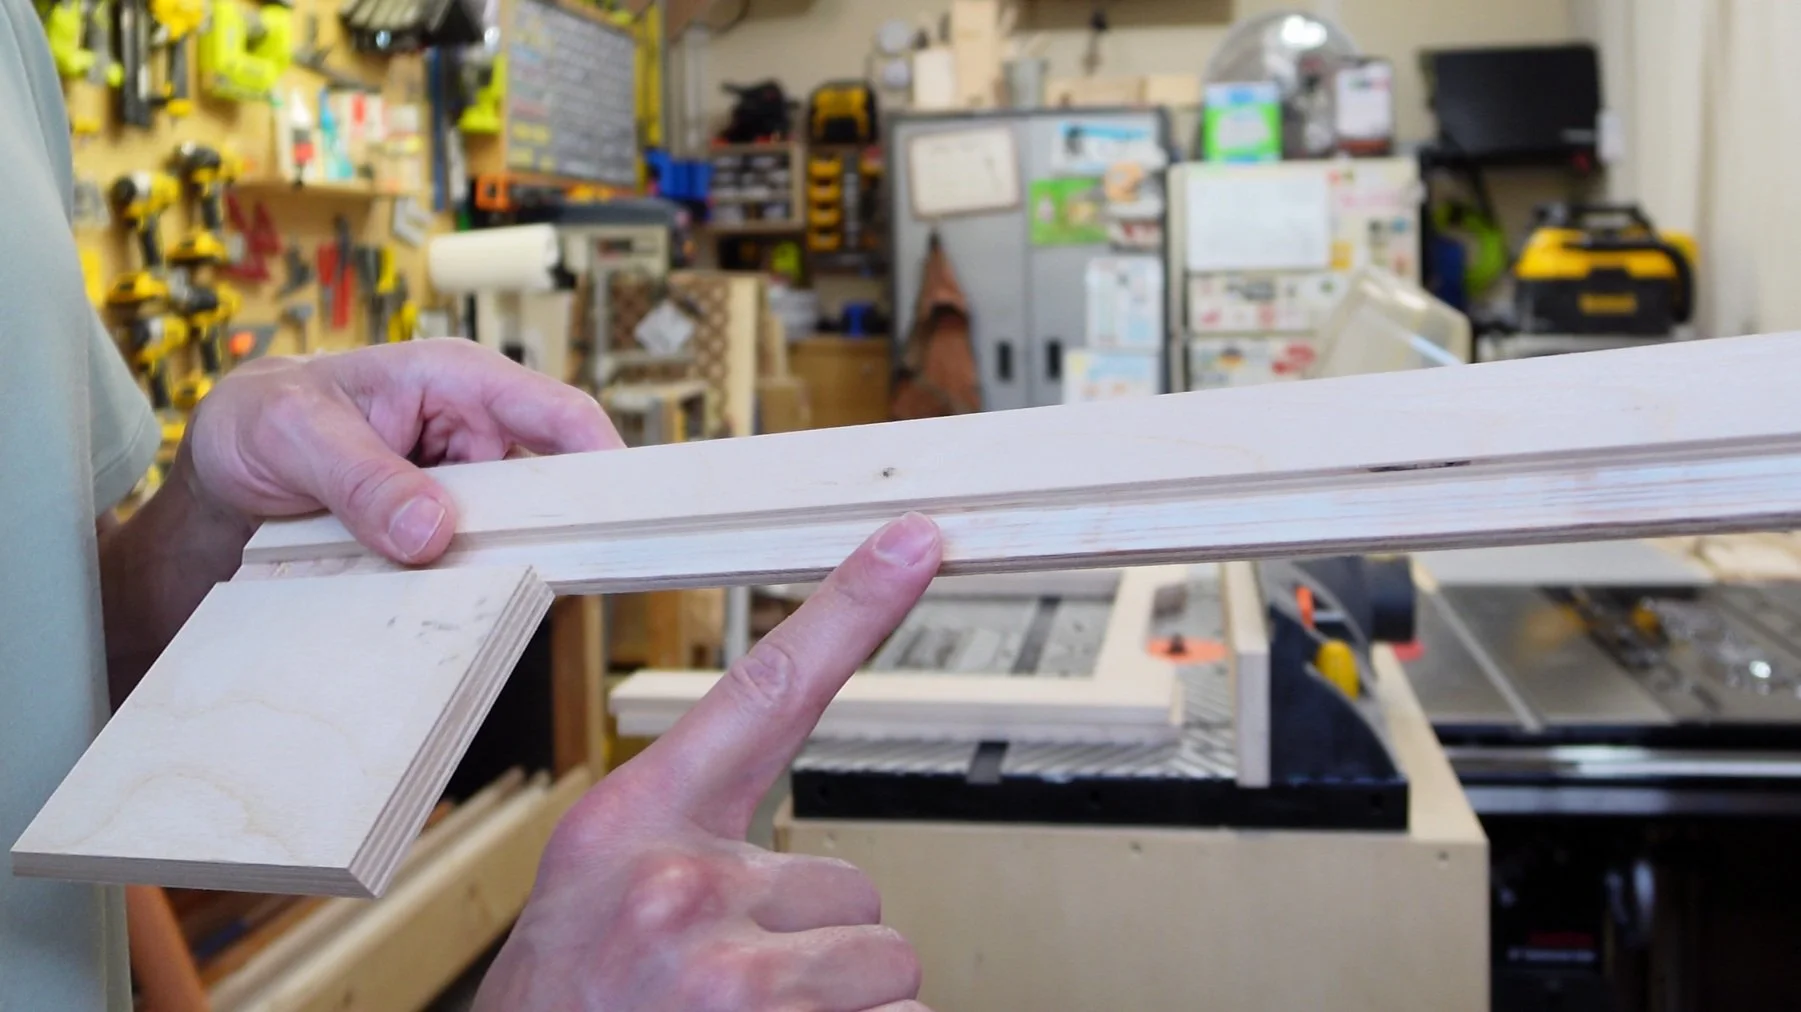
The long and short frame pieces (parts B and C) need a dado cut to accept the top (part A). You could do this with a dado stack sized to match your plywood, but I took the slower approach by sneaking up on the fit with multiple passes.
I used a scrap piece of plywood to dial in the width before touching the real parts. Once the fit was snug, I made the final pass on the actual frame pieces. A setup bar helped ensure the blade height was exactly 1/2".
A setup bar comes in handy here to set the blade to the exact height.


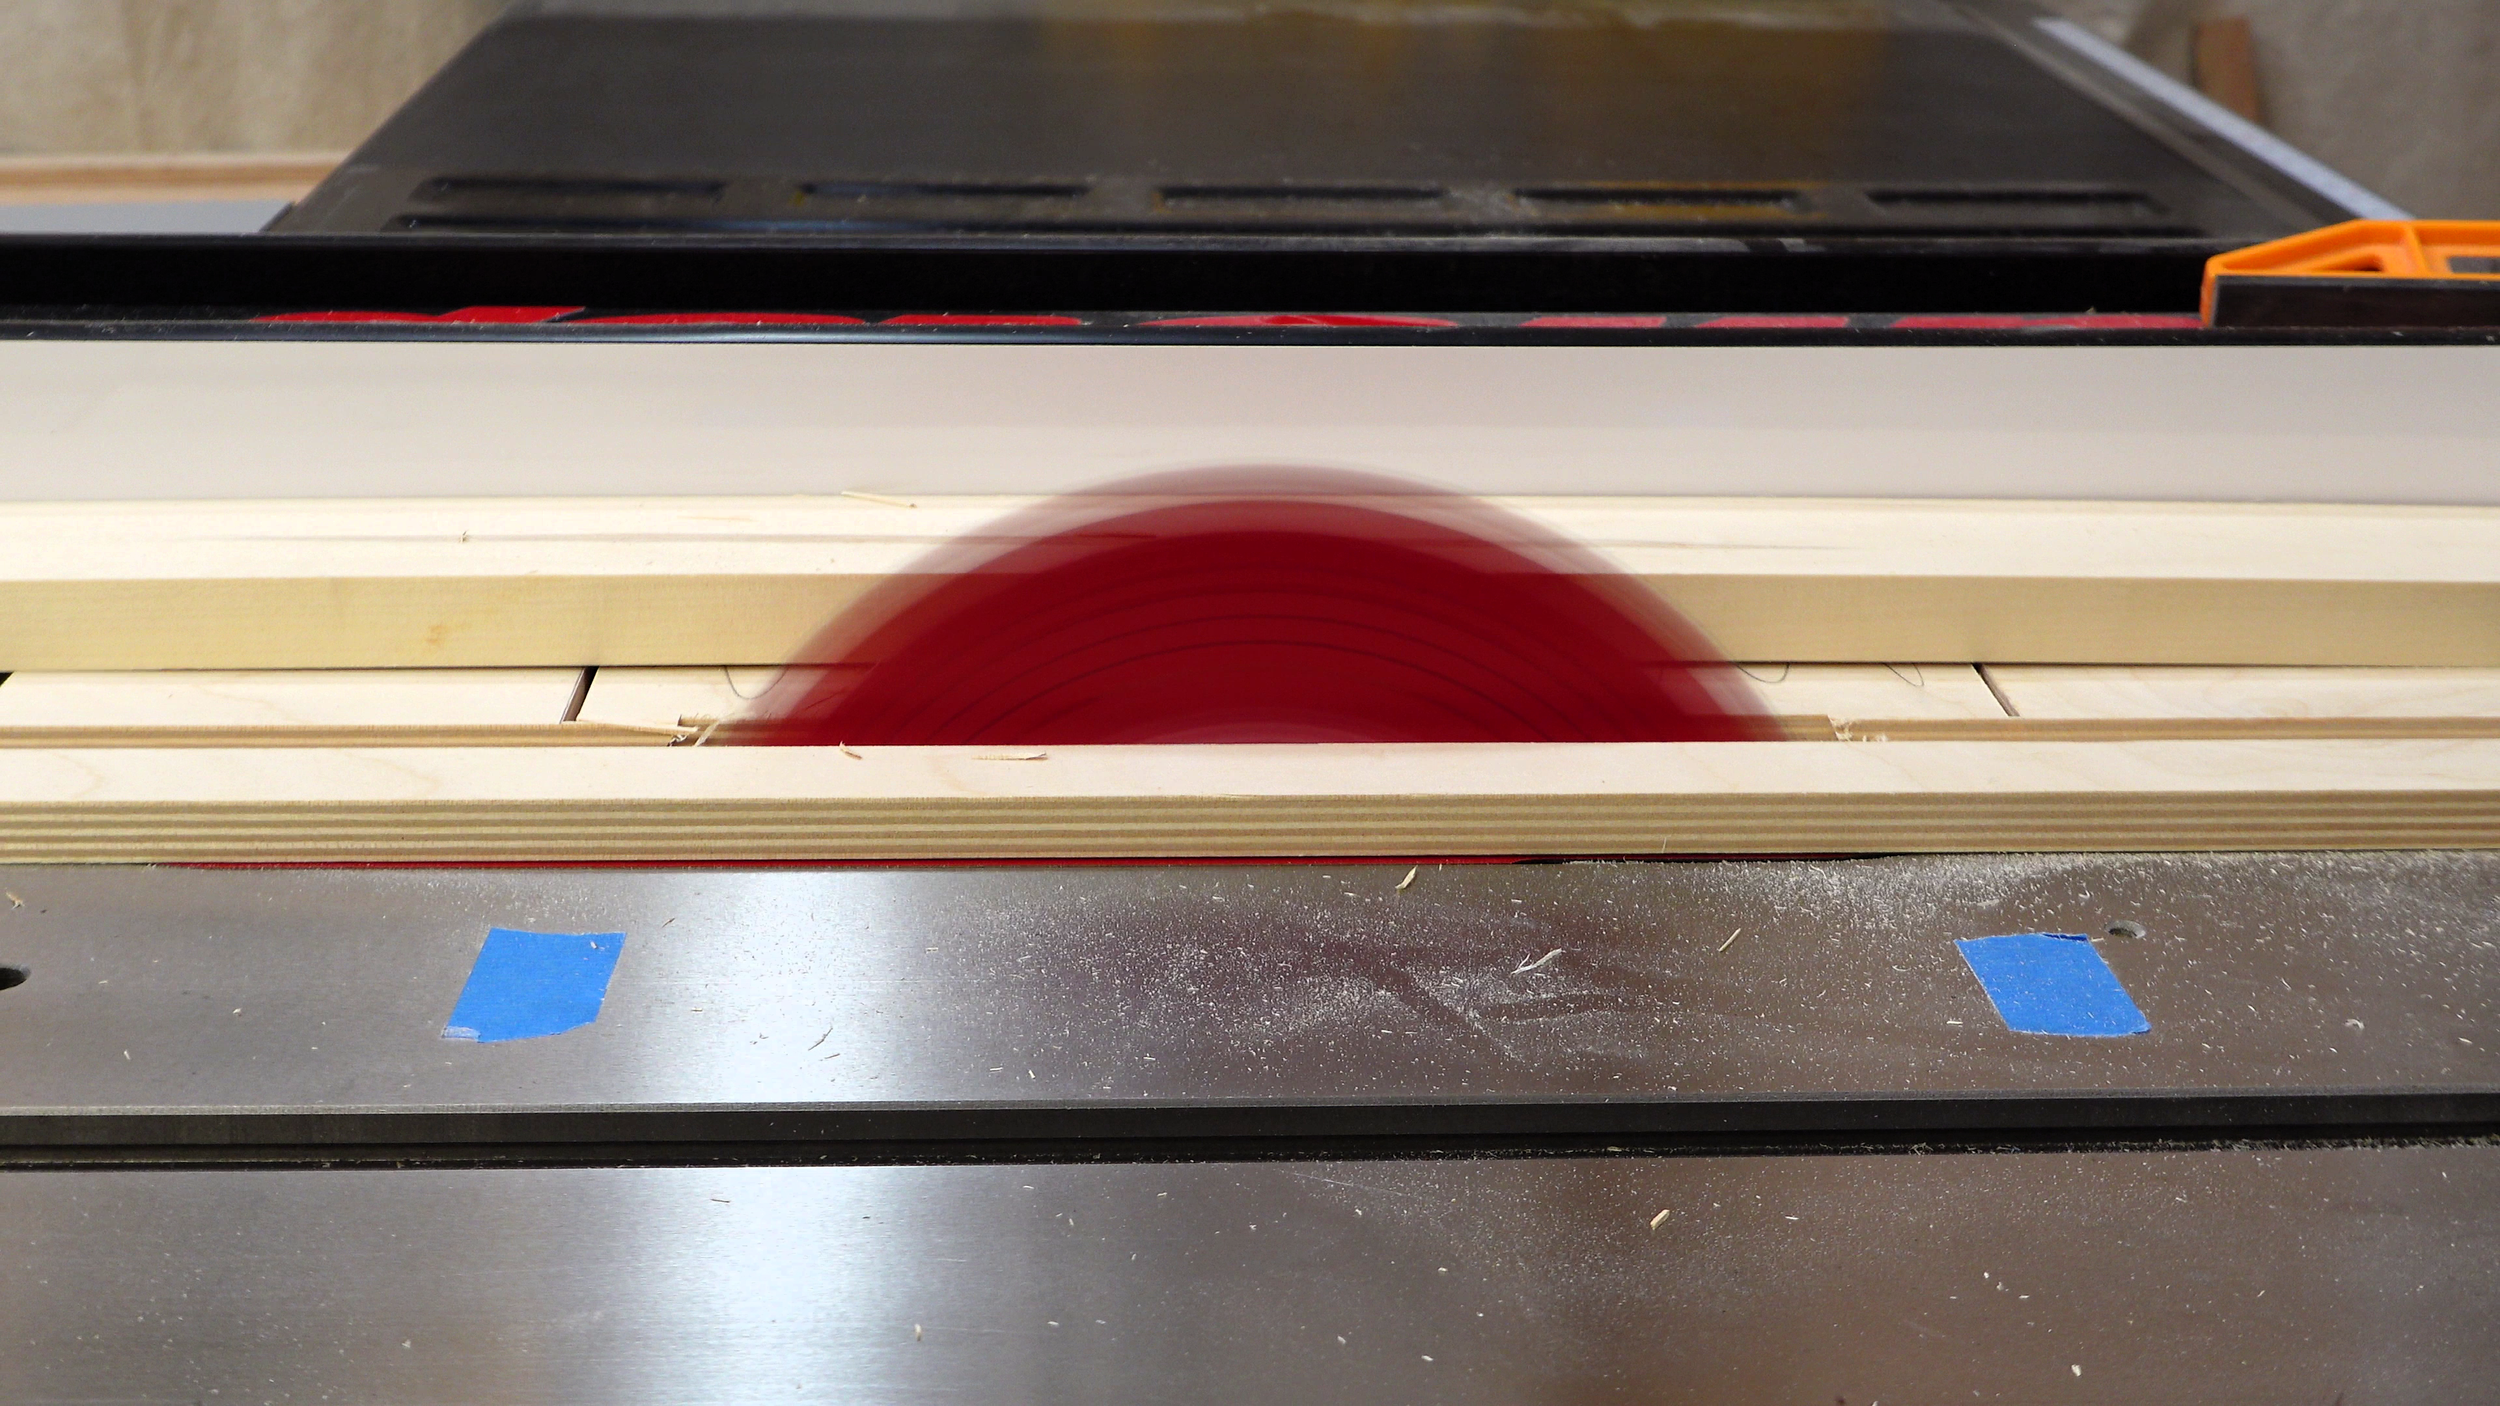
With the rabbets done, it’s time to cut the miters to length. I set the blade to 45 degrees and taped the matching part Bs together, then did the same for the part Cs. Gang-cutting each pair helps ensure both pieces are exactly the same length, which is key for getting tight corners and a square frame.
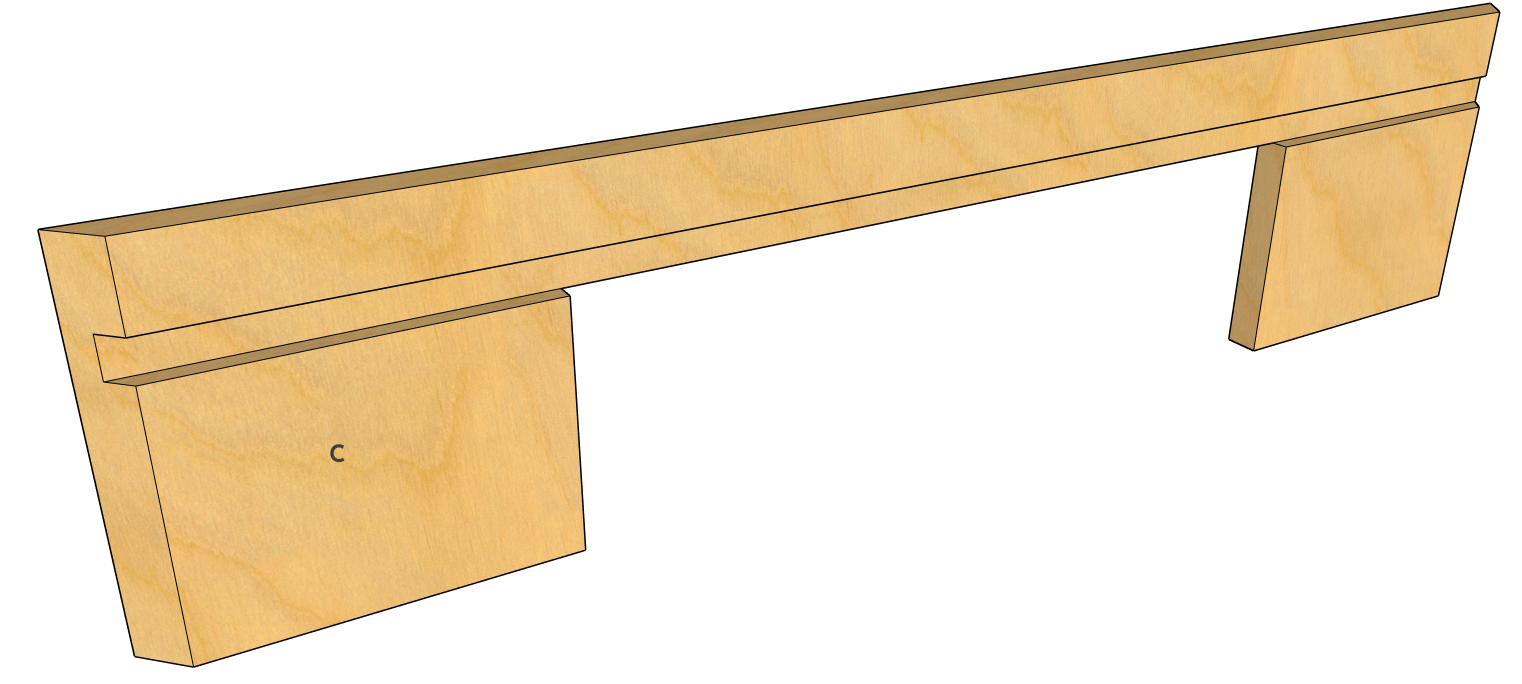
Part C needs an opening cut for the storage bin. The top of the cut stops at the bottom edge of the rabbet to keep the panel supported.
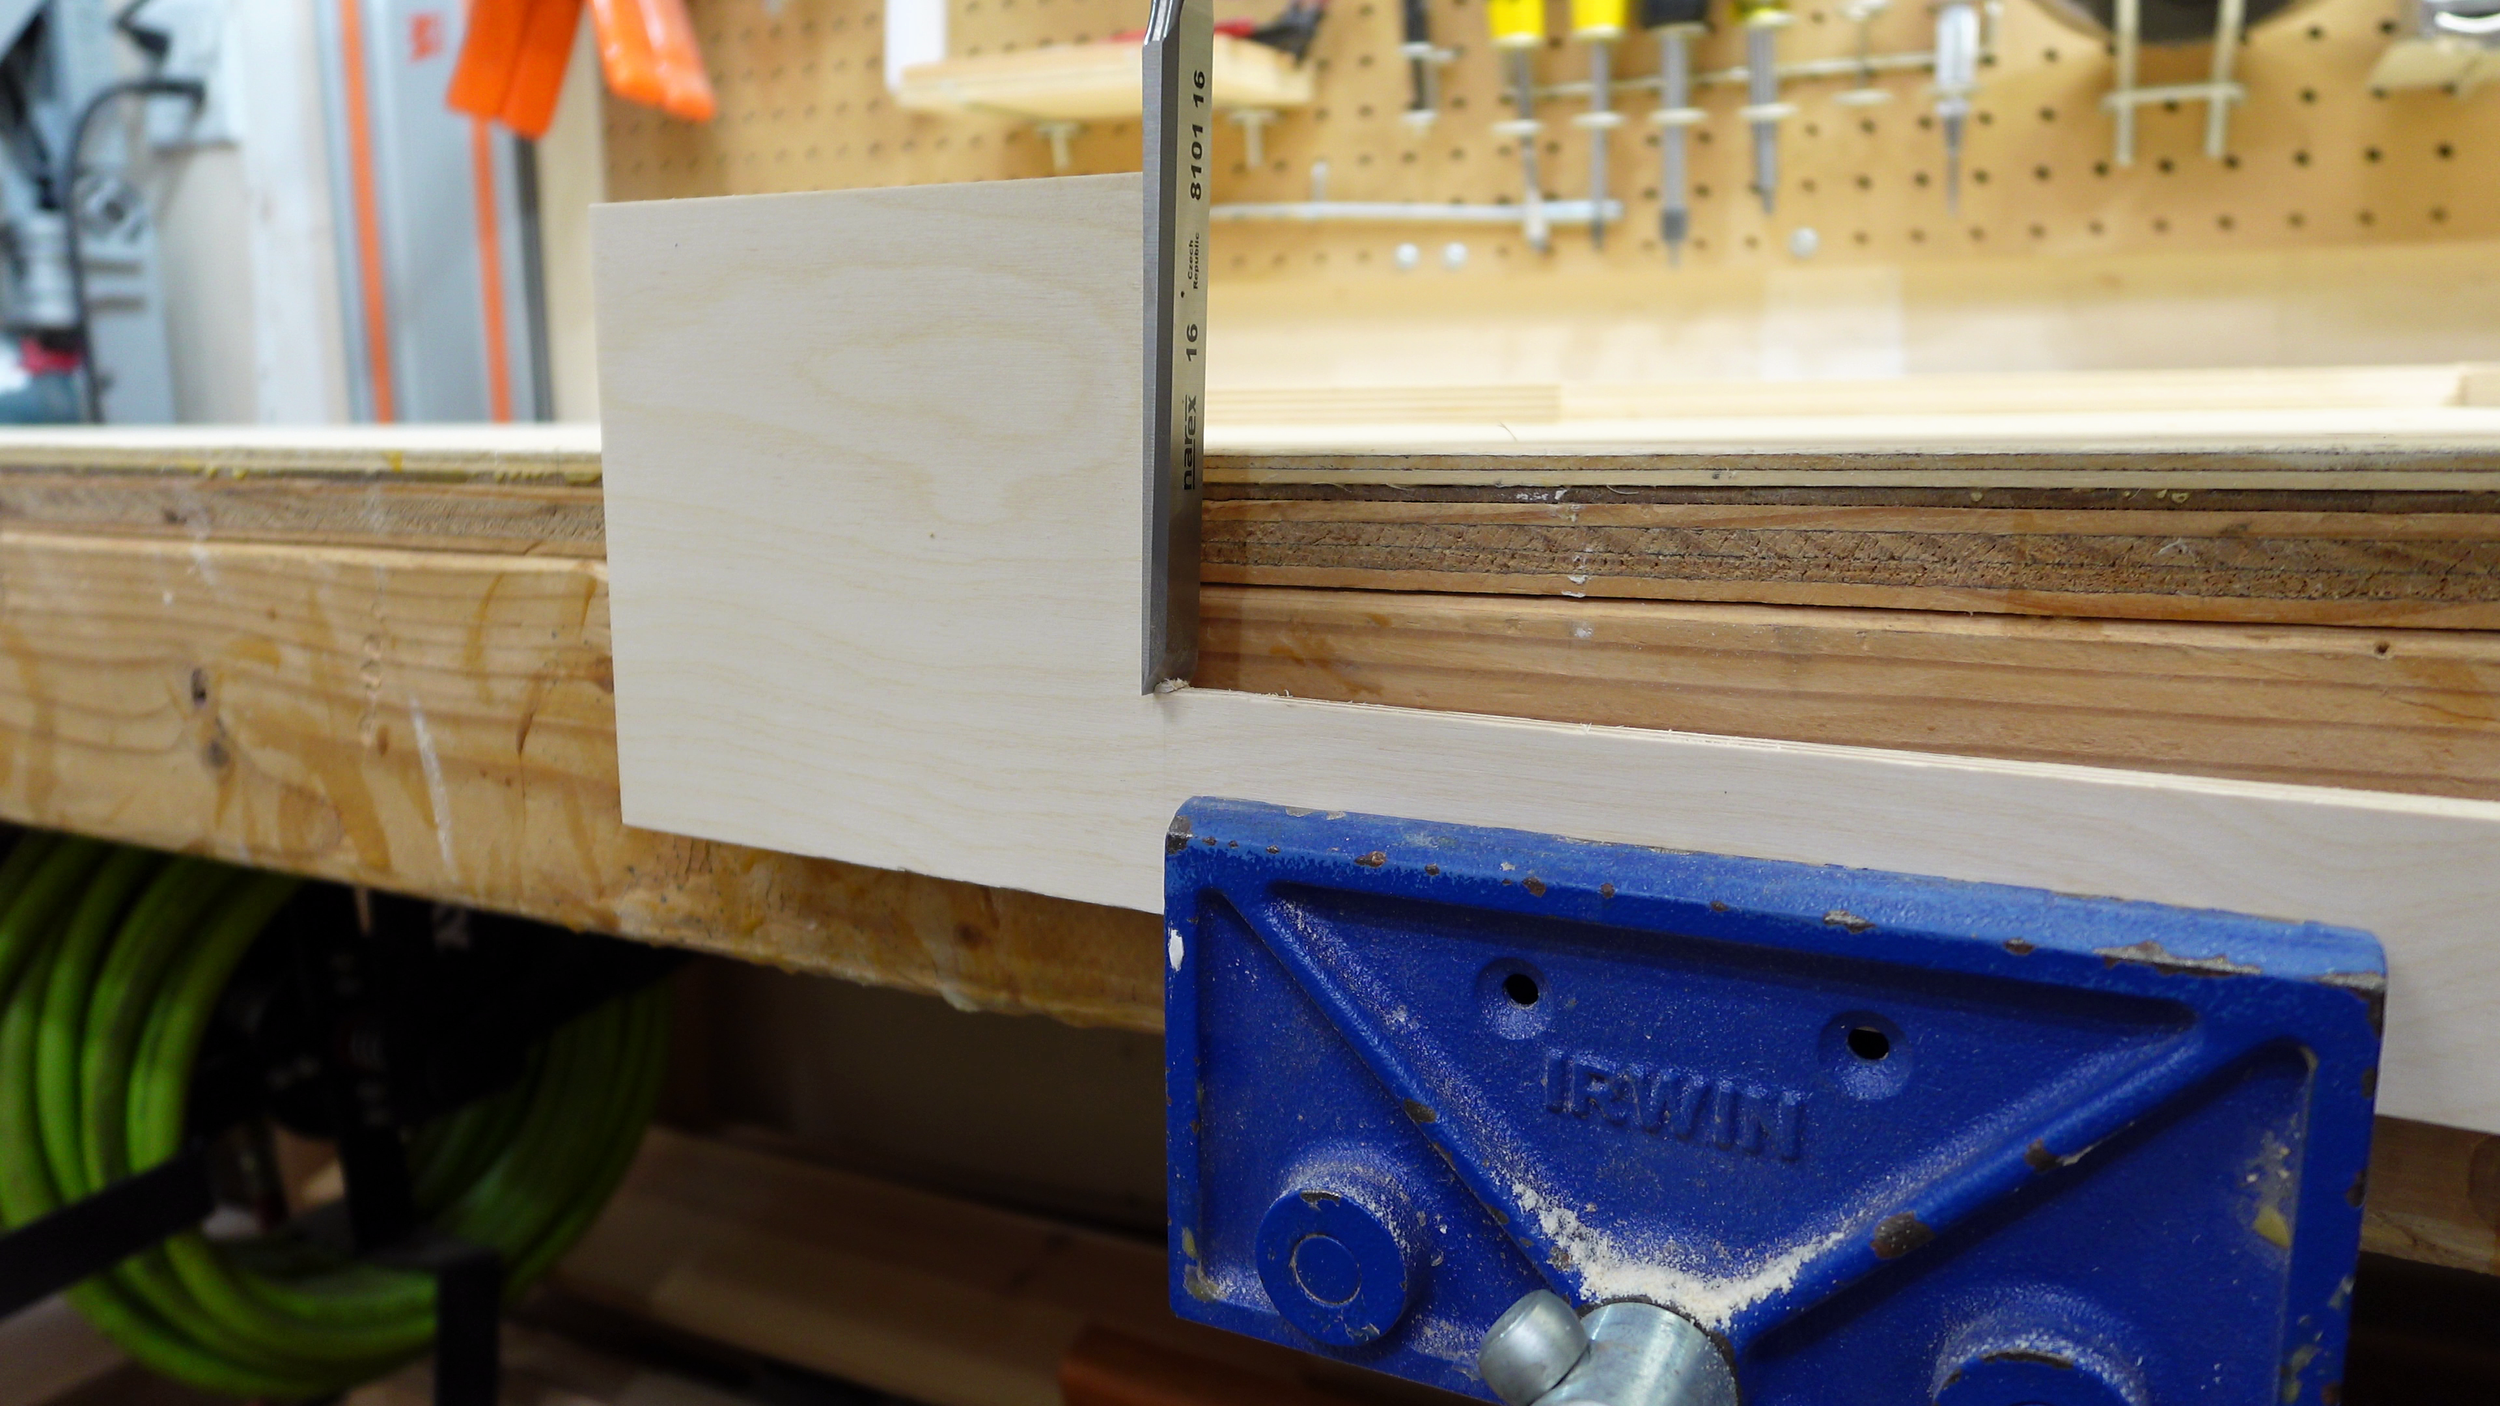

To cut the opening, I first raised the table saw blade to just below the rabbet and made the vertical cut. Then I set the board the correct distance from the fence and slowly raised the blade to remove most of the horizontal material. A handsaw, chisel, and a bit of sandpaper cleaned up the rest.


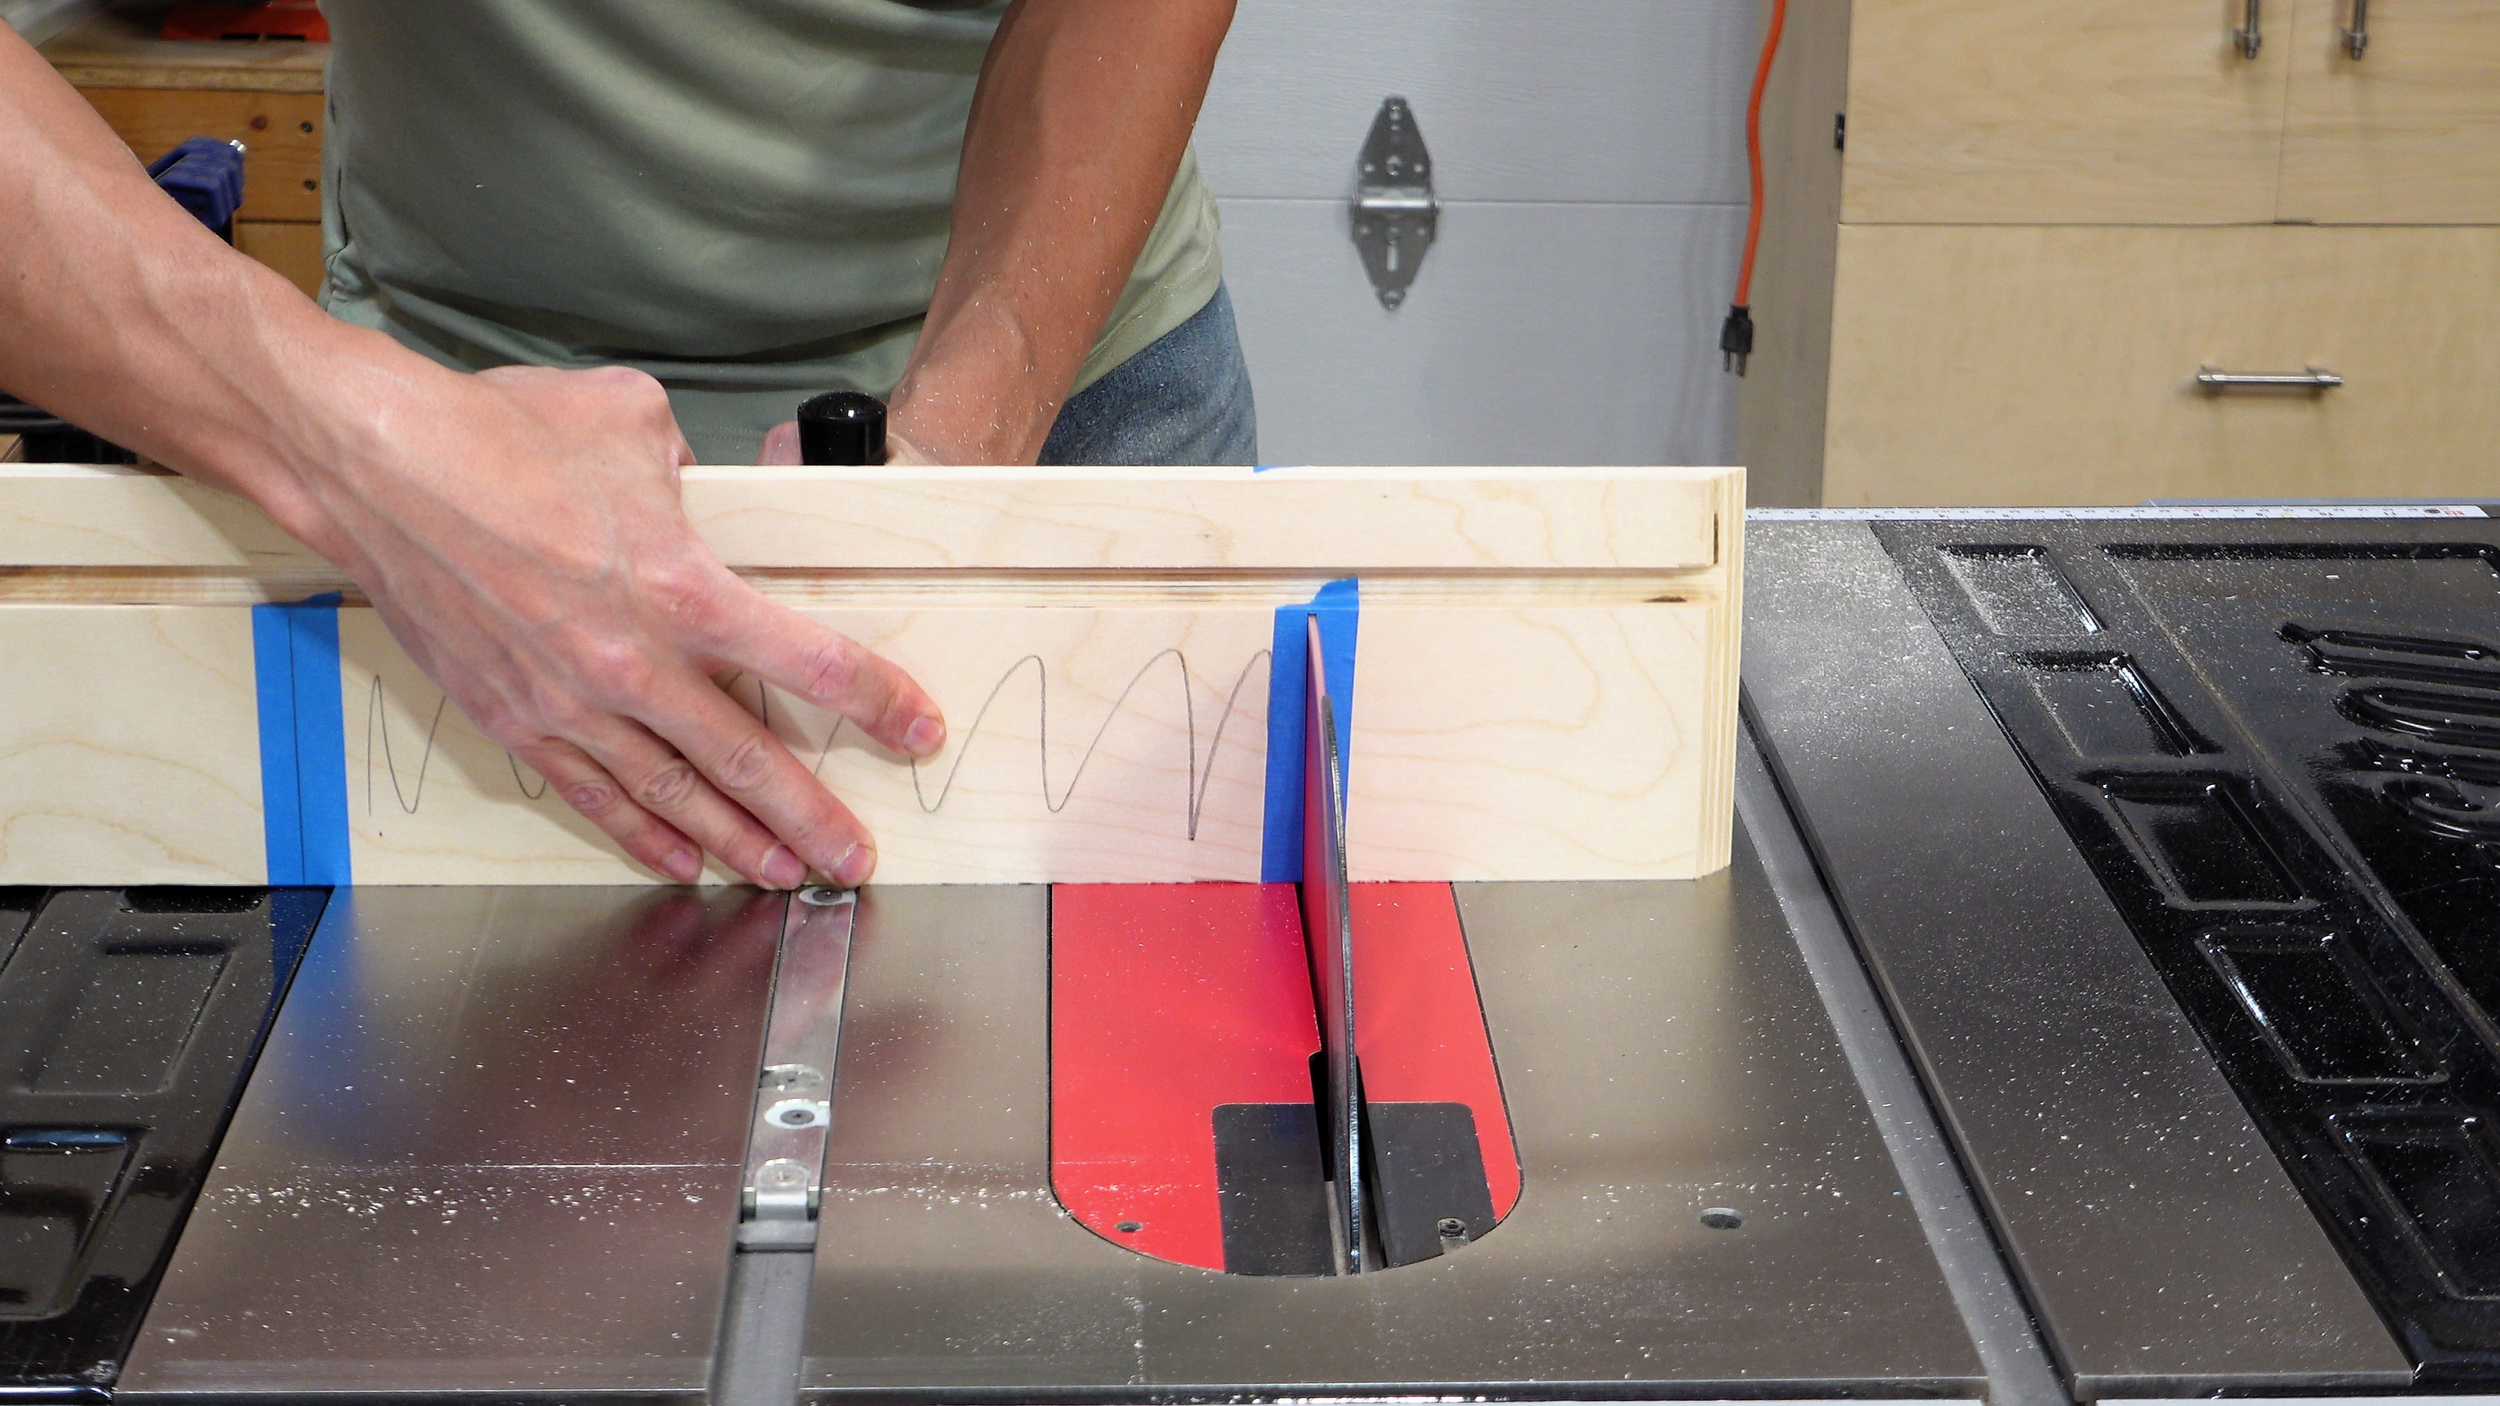
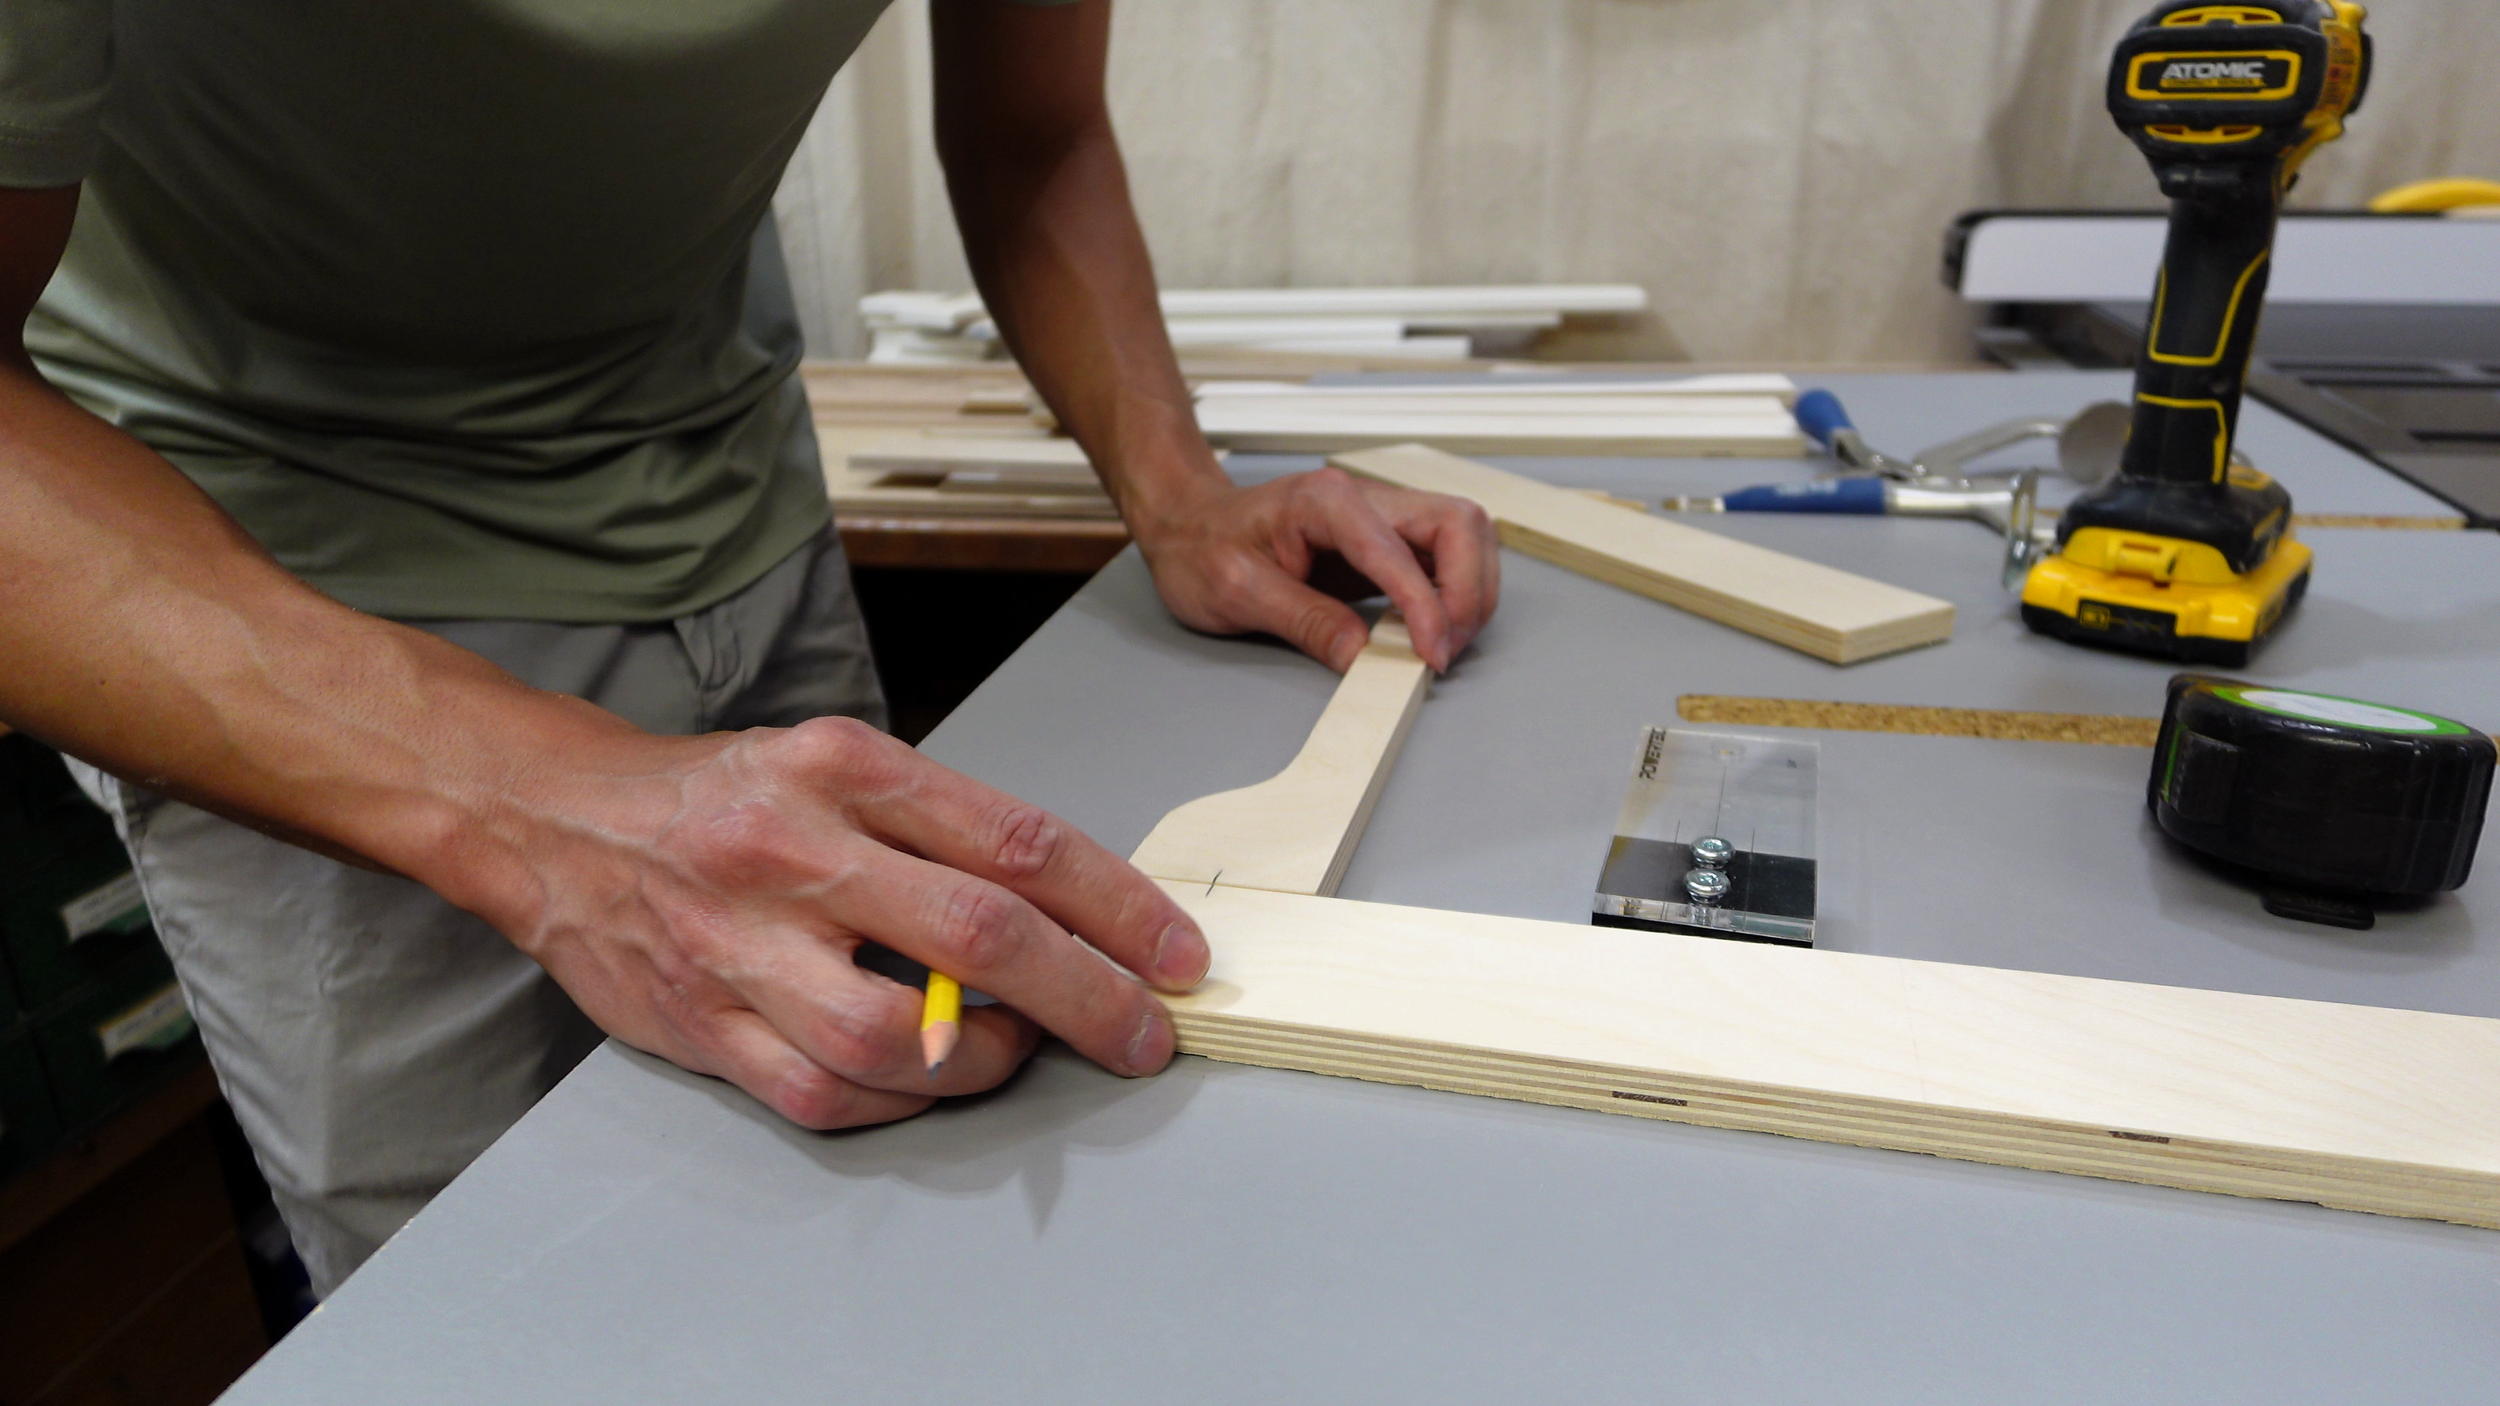
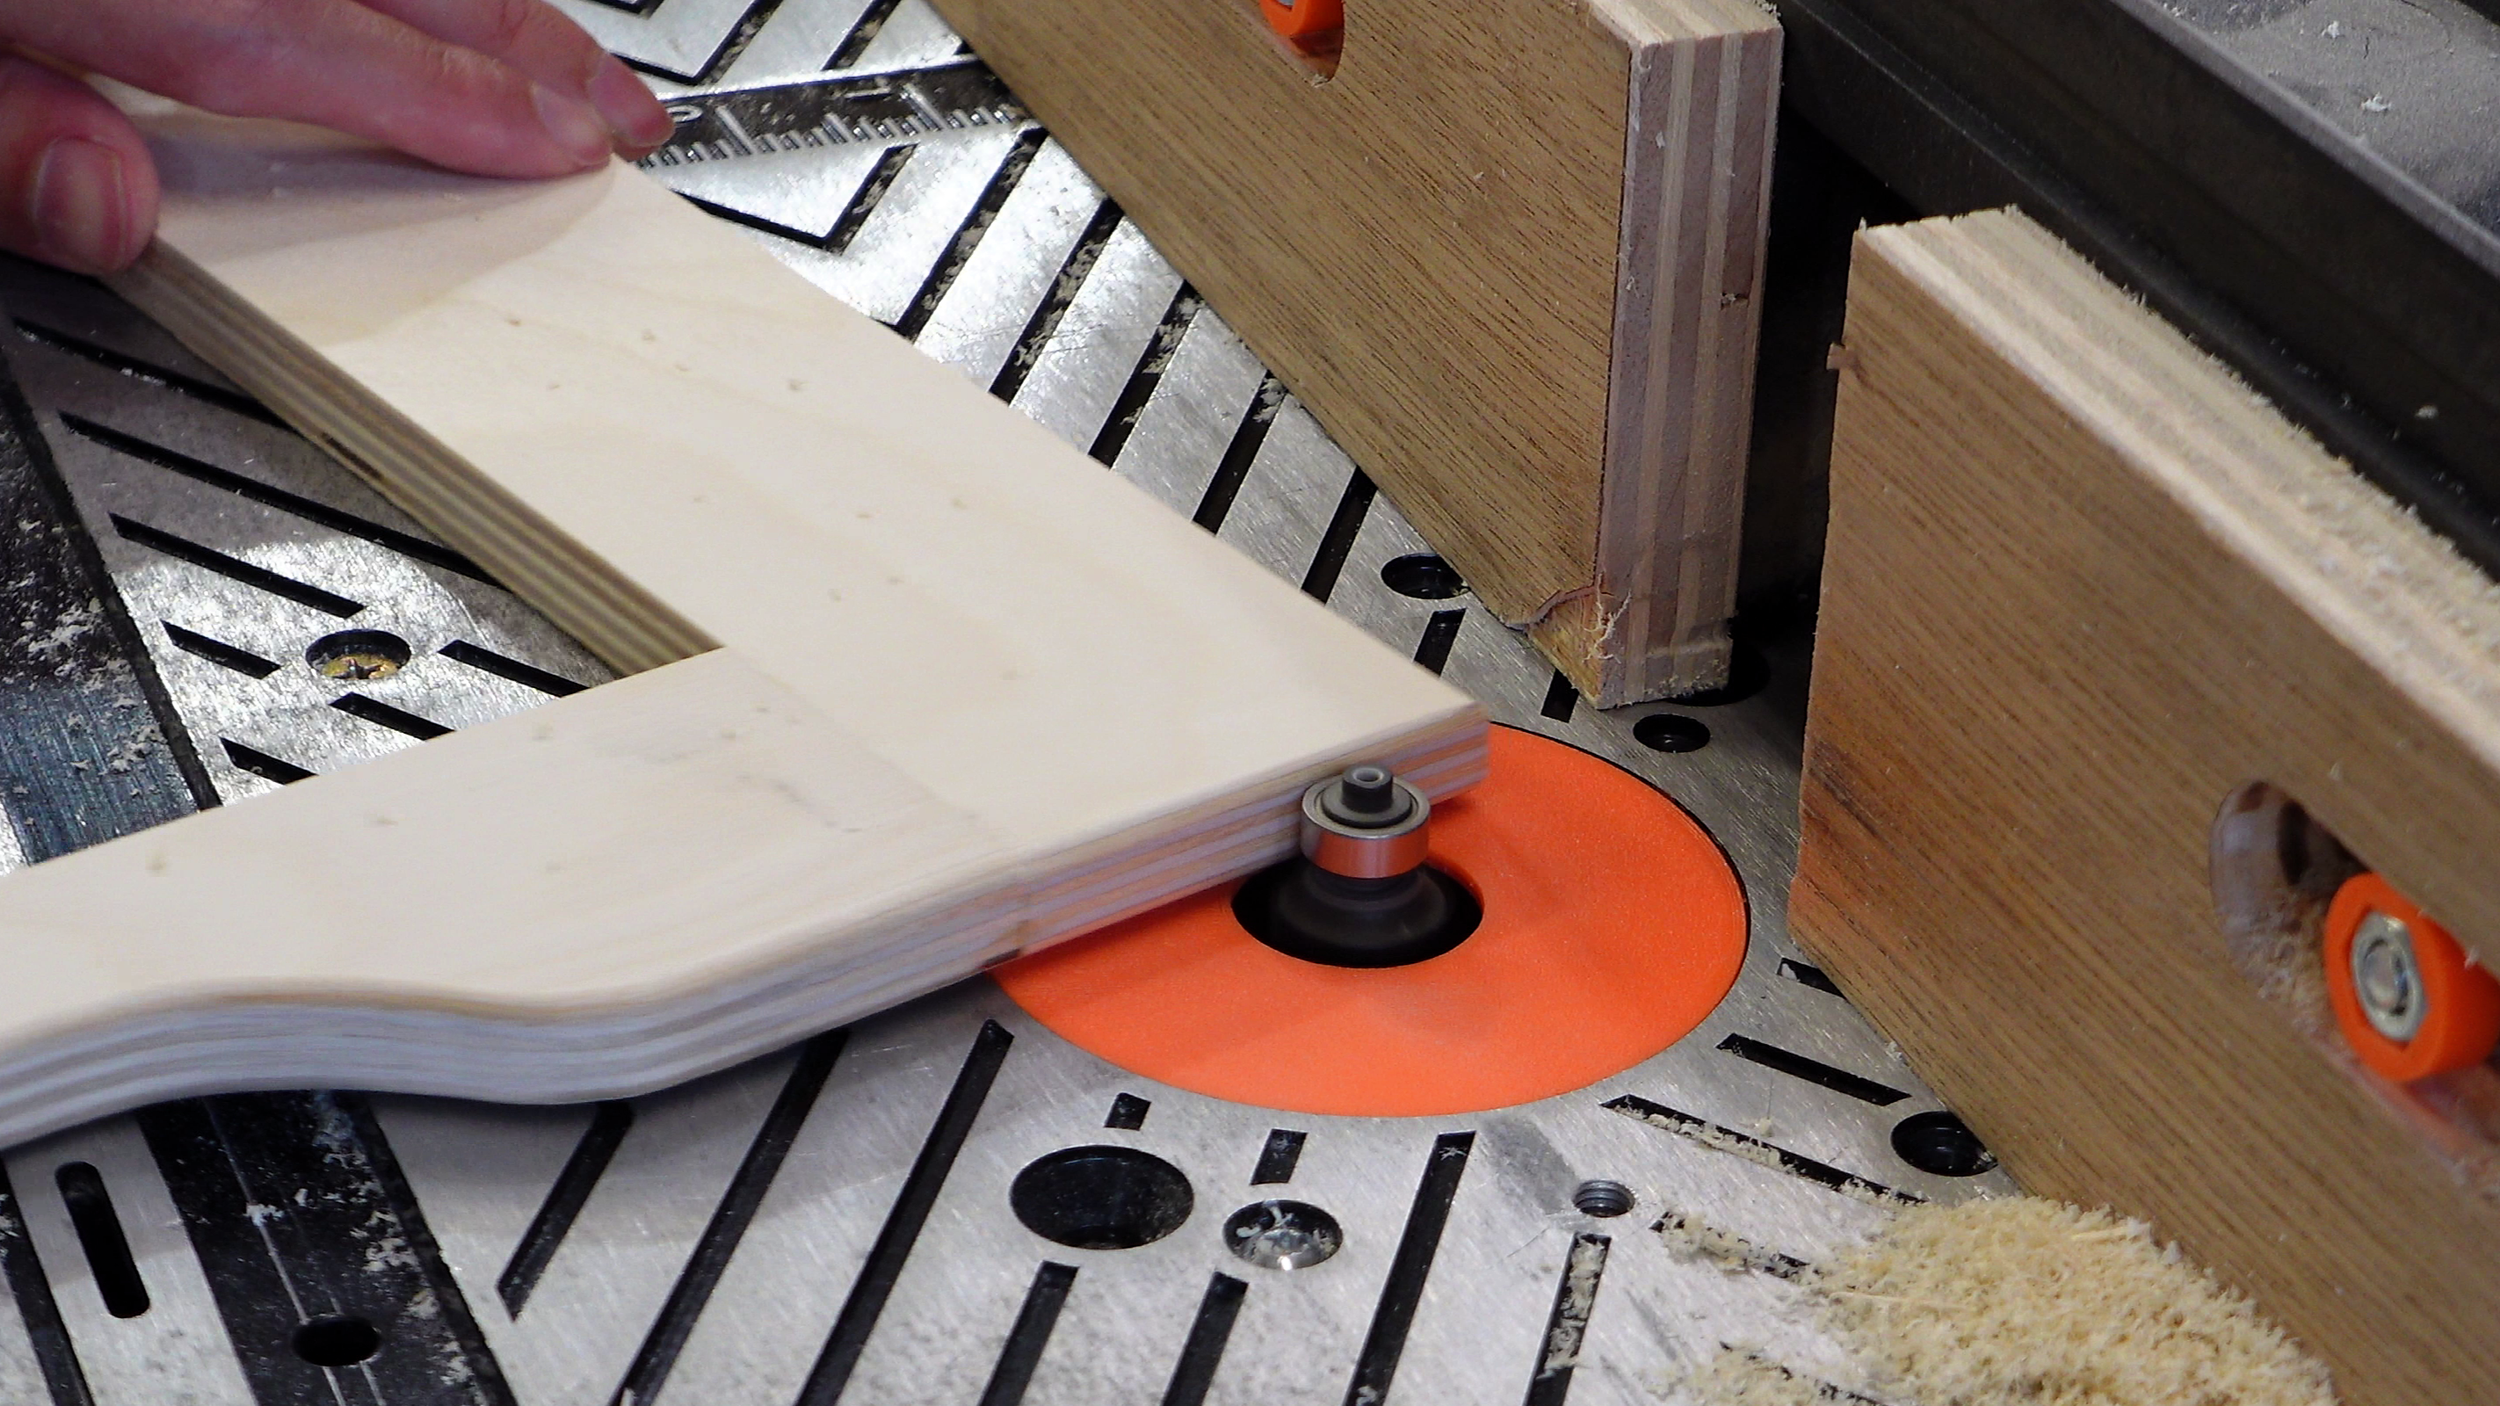
To add some design and break up the straight lines, I cut curves into both part Bs. I printed the 1:1 templates from the plan set, traced the shape onto the boards, and cut them out with a bandsaw. A jigsaw would work just as well. I smoothed the curves with a sander for a clean finish.
Set those four frame pieces to the side for now, we need some leg pieces assembled before we can move on.
The Legs


Same process here. I gang cut the four part Es to length and ripped them to width. Part D gets the template, bandsaw, and sander treatment to add a little flair.

To join the leg pieces, I used a 1/4" dowel jig. It’s a sturdy and cost-effective method. I lined up each pair, made a reference mark across the faces, then aligned the jig to that line. Two 1/4" holes go into each part.
Quick tip: you'll be drilling 16 holes, so mark your pieces clearly to avoid mix-ups during assembly.
I added glue to the 1/4" dowels, pressed the parts together, and made sure everything was square and flush before clamping. Say what you want about Harbor Freight, but their parallel clamps are excellent!
Frame Assembly
The reason for switching to the legs earlier was to get everything to a point where I could add a roundover. The goal here is to soften every edge a small hand might grab. I used a 1/8" roundover bit for most of it, but a hand router or even sandpaper would work just fine.


There are a few edges to skip. Avoid the 45 degree miters on the frame and the upper lip of the part C opening. The router bearing will ride up and gouge the wood, I learned that the hard way on the prototype.
For those spots, hand sanding is the way to go. A roundover bit won’t reach every inside edge, so a chisel and some sandpaper help smooth things out.


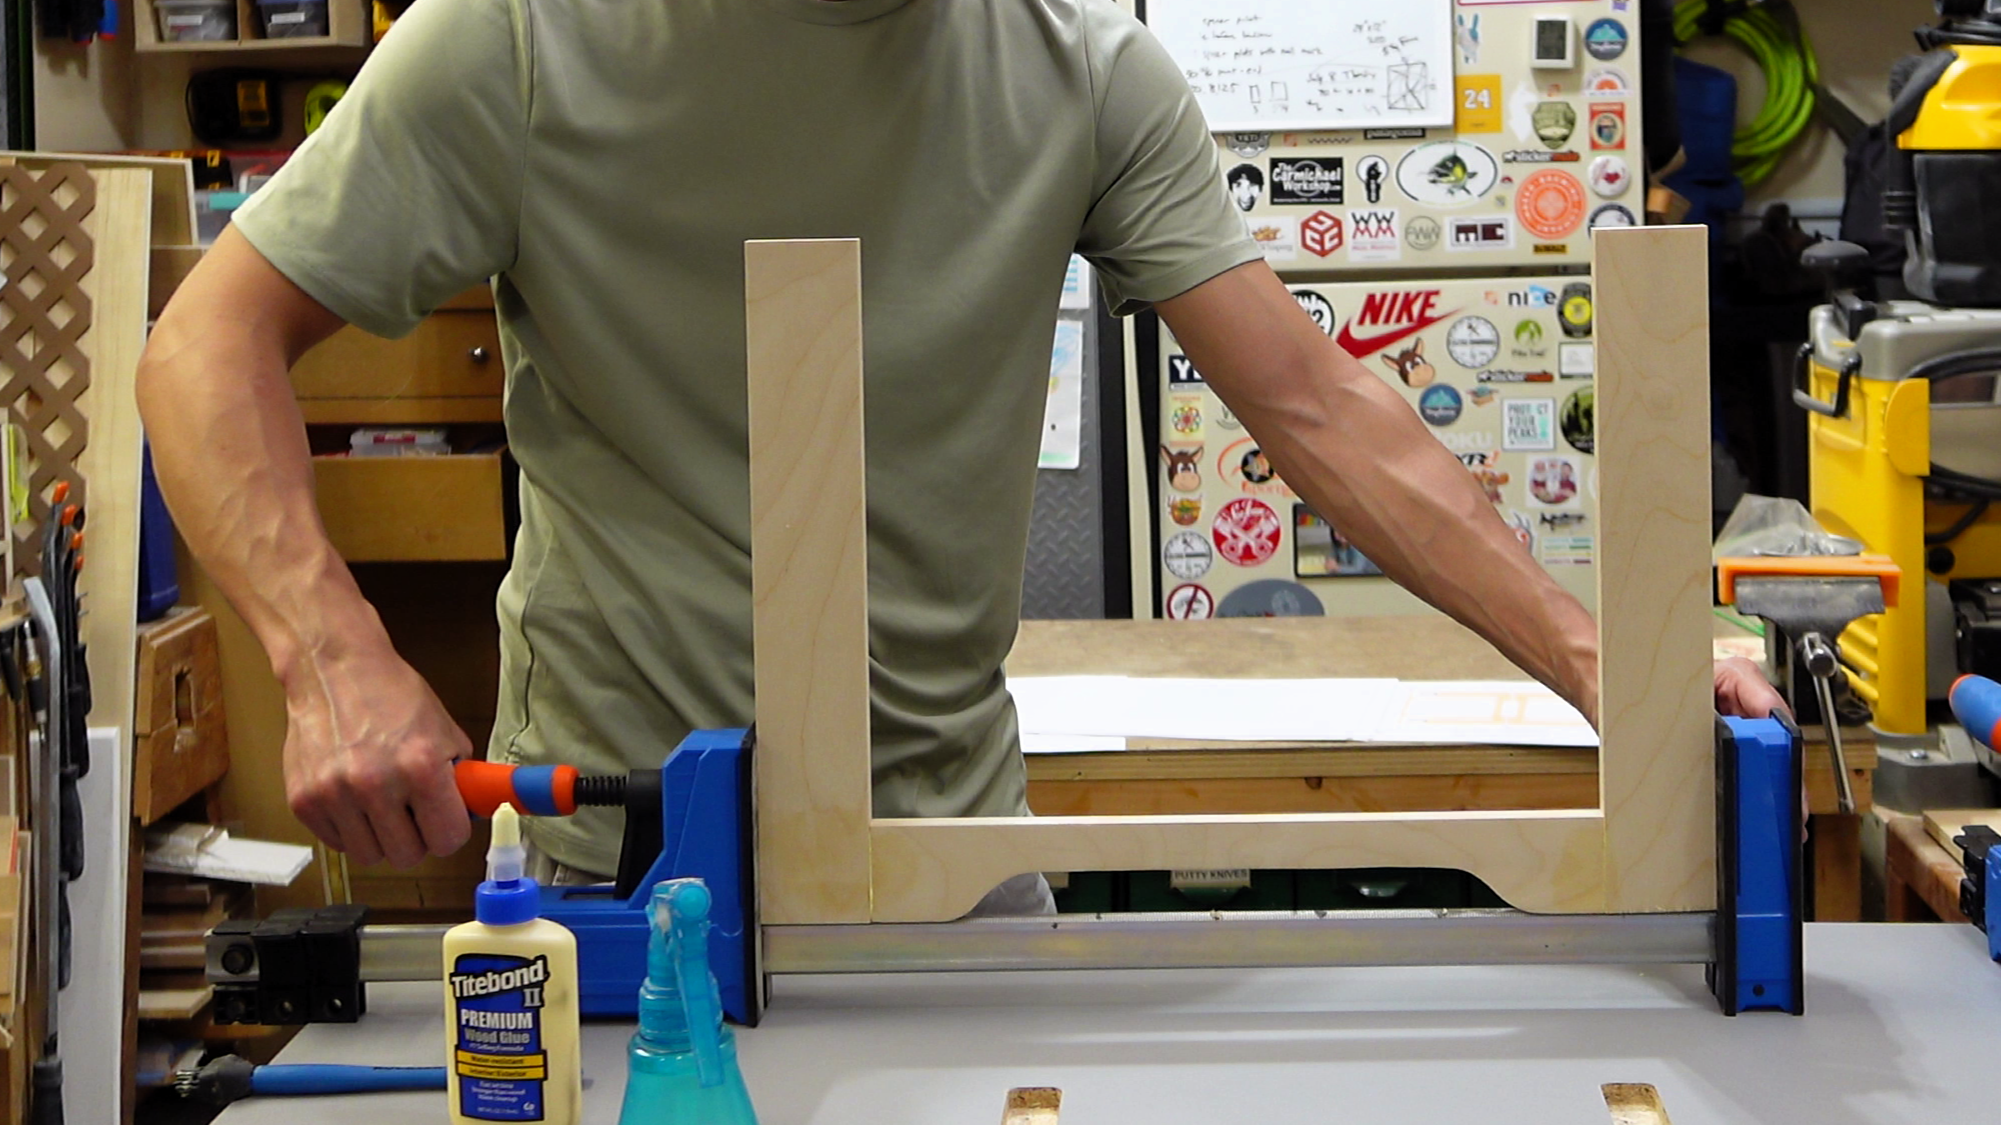
With the joinery done, part A gets cut out and test fit. I leave it a little heavy and sneak up on the final cut until it fits snug in the dados. Wood glue and clamps bring everything together. Painter's tape across the miters helps keep them from shifting under pressure.
I don’t use strap clamps often, but when I do, there’s no substitute. Be sure to wipe up all glue squeeze-out with a wet rag right away. It’s a pain to clean once it dries inside the grooves.

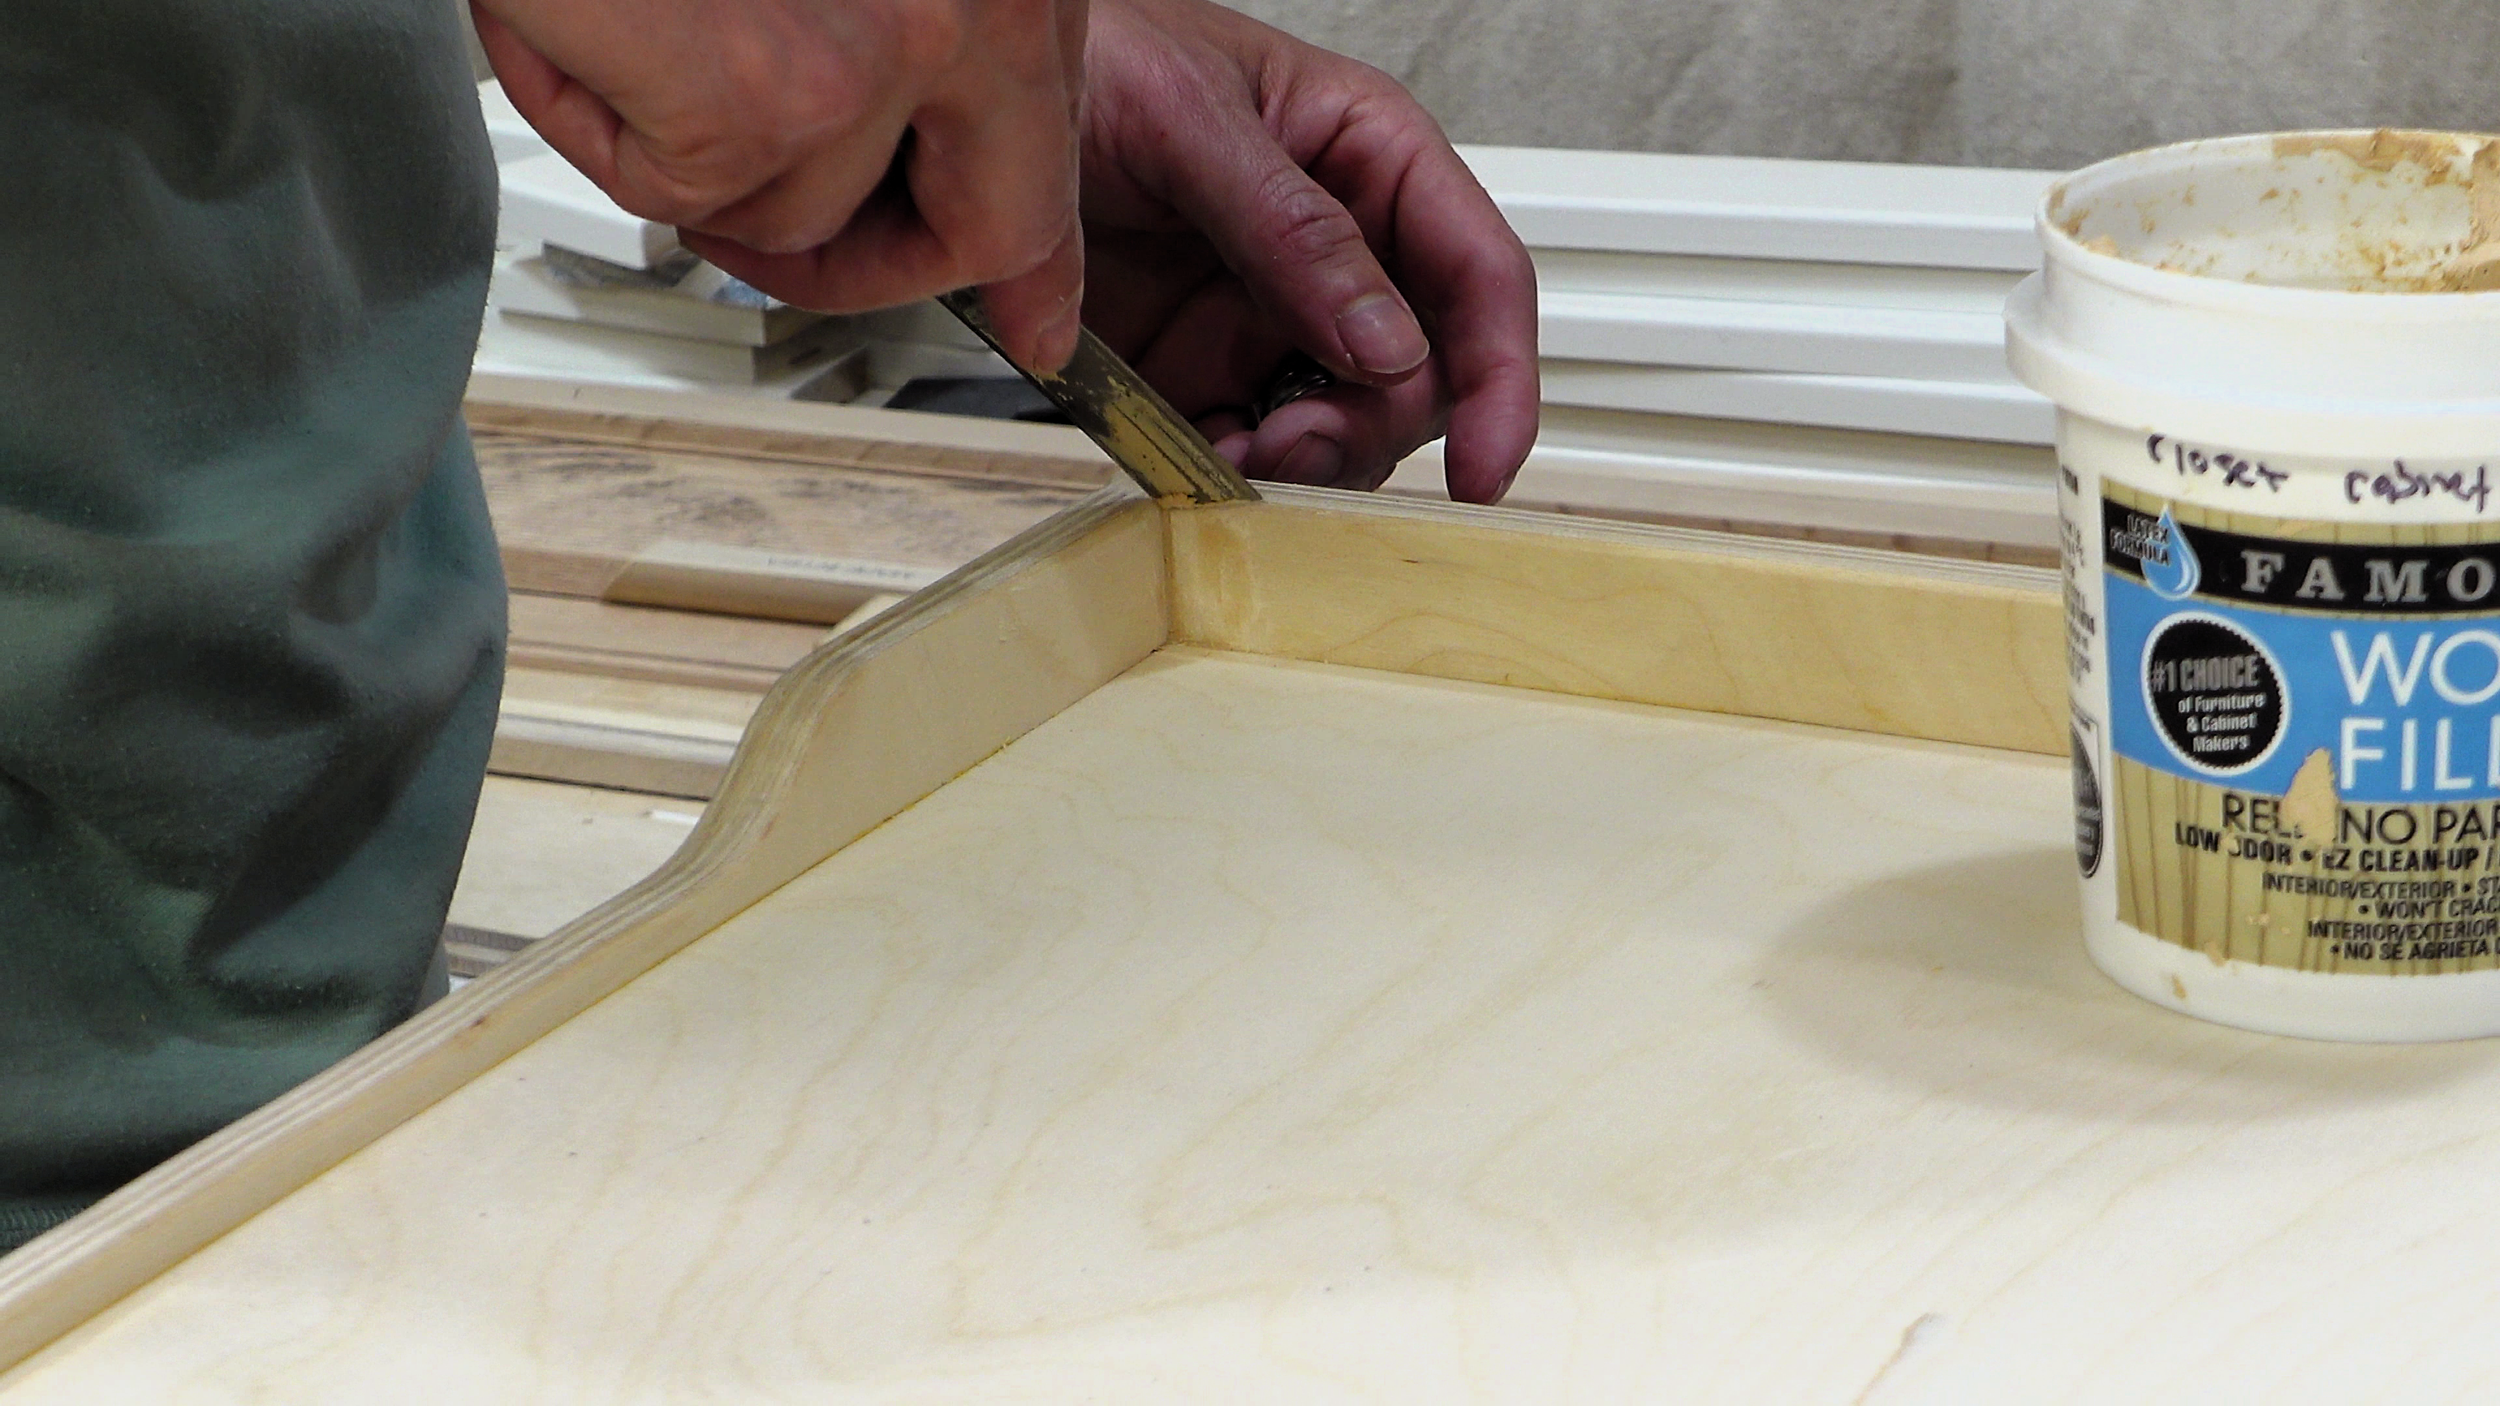
Now’s a good time to finish sanding the roundovers on the mitered corners by hand. I had one small gap on a corner, but a bit of wood filler and sanding cleaned it up quickly.
Drawer Runners

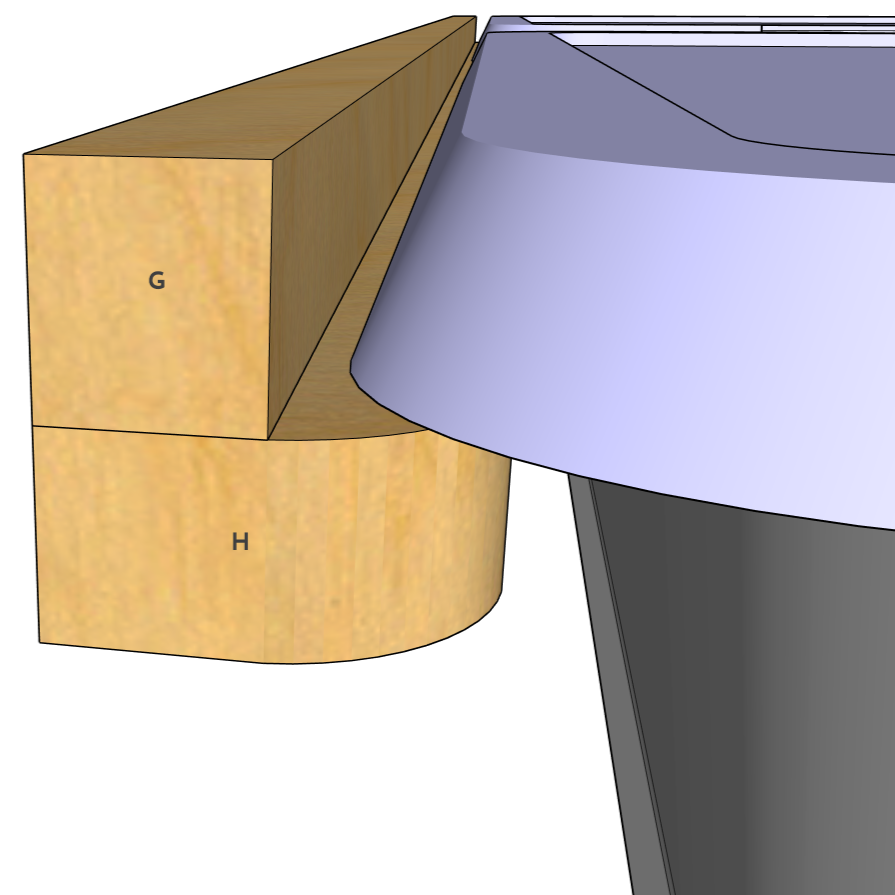
Parts G, H, and I keep the drawers (14” x 11” x 3 1/4” plastic bins) in place. G and H work together as simple drawer slides, while the I pieces act as depth stops. Each piece is cut to fit during assembly.
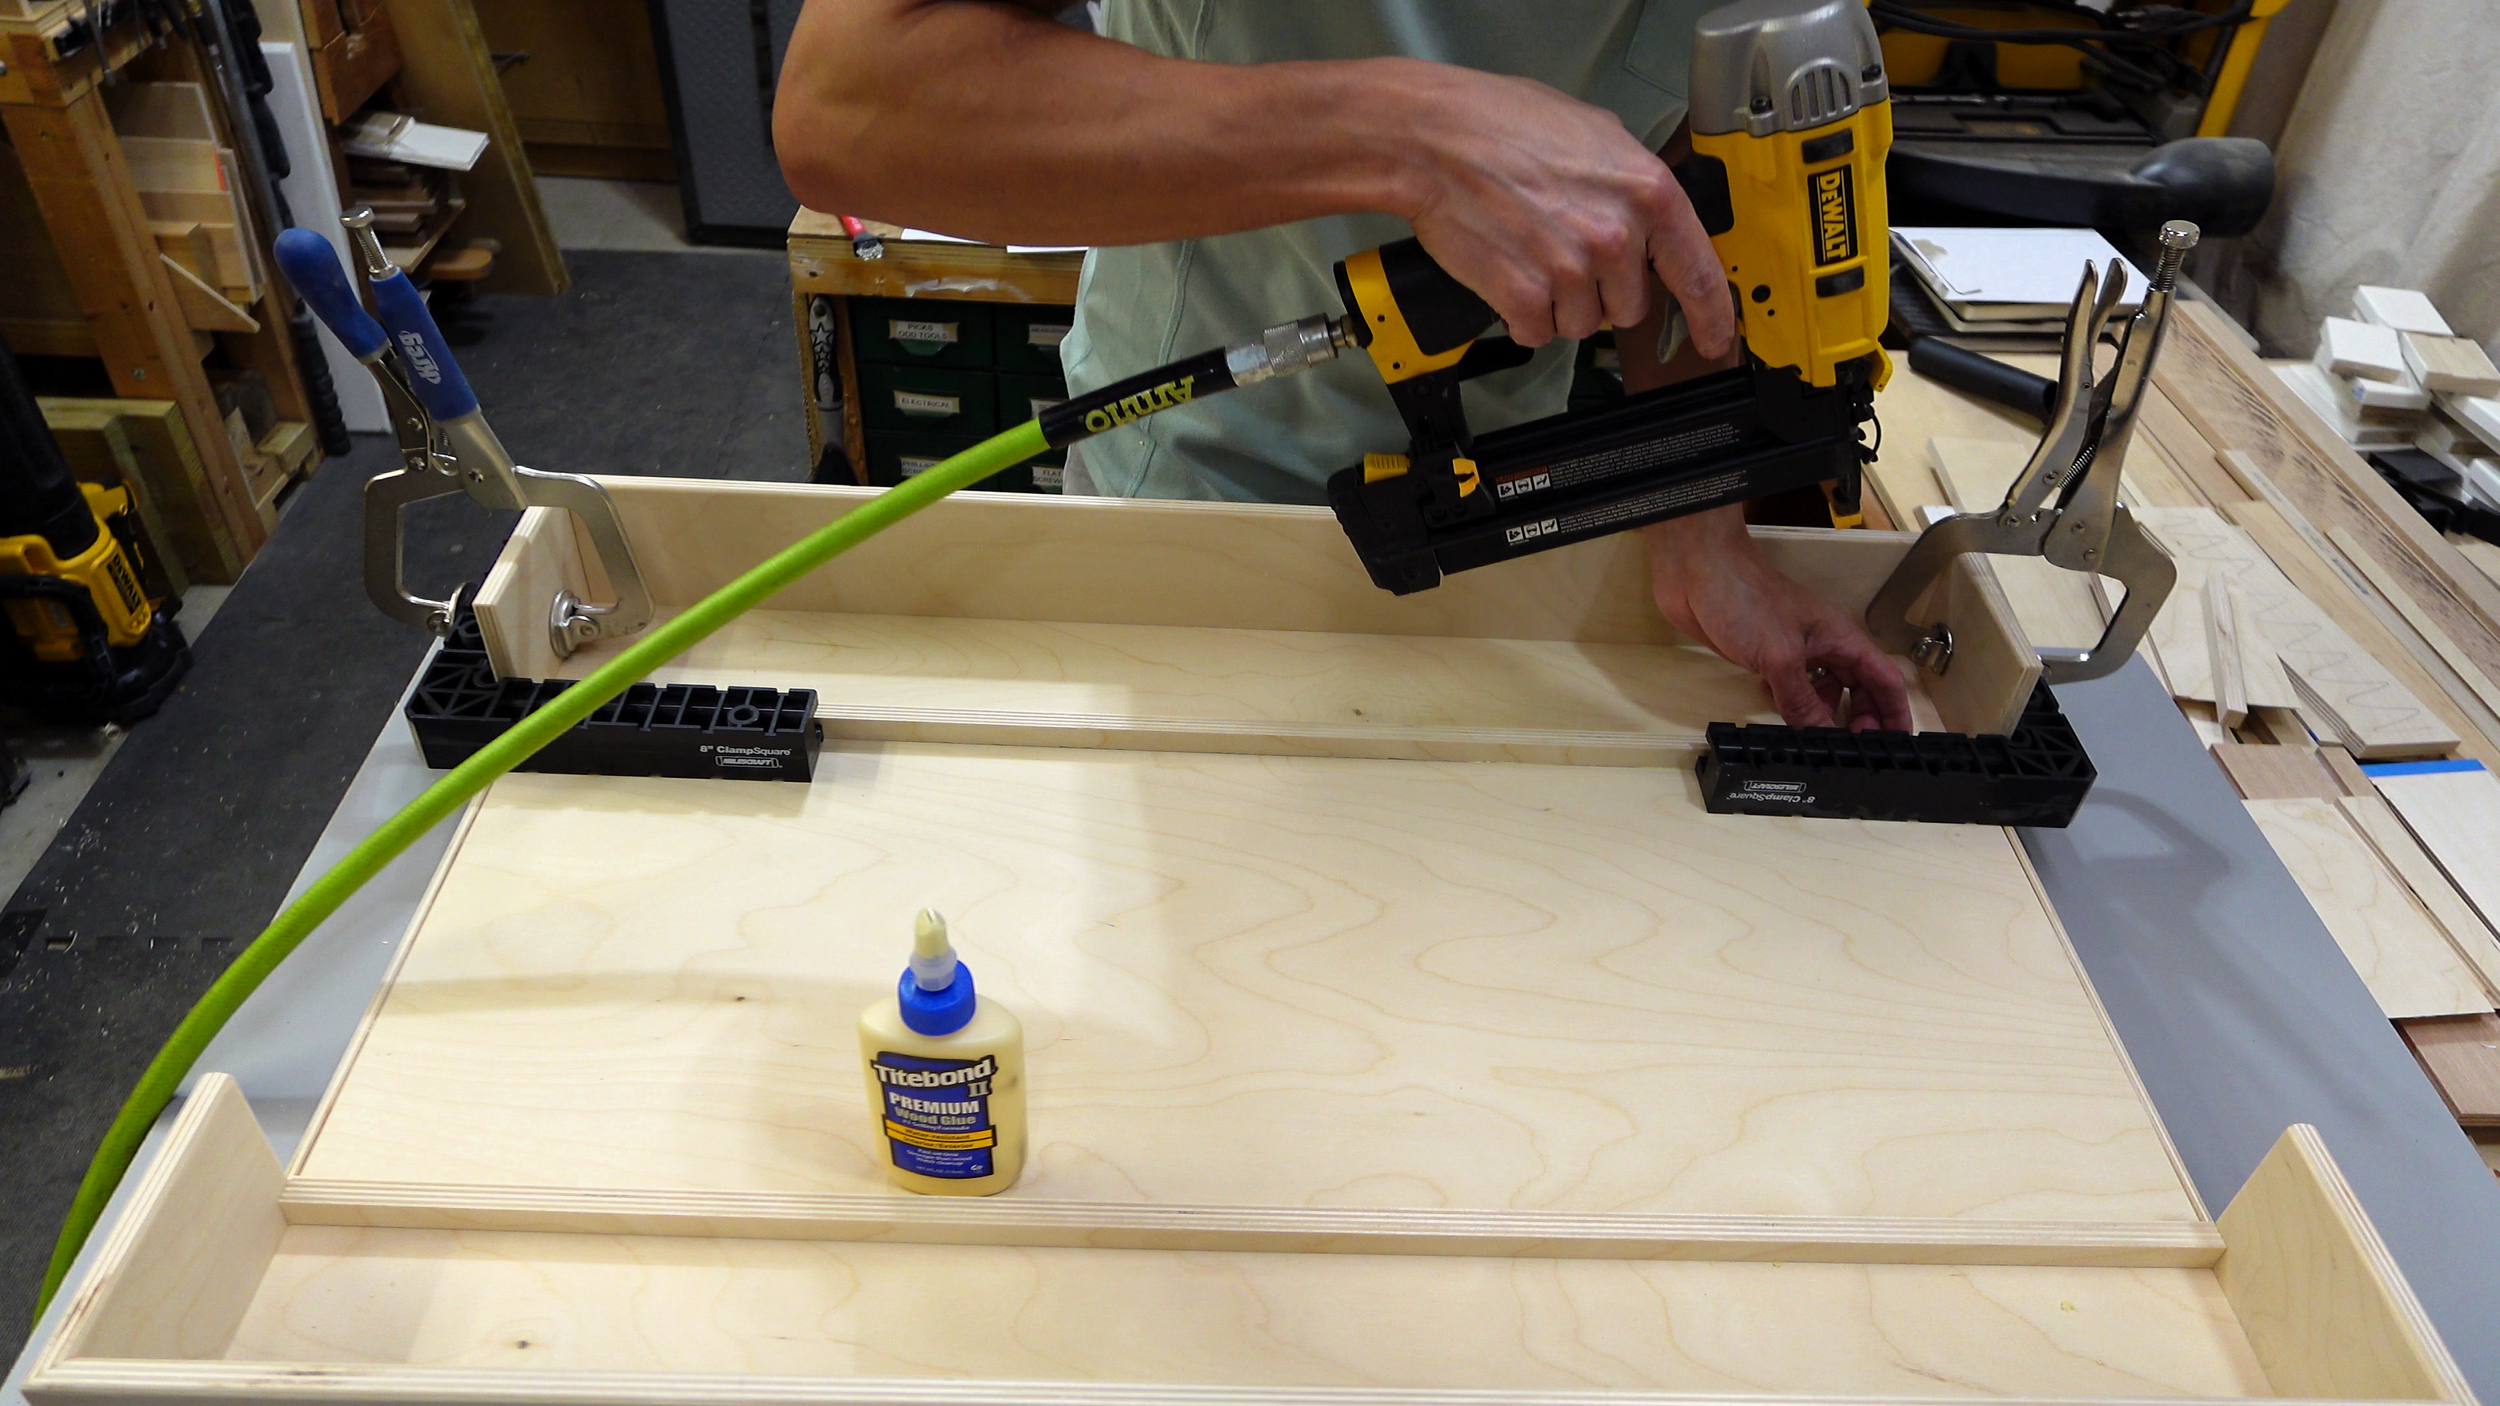
Start by attaching part G directly to the underside of the top (part A). I used 3/4" brad nails to avoid blowing through. Right angle clamps help with alignment and make the install go quicker.


Part H gets a roundover to help guide the drawer and soften the edges. It’s glued and brad nailed right on top of part G.
To avoid hitting nails from the previous step, I marked their locations on some blue tape. During my sample build, I hit one dead-on and shot a nail through the top, splitting the wood. Lesson learned.

With the slides in place, I measured according to the plans and installed the part I stops. A little glue and a few 3/4" brad nails hold them in place.
Finishing


The first and most important step is a thorough sanding. I had already sanded everything to 180 grit before assembly, but now I’m hand sanding up to 220.
Once everything is smooth, it’s crucial to vacuum, blow off the dust with compressed air, and go over each part with a tack cloth to get it completely clean.
Before finishing, I applied blue tape around the perimeter where the Lego base plates will go. The adhesive needs to bond directly to bare plywood, so no finish in that area.
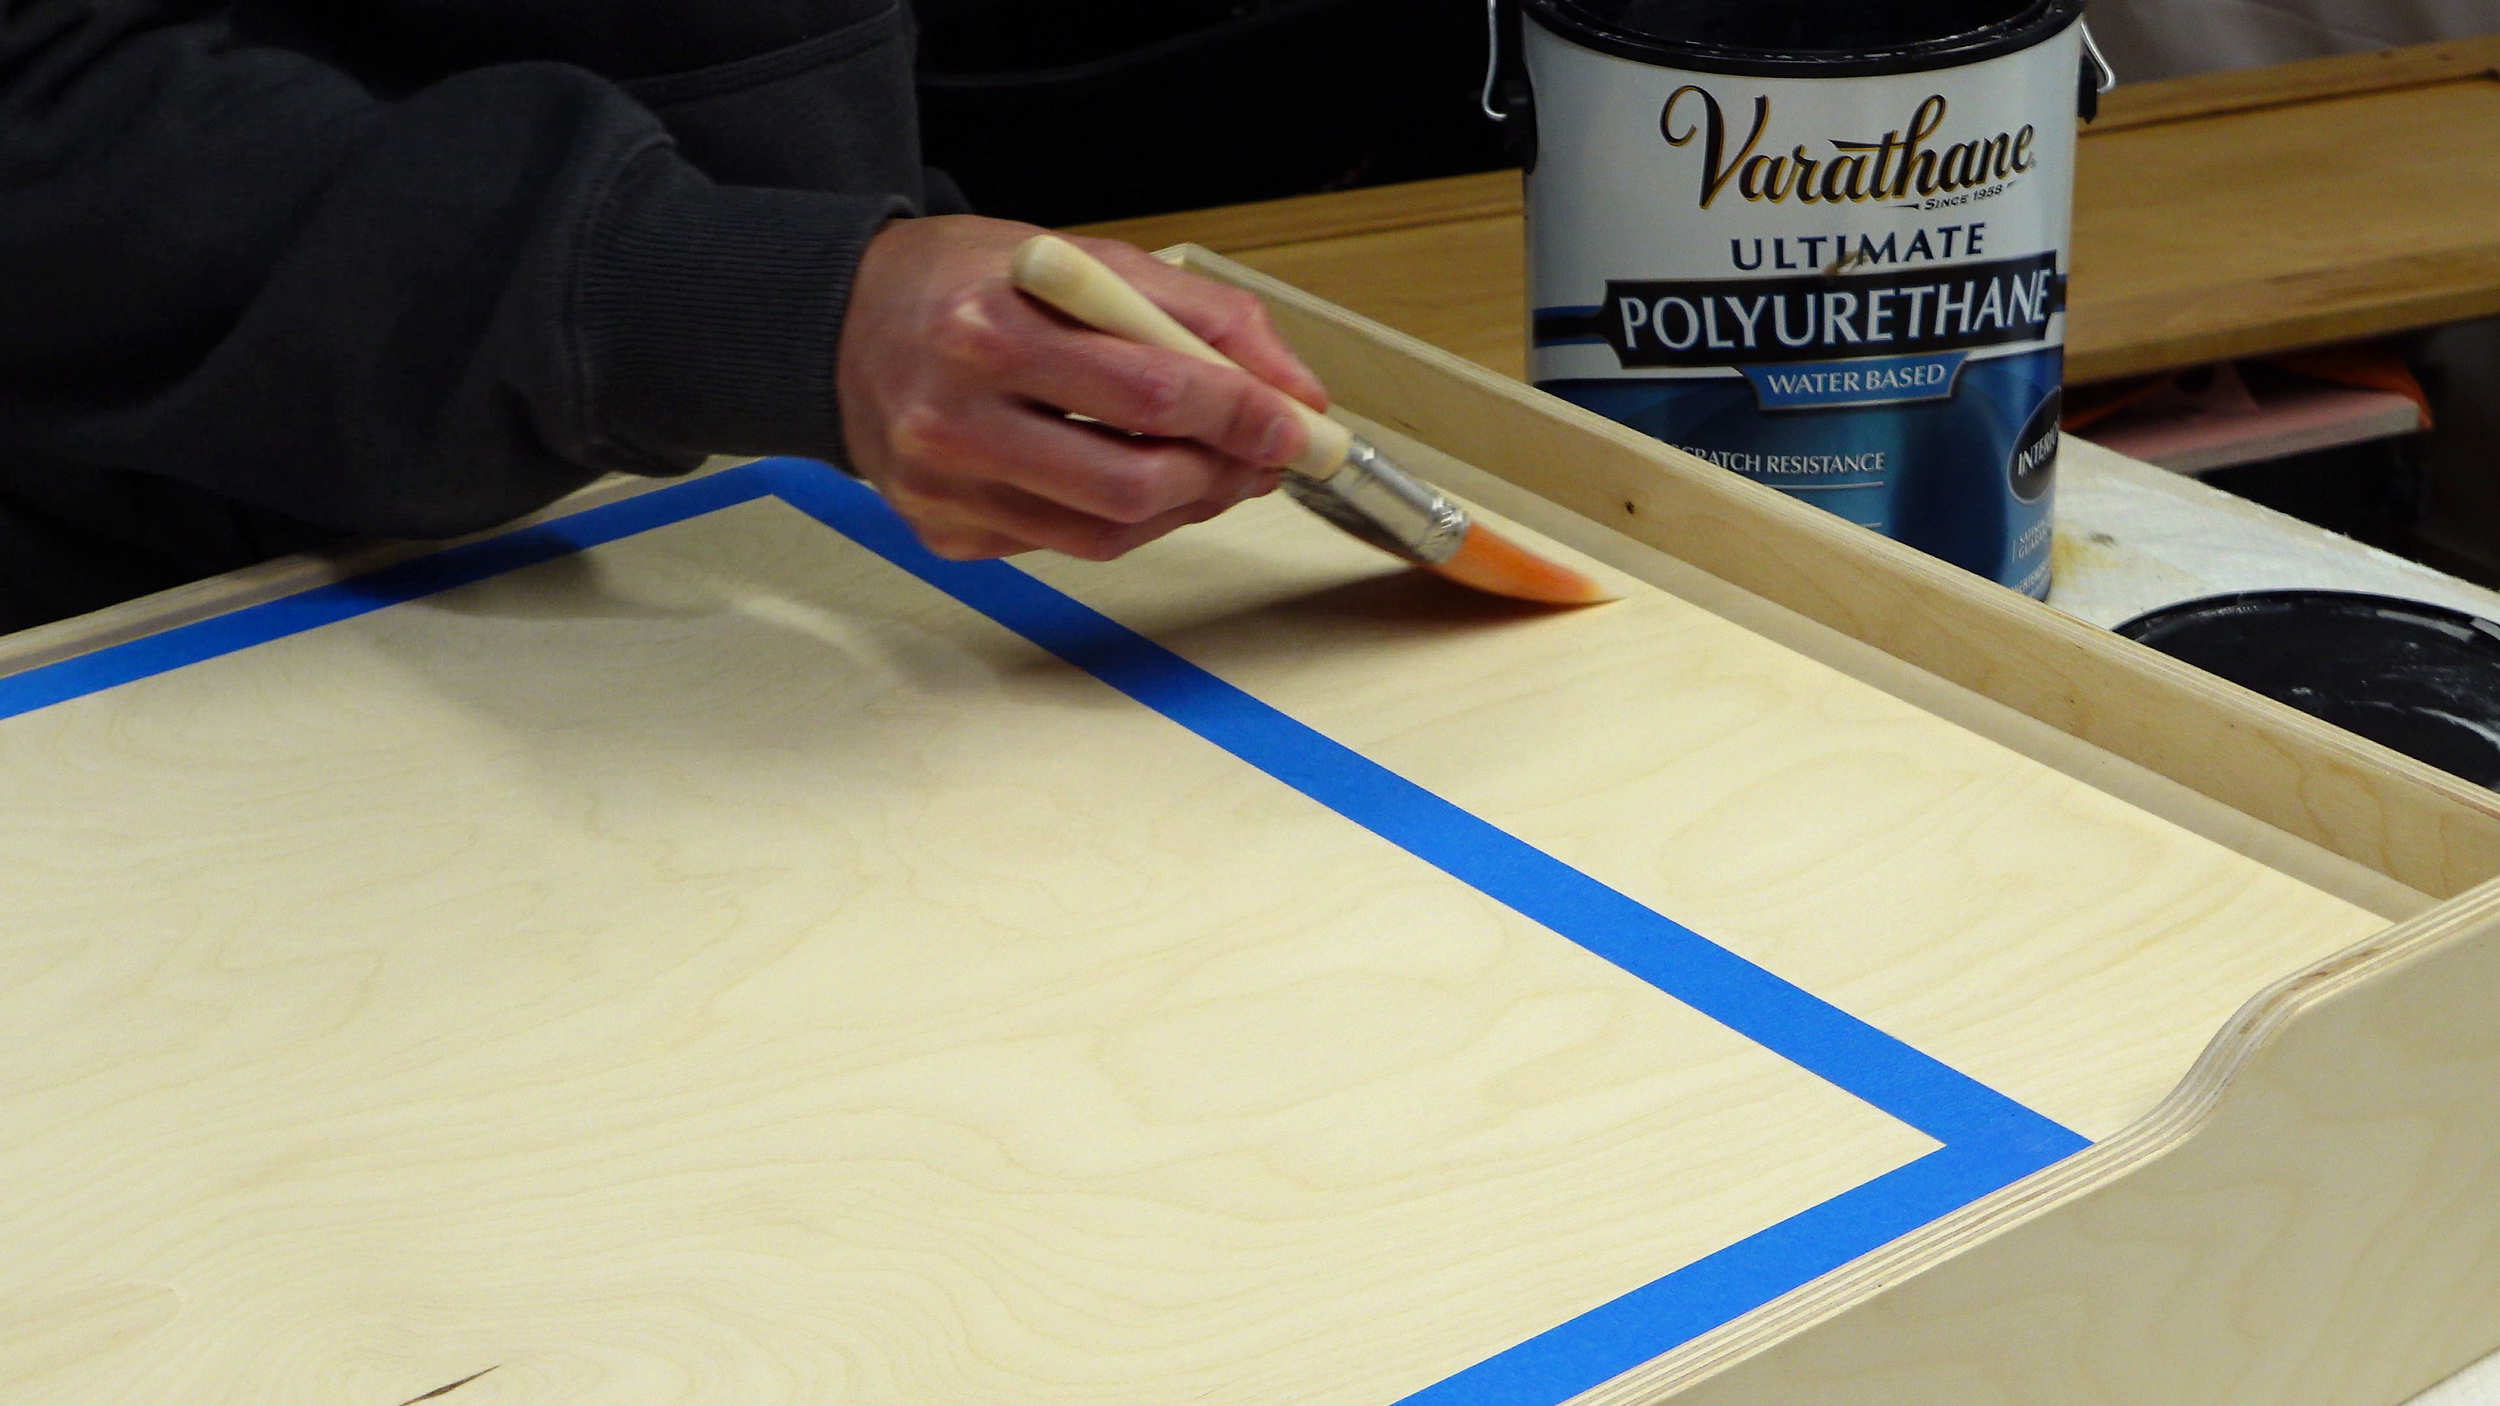
I’m no expert finisher, but I’ve had enough experience to know what works. My go-to lately has been Varathane Ultimate Water-Based Polyurethane. It’s easy to apply and dries fast.
I brushed on the first coat, which raised the grain, then brought it back into the shop for a light sanding with 220. After wiping it clean, I followed up with two more coats on all parts.
Leg Attachment

After letting the poly cure for a few days, it’s time to attach the legs. I saved this step for after finishing to avoid removing and reinstalling the hinges, which can wear out the screw holes.
These locking hinges are really the star of the show. I bought and tested more variations than I’d like to admit before landing on this model.

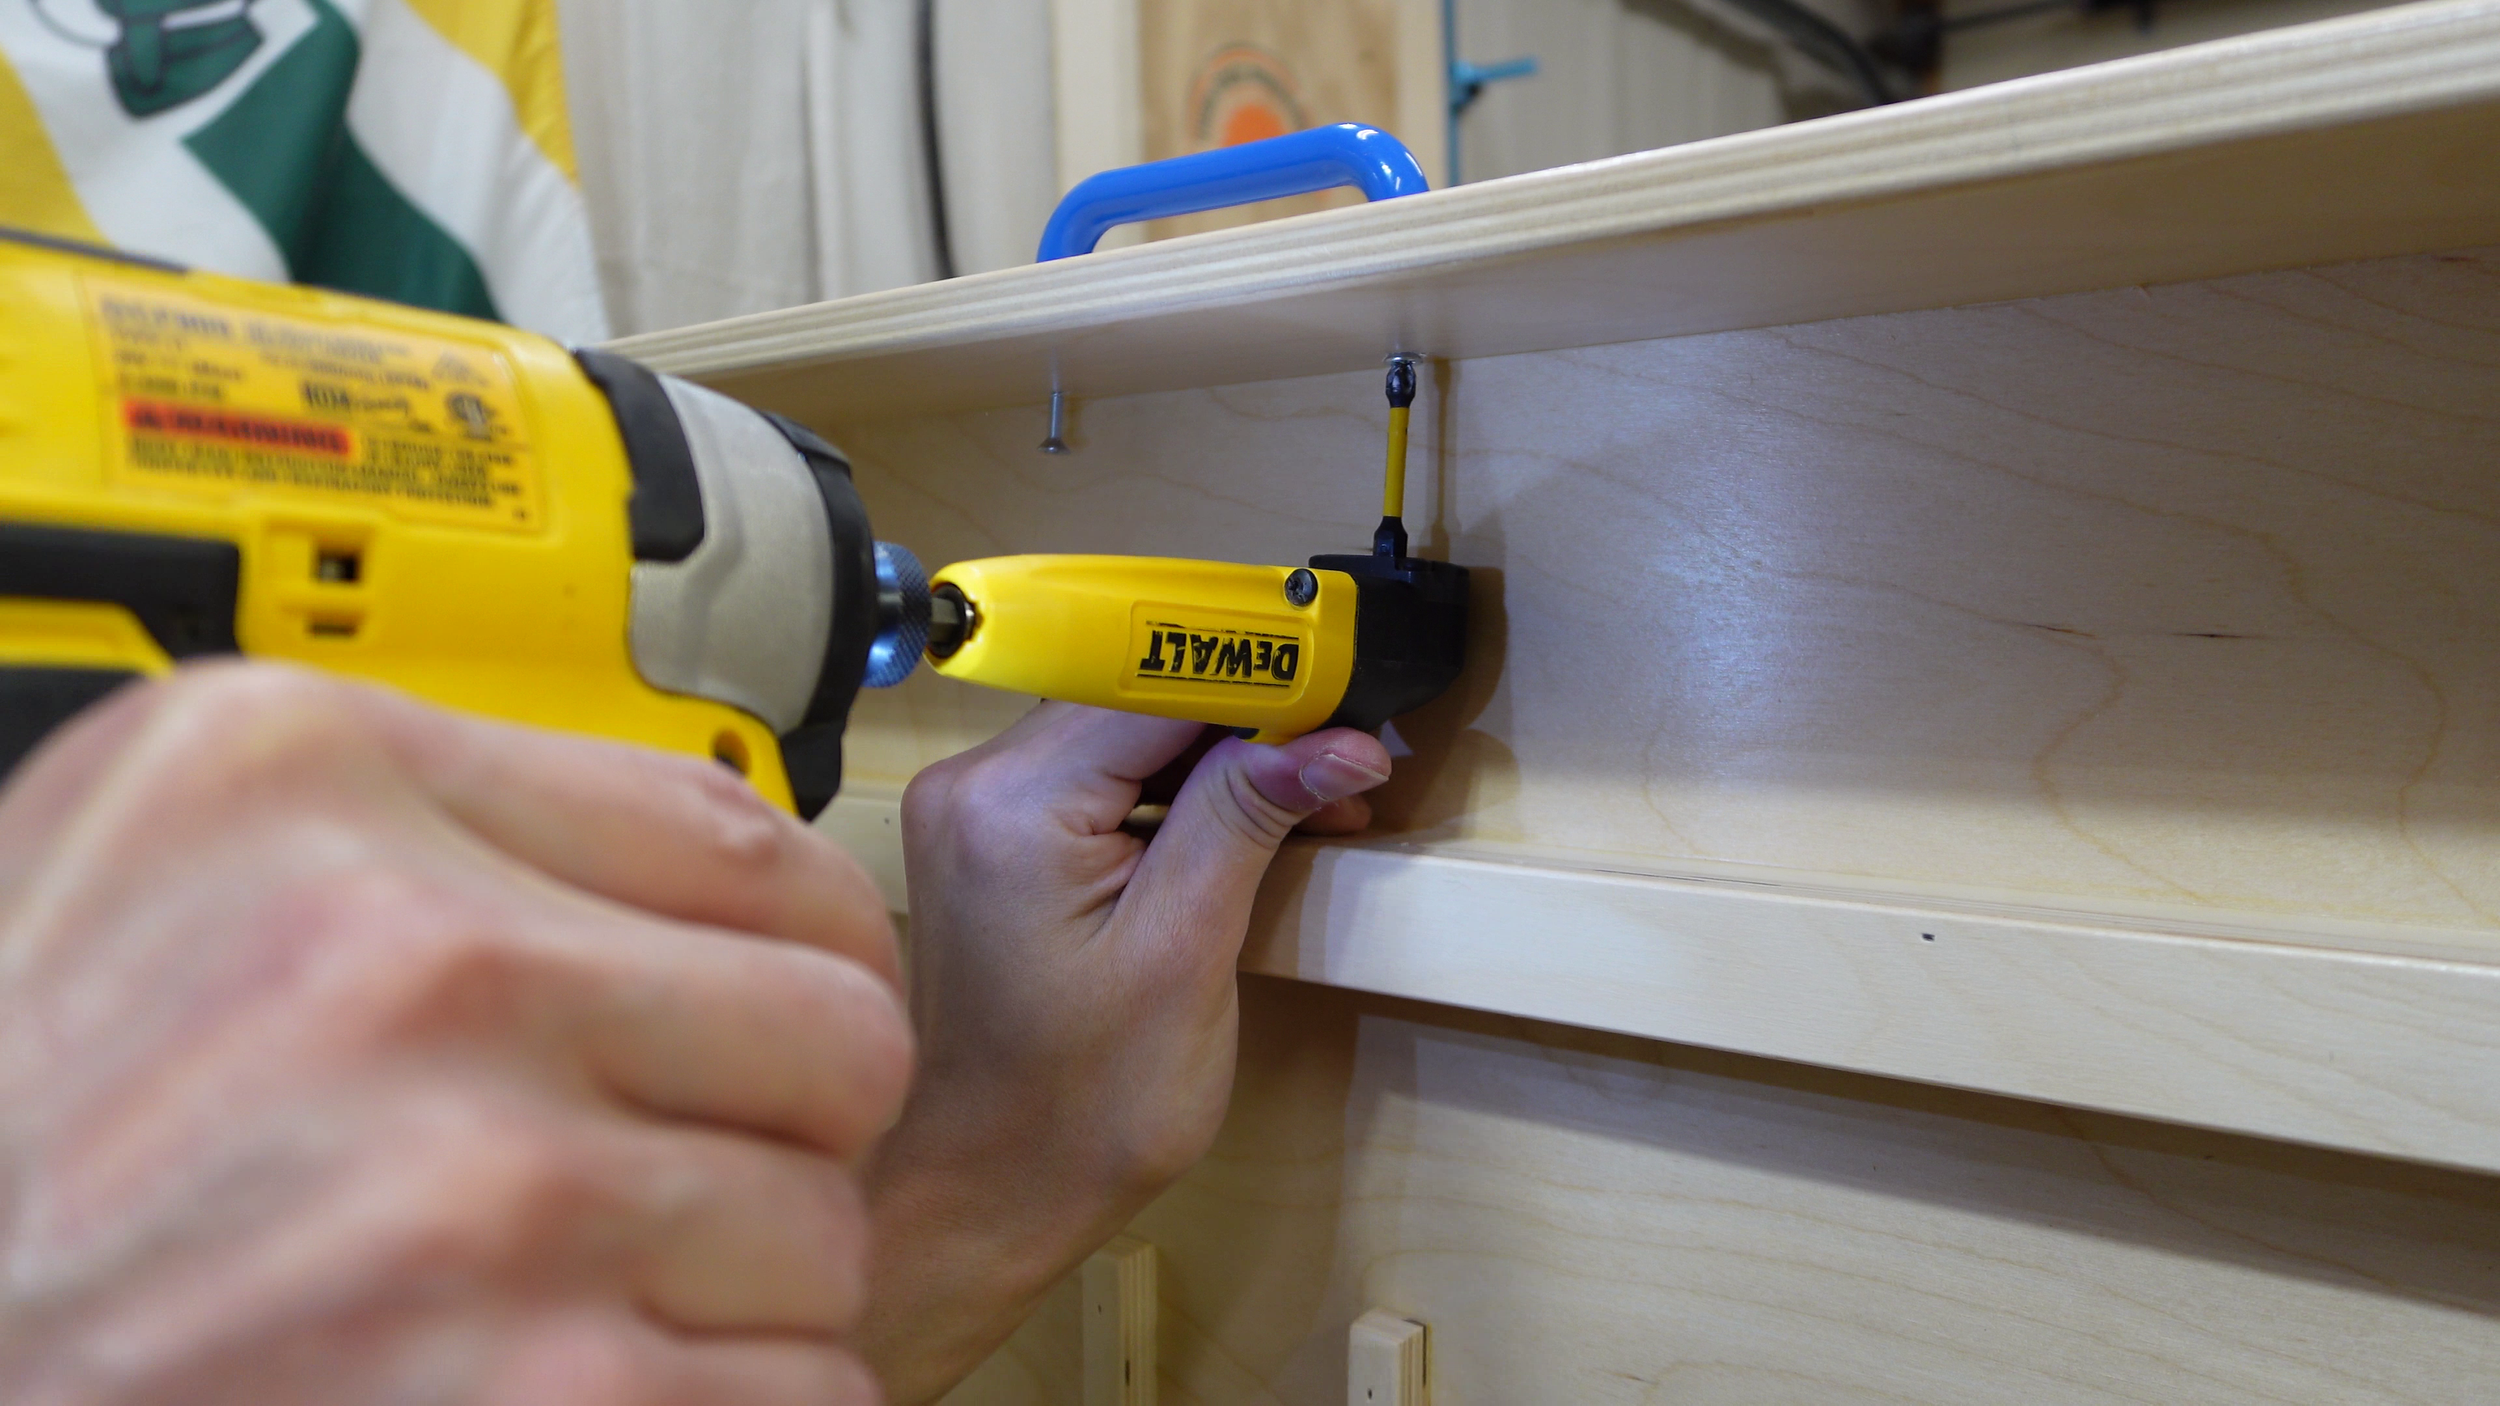
With the legs resting in place on the underside of the top, I marked the screw hole locations. Be sure to face the hinge button releases toward the inside so they’re easy to reach when opening and closing the legs.

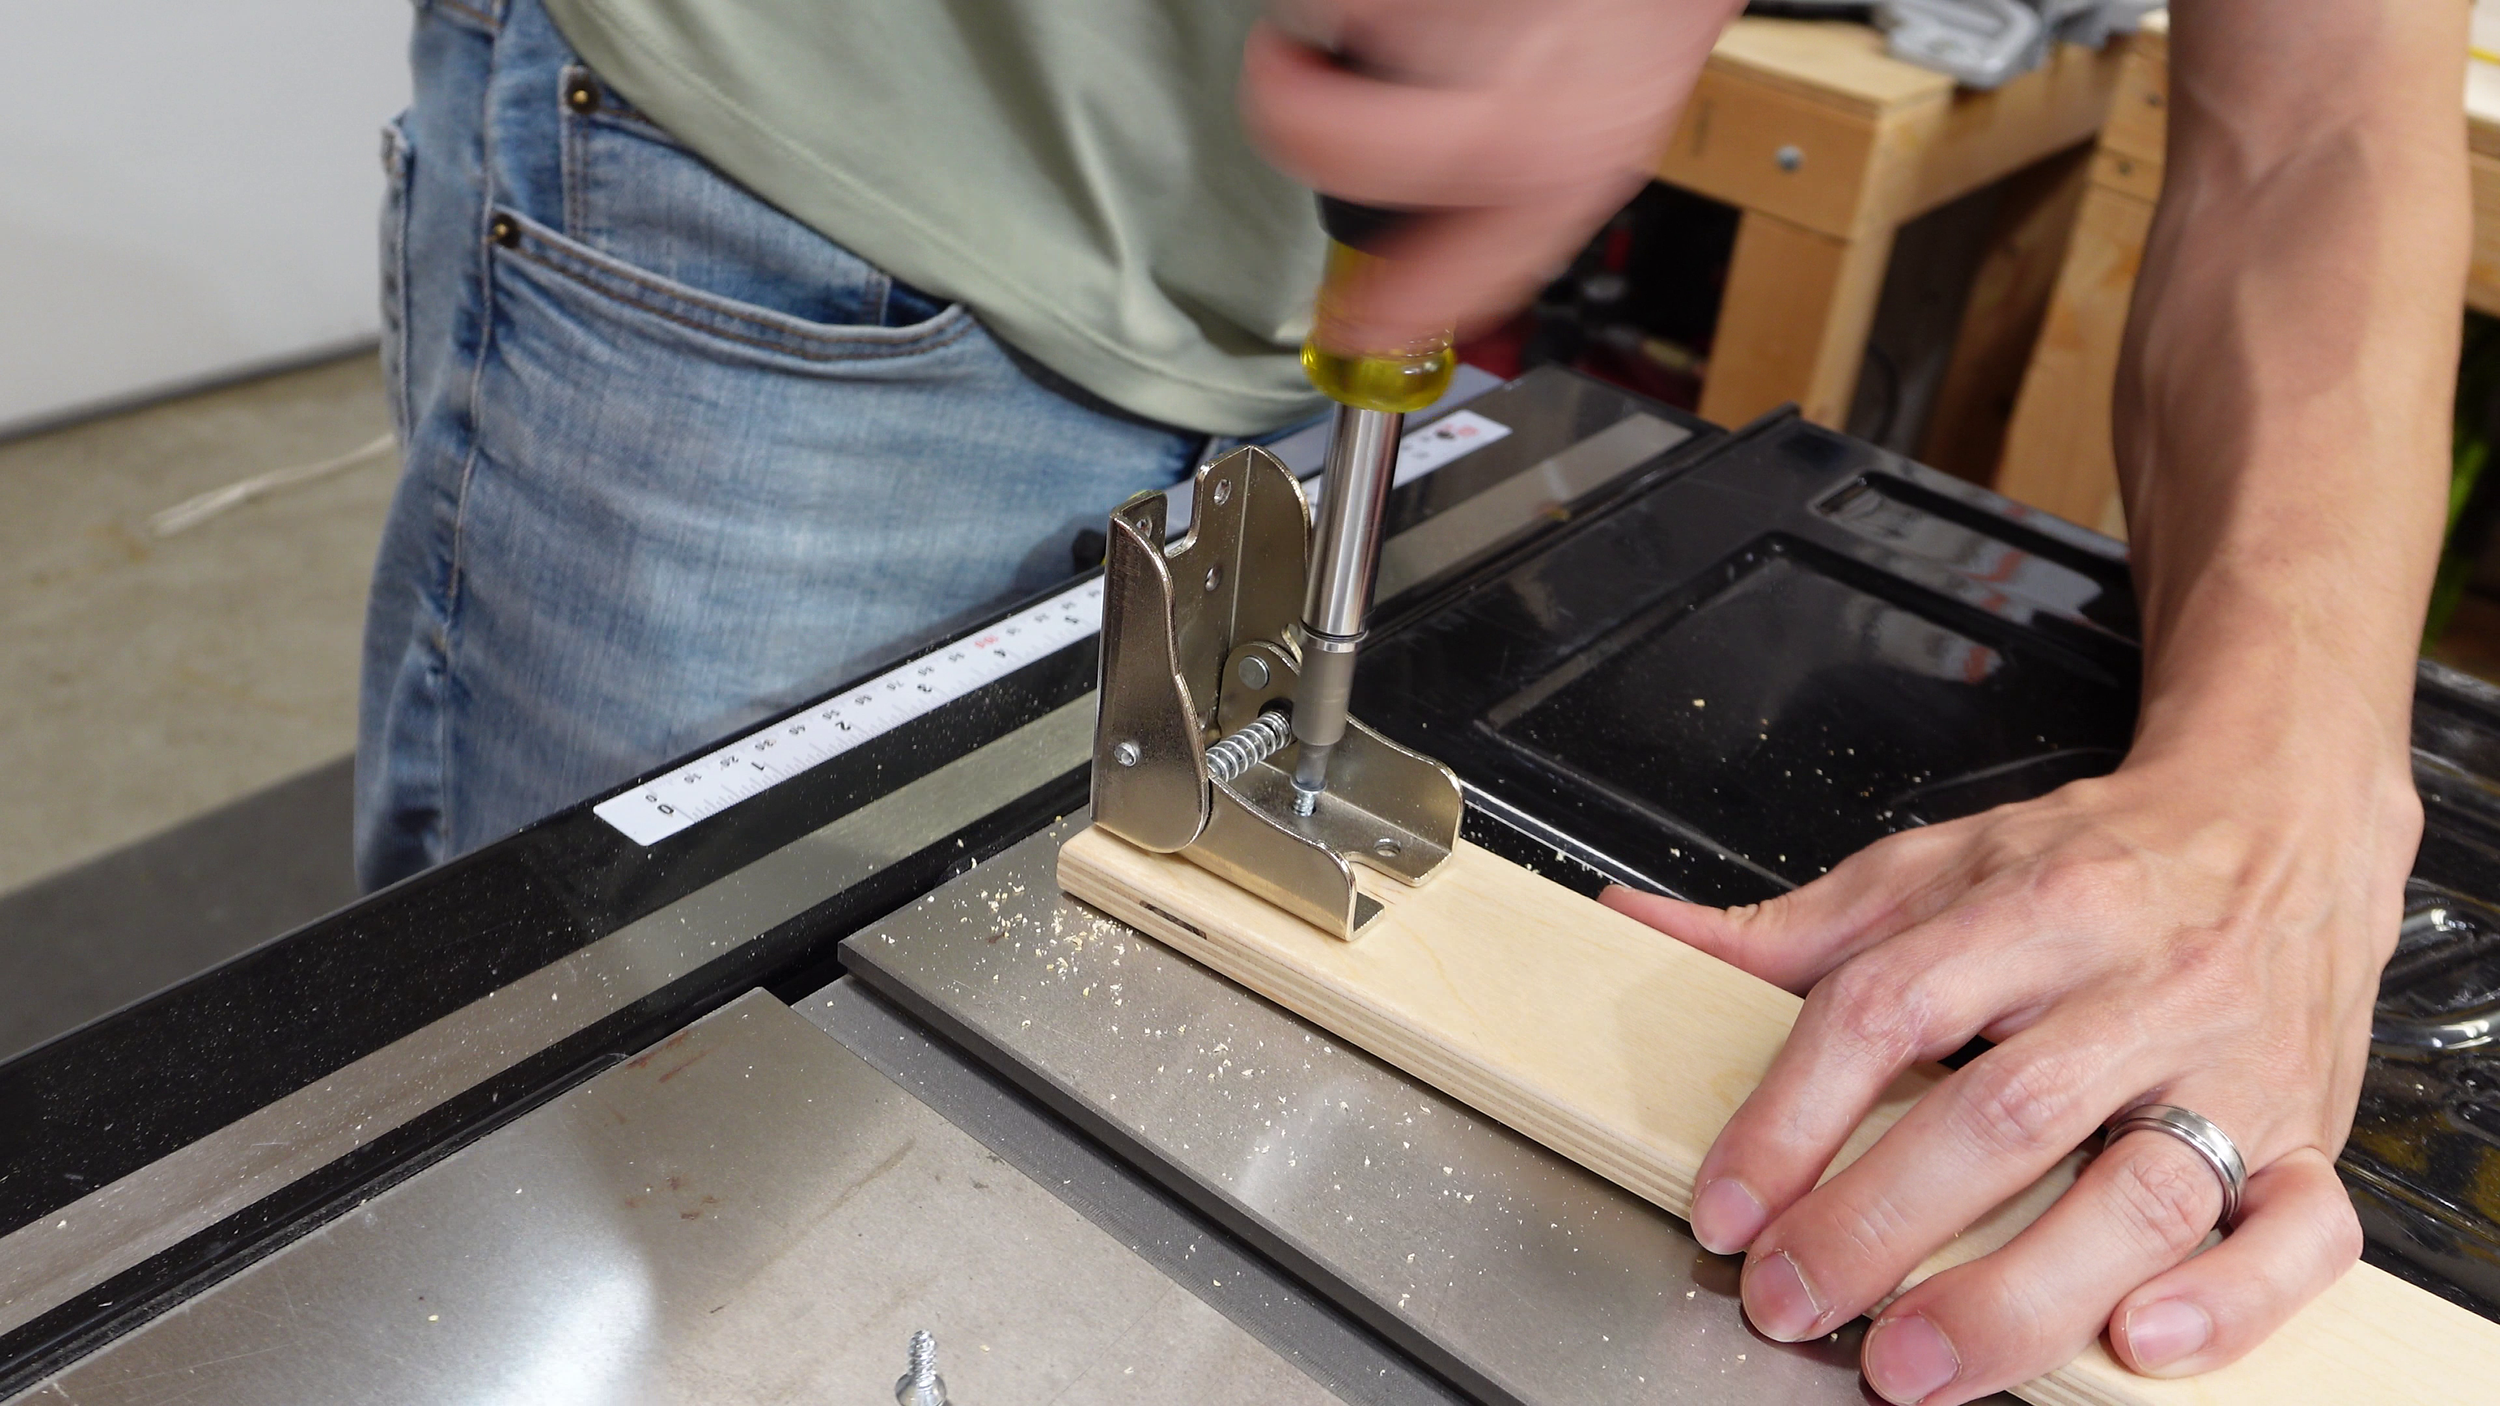
I drilled pilot holes and drove in the screws to mount the hinges. They didn’t come with hardware, which is fine. We need 1/2" screws here to avoid blowing through the other side of the leg.
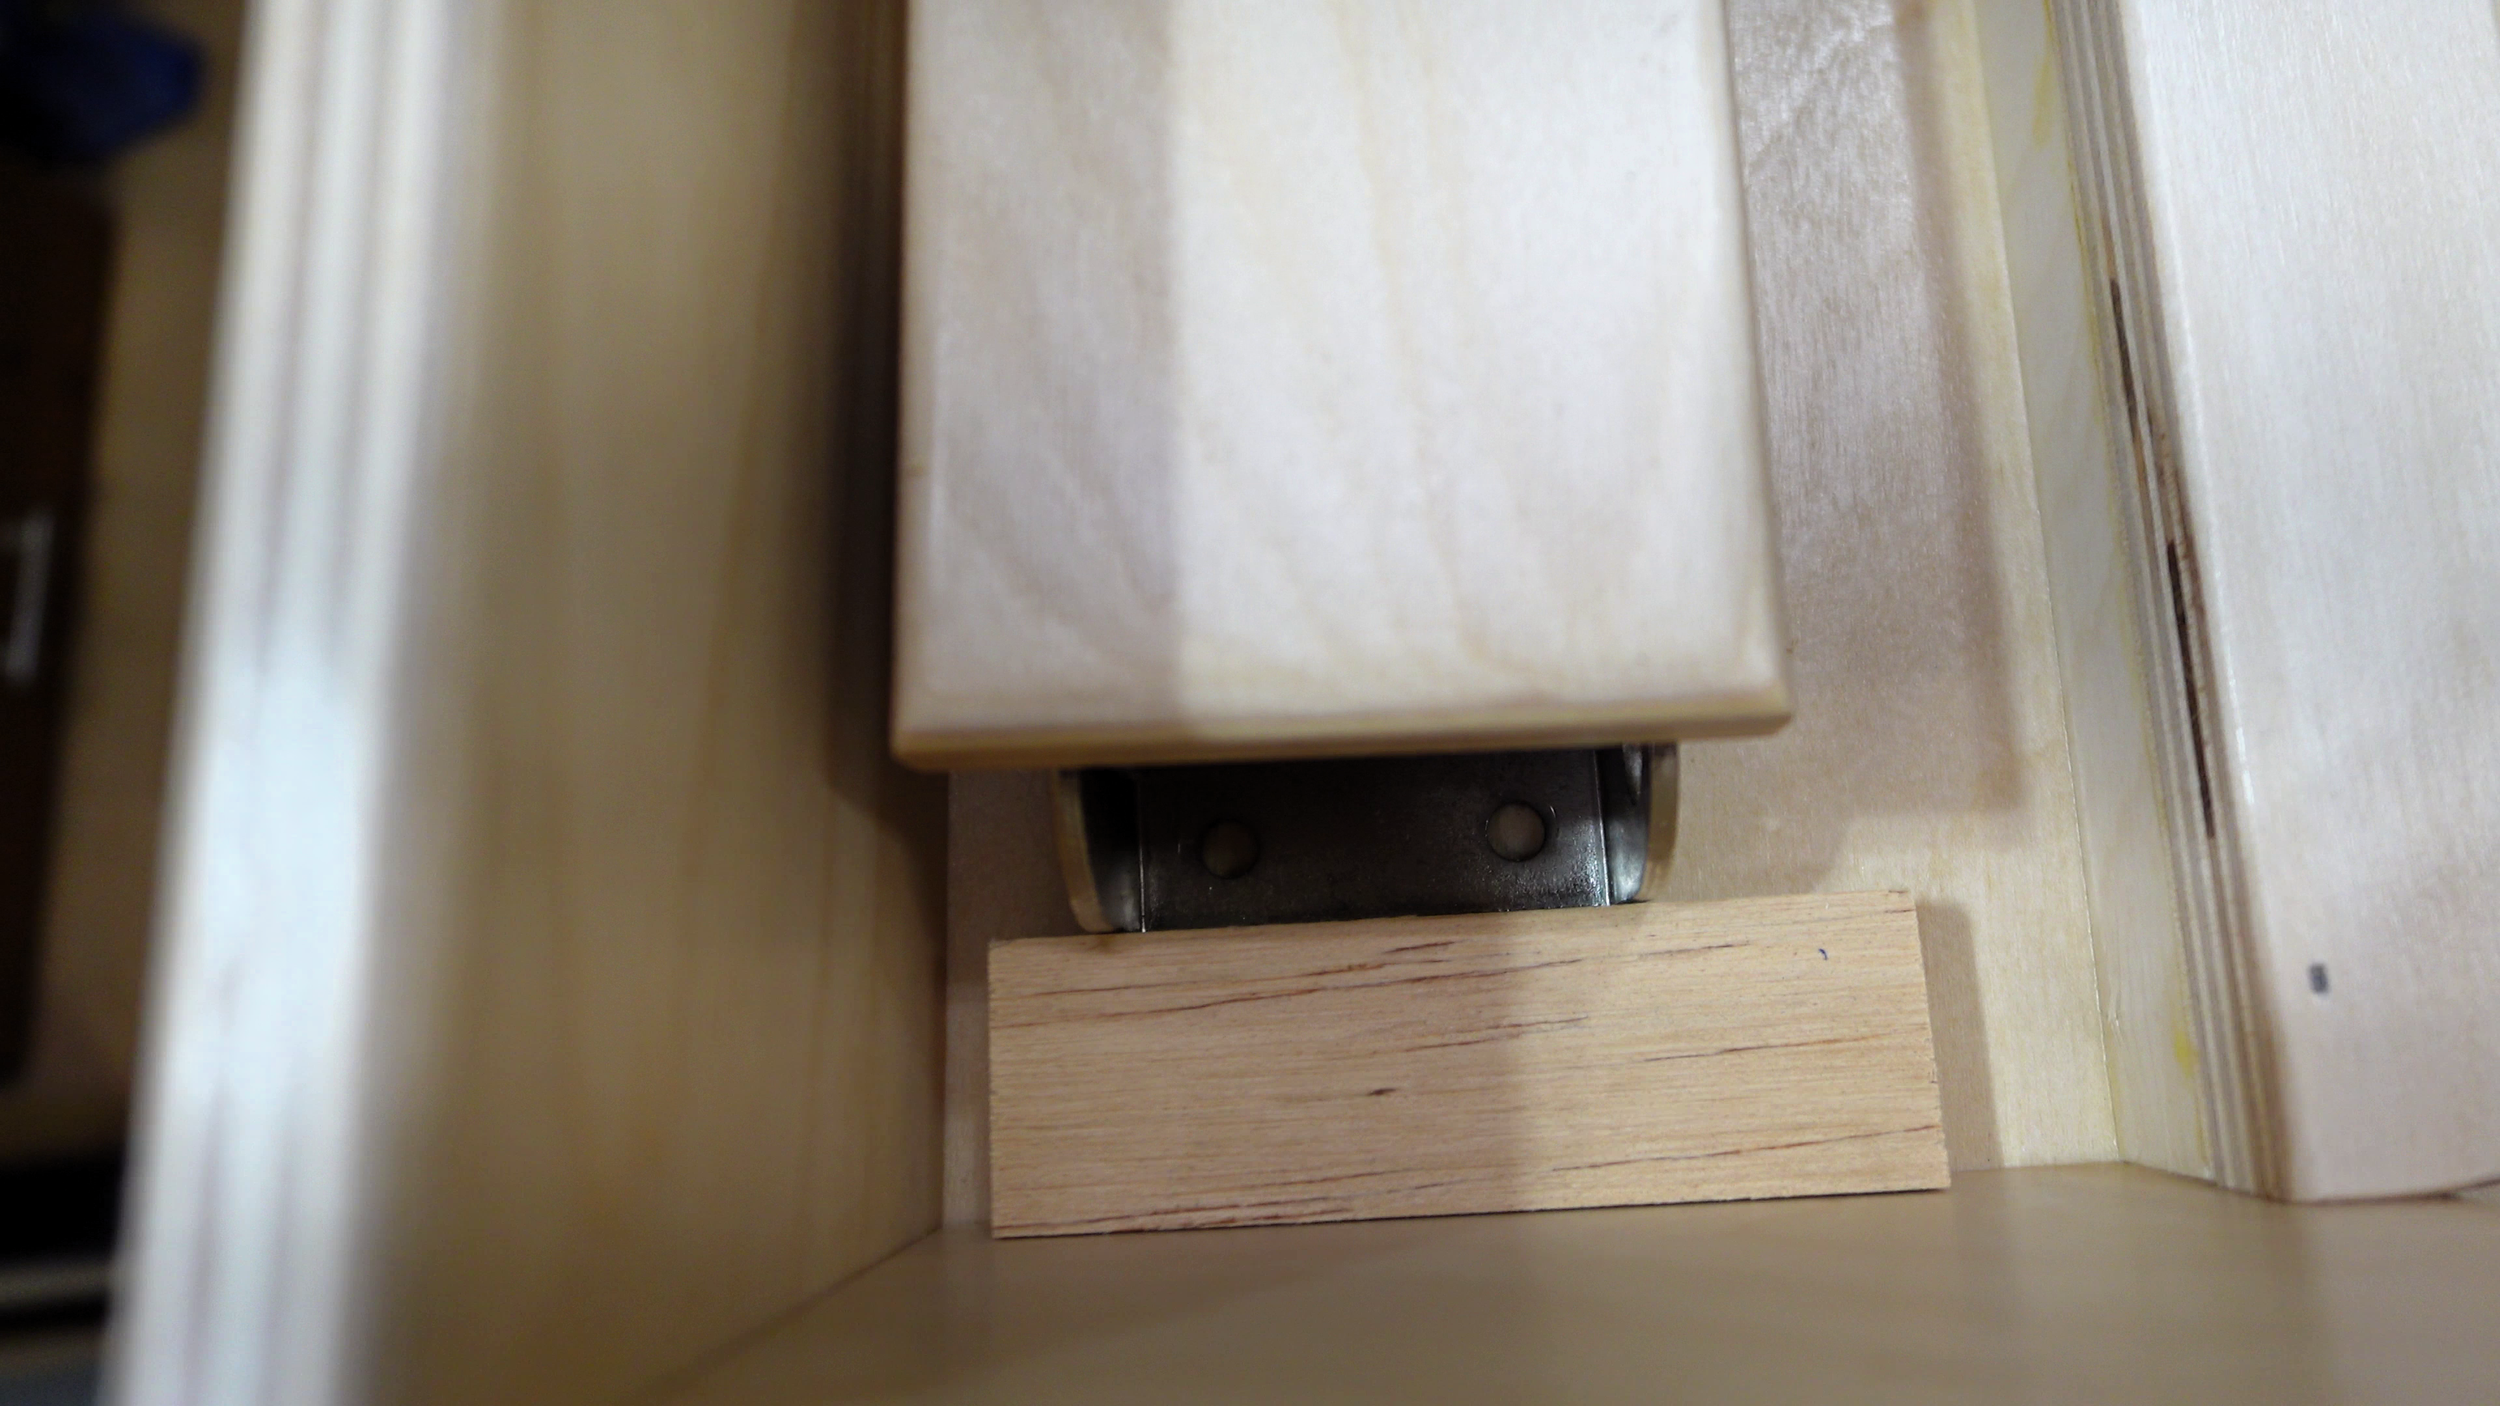

I cut a spacer to keep each leg the same distance from the side walls and to get an even reveal between them when folded. I marked the visible holes, drilled pilot holes, and drove in two screws. Then I opened the legs to access and install the remaining screws.
LEGO Baseplate Attachment

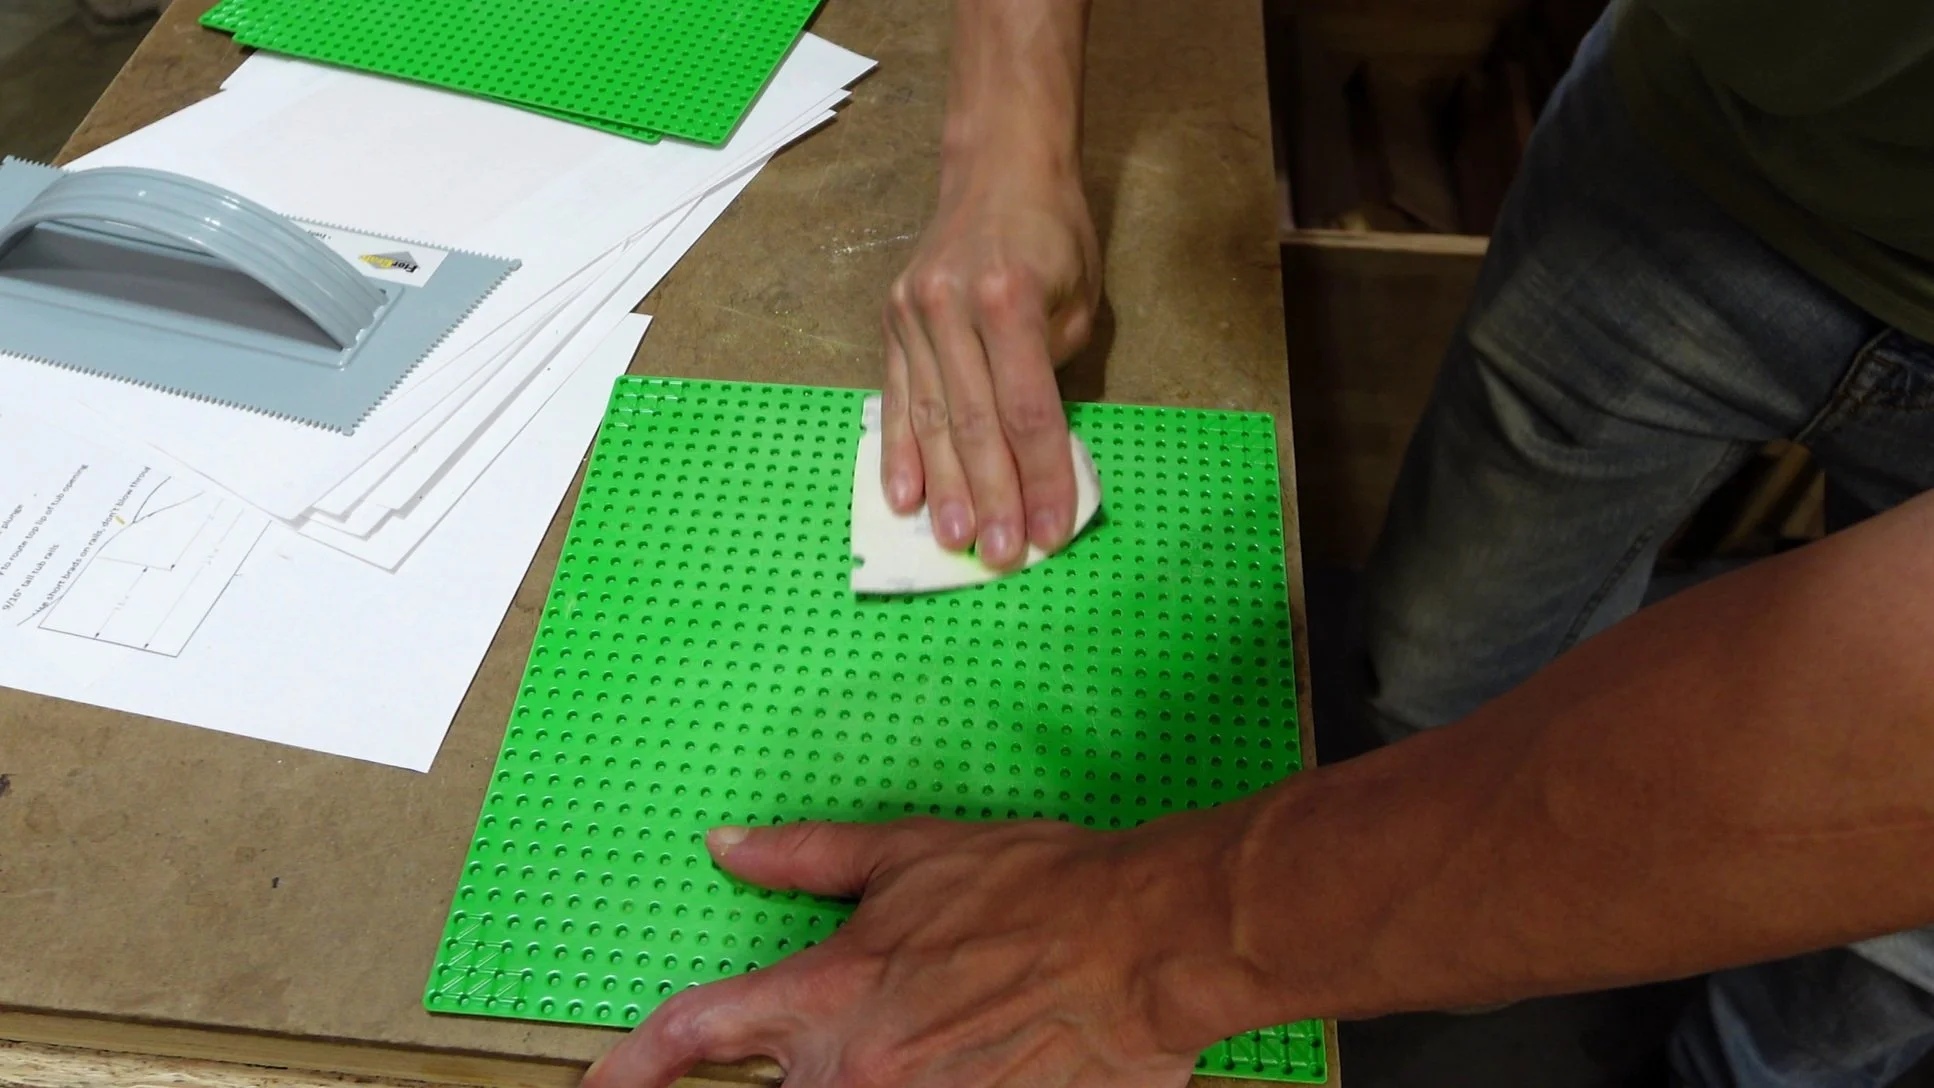
Alright, let’s turn this into a LEGO table. I used low grit sandpaper to scuff up the plywood where the four LEGO base plates will go. After that, I removed the blue tape and gave the surface a good vacuum to clean up the dust.
The backs of the LEGO base plates also get scuffed up. We want to give the adhesive every chance to bond strong and hold over time.

Important: Leave a Gap Between Plates!
This step is critical. The LEGO base plates cannot be butted up edge to edge. You need to leave a small gap, about 1/16 inch, between each plate. Without that gap, bricks will not span across the seams properly.
I laid all four plates in place to line them up, then removed them one at a time for glue and final positioning.


I ran a lot of tests and found that Liquid Nails FuzeIt All Surface Construction Adhesive works great for bonding plastic to wood, as long as both surfaces are thoroughly scuffed.
At first, I used a putty knife, but it pushed the adhesive into the holes on the plate and didn’t leave enough on the surface. A cheap V-notch trowel or adhesive spreader is the way to go for proper coverage.
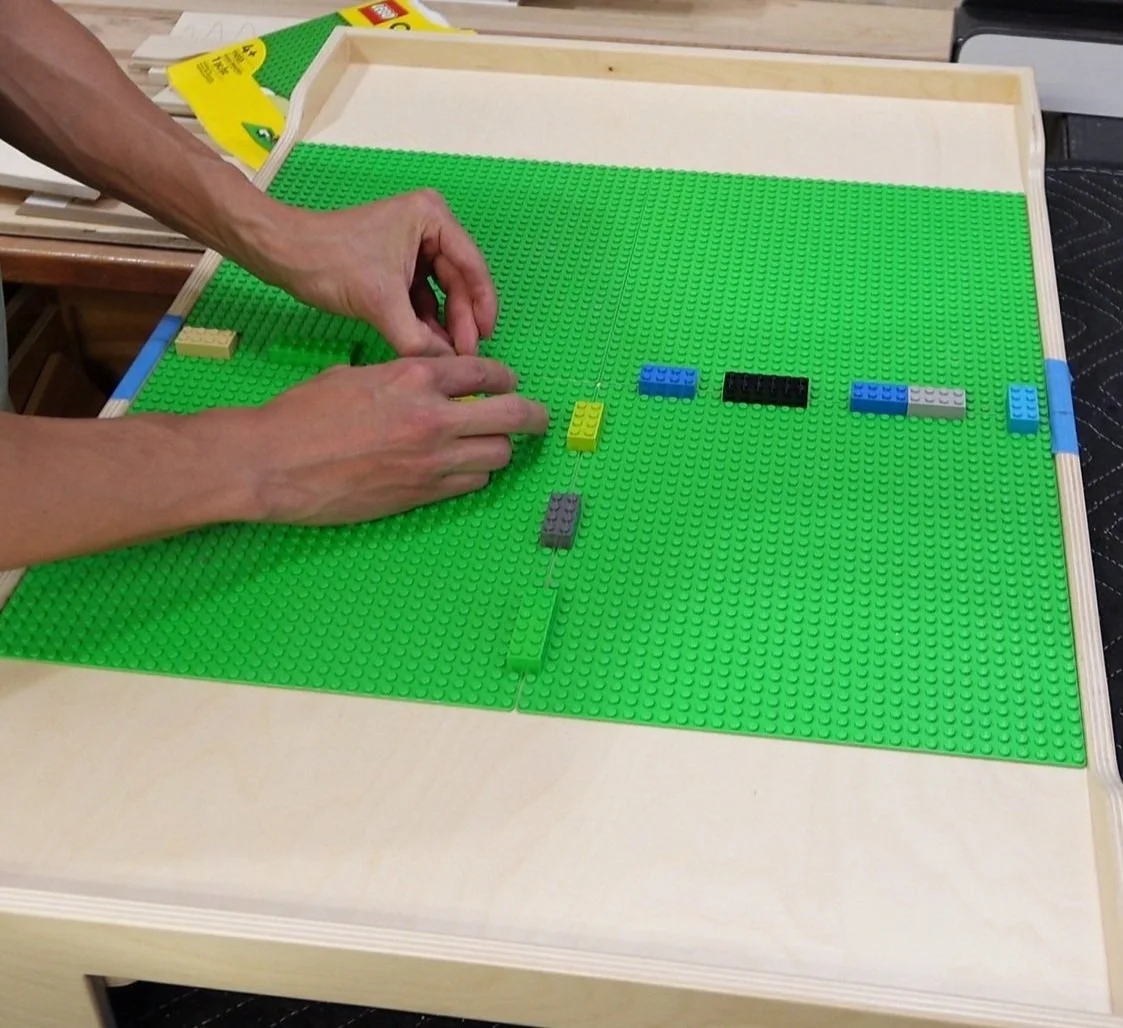
I glued each plate down one at a time. After setting a plate in position, I used LEGO bricks to hold the correct gap between it and the plates next to it. This keeps everything lined up and spaced perfectly while the adhesive sets.

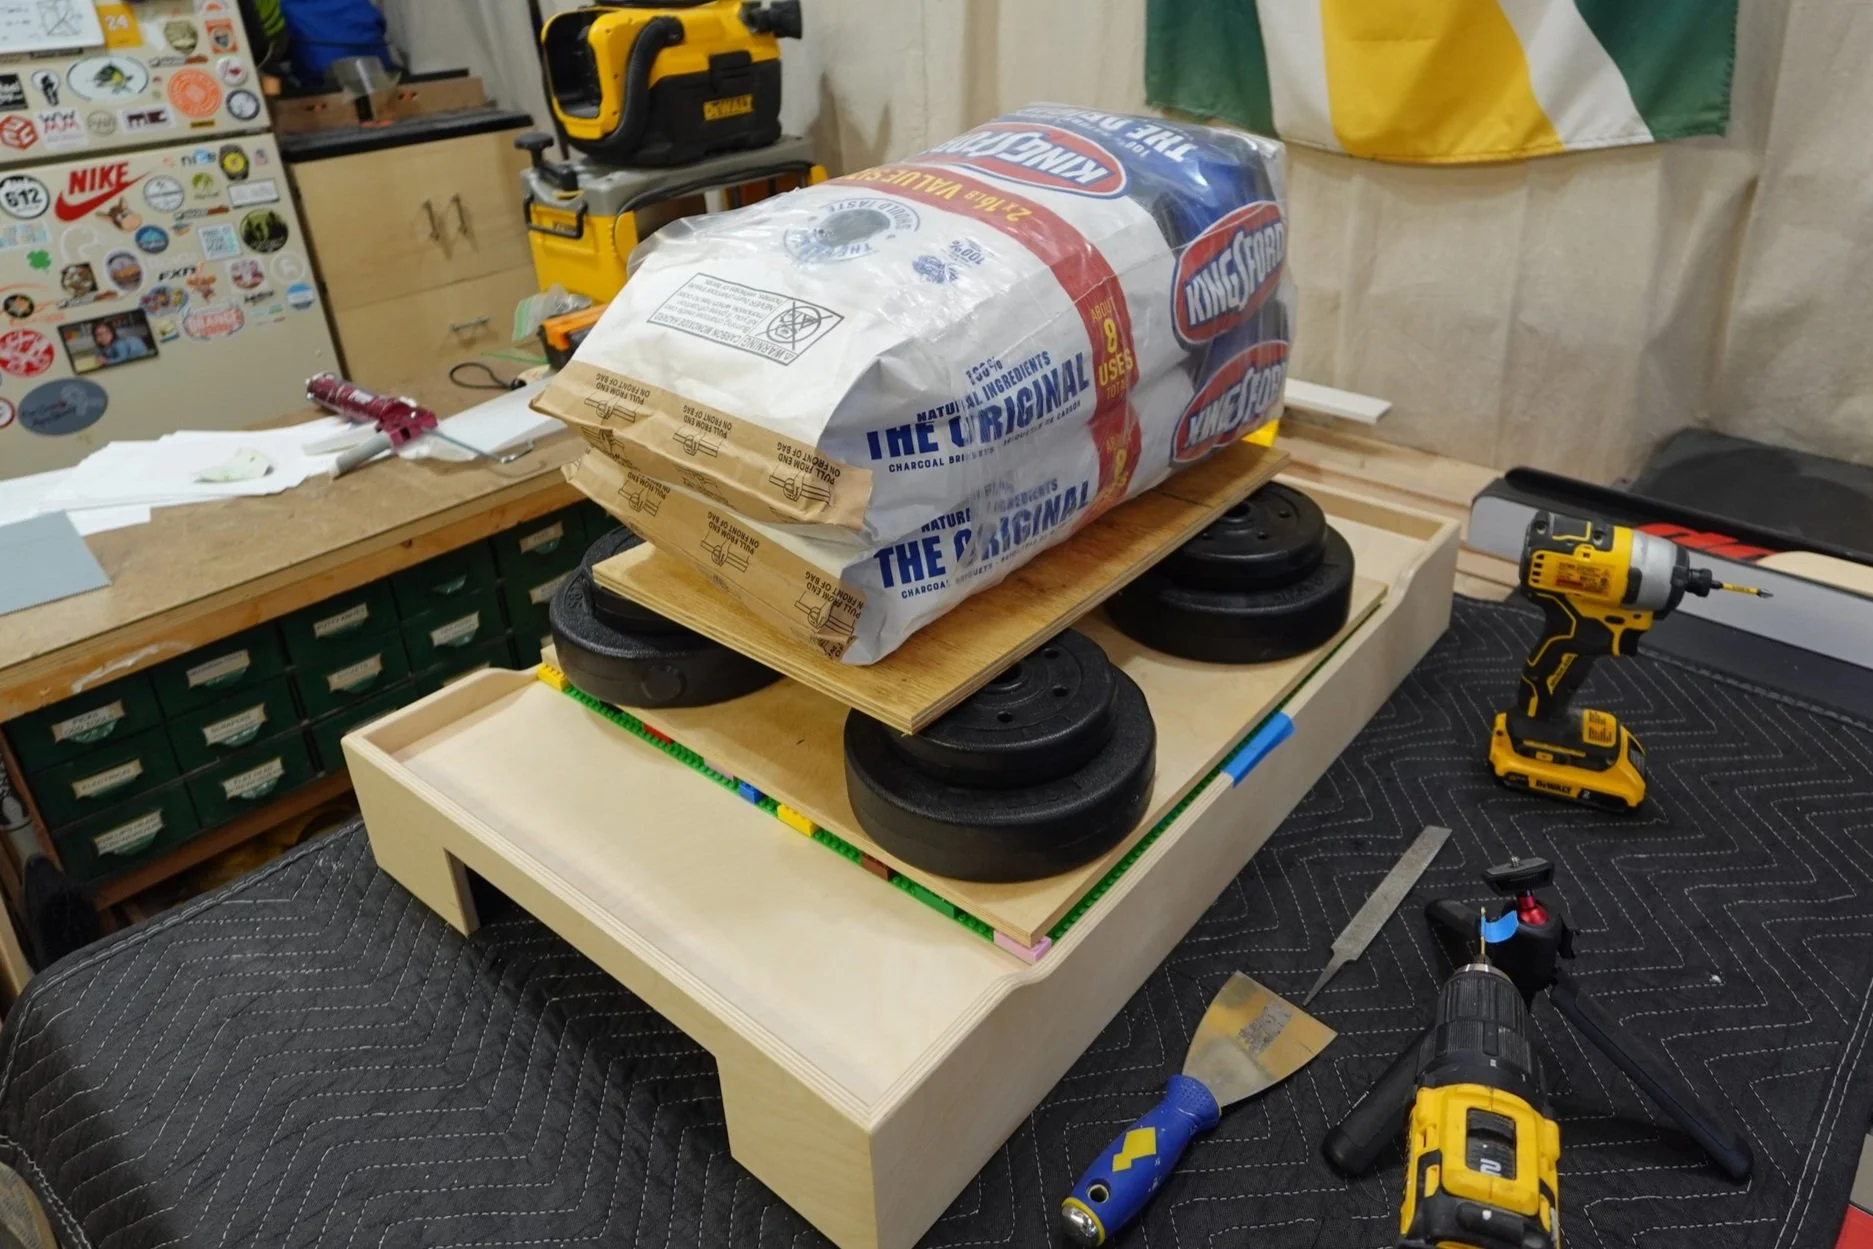
With all four plates glued down, I scattered LEGO bricks across the surface to help apply even pressure. Then I laid a scrap piece of plywood over the top and piled on weights and whatever heavy stuff I had nearby. That all sat overnight to act as clamping pressure while the adhesive cured.
Intalling the Handle

The final step is attaching a handle. I used a plastic 4-inch handle I had in the garage and drove wood screws in from the back side. When measuring for placement, make sure there’s enough clearance to drill from behind without hitting the top panel (part A). A right angle drill attachment comes in handy for those tight spots.

This project was a fun mix of function and creativity. Designing a table that folds up neatly, stores a ton of LEGO bricks, and still looks clean in a room checked all the boxes for me. The sliding tubs, locking legs, and plate spacing took some trial and error, but it all came together in the end. It’s the kind of build that’s useful now and built to last, and I can already tell it’s going to get a ton of use. Simple ideas often take the most thought, but that’s what makes them so rewarding to bring to life.
Thanks for reading and feel free to email me or message me on Instagram if you have any questions while building one of your own!
This instant download PDF includes 18 pages of detailed instructions and diagrams to help you build a folding LEGO table with storage tubs. It features a 20" x 20" LEGO play surface made from four standard base plates, slide-out storage for bricks, and foldable legs that make it easy to tuck away when not in use. Whether you're short on space or just want a convenient way to keep playtime organized, this project makes a fun and practical addition to any playroom.
Important!A step-by-step YouTube video and full build article are available for this project.
Features:
20" x 20" LEGO-compatible surface using standard base plates.
Two built-in slide-out tubs to store bricks and minifigs.
Fold-flat design for easy storage when not in use.
Compact, lightweight, and sturdy enough for everyday play.
Plan Set Contents:
Lumber List – Everything needed in one trip to the store.
Hardware & Consumables List – Includes hinges, handle, tubs, and glue.
Tool & Supply List – What was used during the build.
Parts List – Includes ID, quantity, final dimensions, and placement.
Board Layout Diagrams – Helps you cut efficiently and maximize material.
Step-by-Step Diagrams – Clear visuals with labels and build notes.
1:1 Printable Templates – Full-size templates for curved parts.
Please contact me if you have any questions before or after purchase!
Note: This purchase is for a digital PDF which will be available as a download. Plans are not mailed.
Tools and Items Used in This Project
Project specific items


Helpful tools and accessories


Consumables


