
Simple DIY Christmas Trees

I wanted a sturdy, classic-looking holiday decoration that could serve multiple purposes: a fun activity for the kids, a high-quality item to sell at a local craft fair, or a thoughtful, handmade gift. So, I designed this minimalist 12" Christmas tree.

These are high-yield projects that can be done in a weekend. You can get 12 trees from a single 2'x4' sheet of 3/4" plywood or 8 trees from one 3/4" x 8" x 8' pine board.

This instant download PDF includes detailed instructions and diagrams to help you build a 12" wooden Christmas tree. The two-piece design is perfect for batch-building and creates a great canvas for acrylic paint decoration by kids. These trees are an ideal project for making handmade gifts or items for a craft fair.
Important! A YouTube video and full build article are available for this project.
Features:
Two Build Options: Plans include material layouts for both the plywood and 8' pine board versions.
Efficient Batching: Maximize material yield to quickly produce multiple trees from one sheet or board.
Two-Piece Construction: Simple construction (tree and base) for a quick, repeatable build.
Ready-to-Decorate: Provides a clean base that takes paint or stain well, ready for customization.
Ornament Ready: Includes pilot hole placement for adding eye hooks and miniature ornaments.
Plan Set Contents:
Lumber List – Everything needed in one trip to the store.
Hardware & Consumables List – Includes finishing materials and eye hooks.
Tool & Supply List – What was used during the build.
Parts List – Includes ID, quantity, final dimensions, and placement.
Board Layout Diagrams – Helps you cut efficiently and maximize material (including layouts for both Plywood and Pine).
Step-by-Step Diagrams – Clear visuals with labels and assembly notes.
Please contact me if you have any questions before or after purchase!
Note: This purchase is for a digital PDF which will be available as a download. Plans are not mailed.
A downloadable PDF plan set is available, which covers both the plywood and the 8' pine board options. The plans include detailed design, layout, material list, cut list, and helpful tools I used.
I also created a step-by-step summary video on YouTube to follow along.
Let’s get to the build!


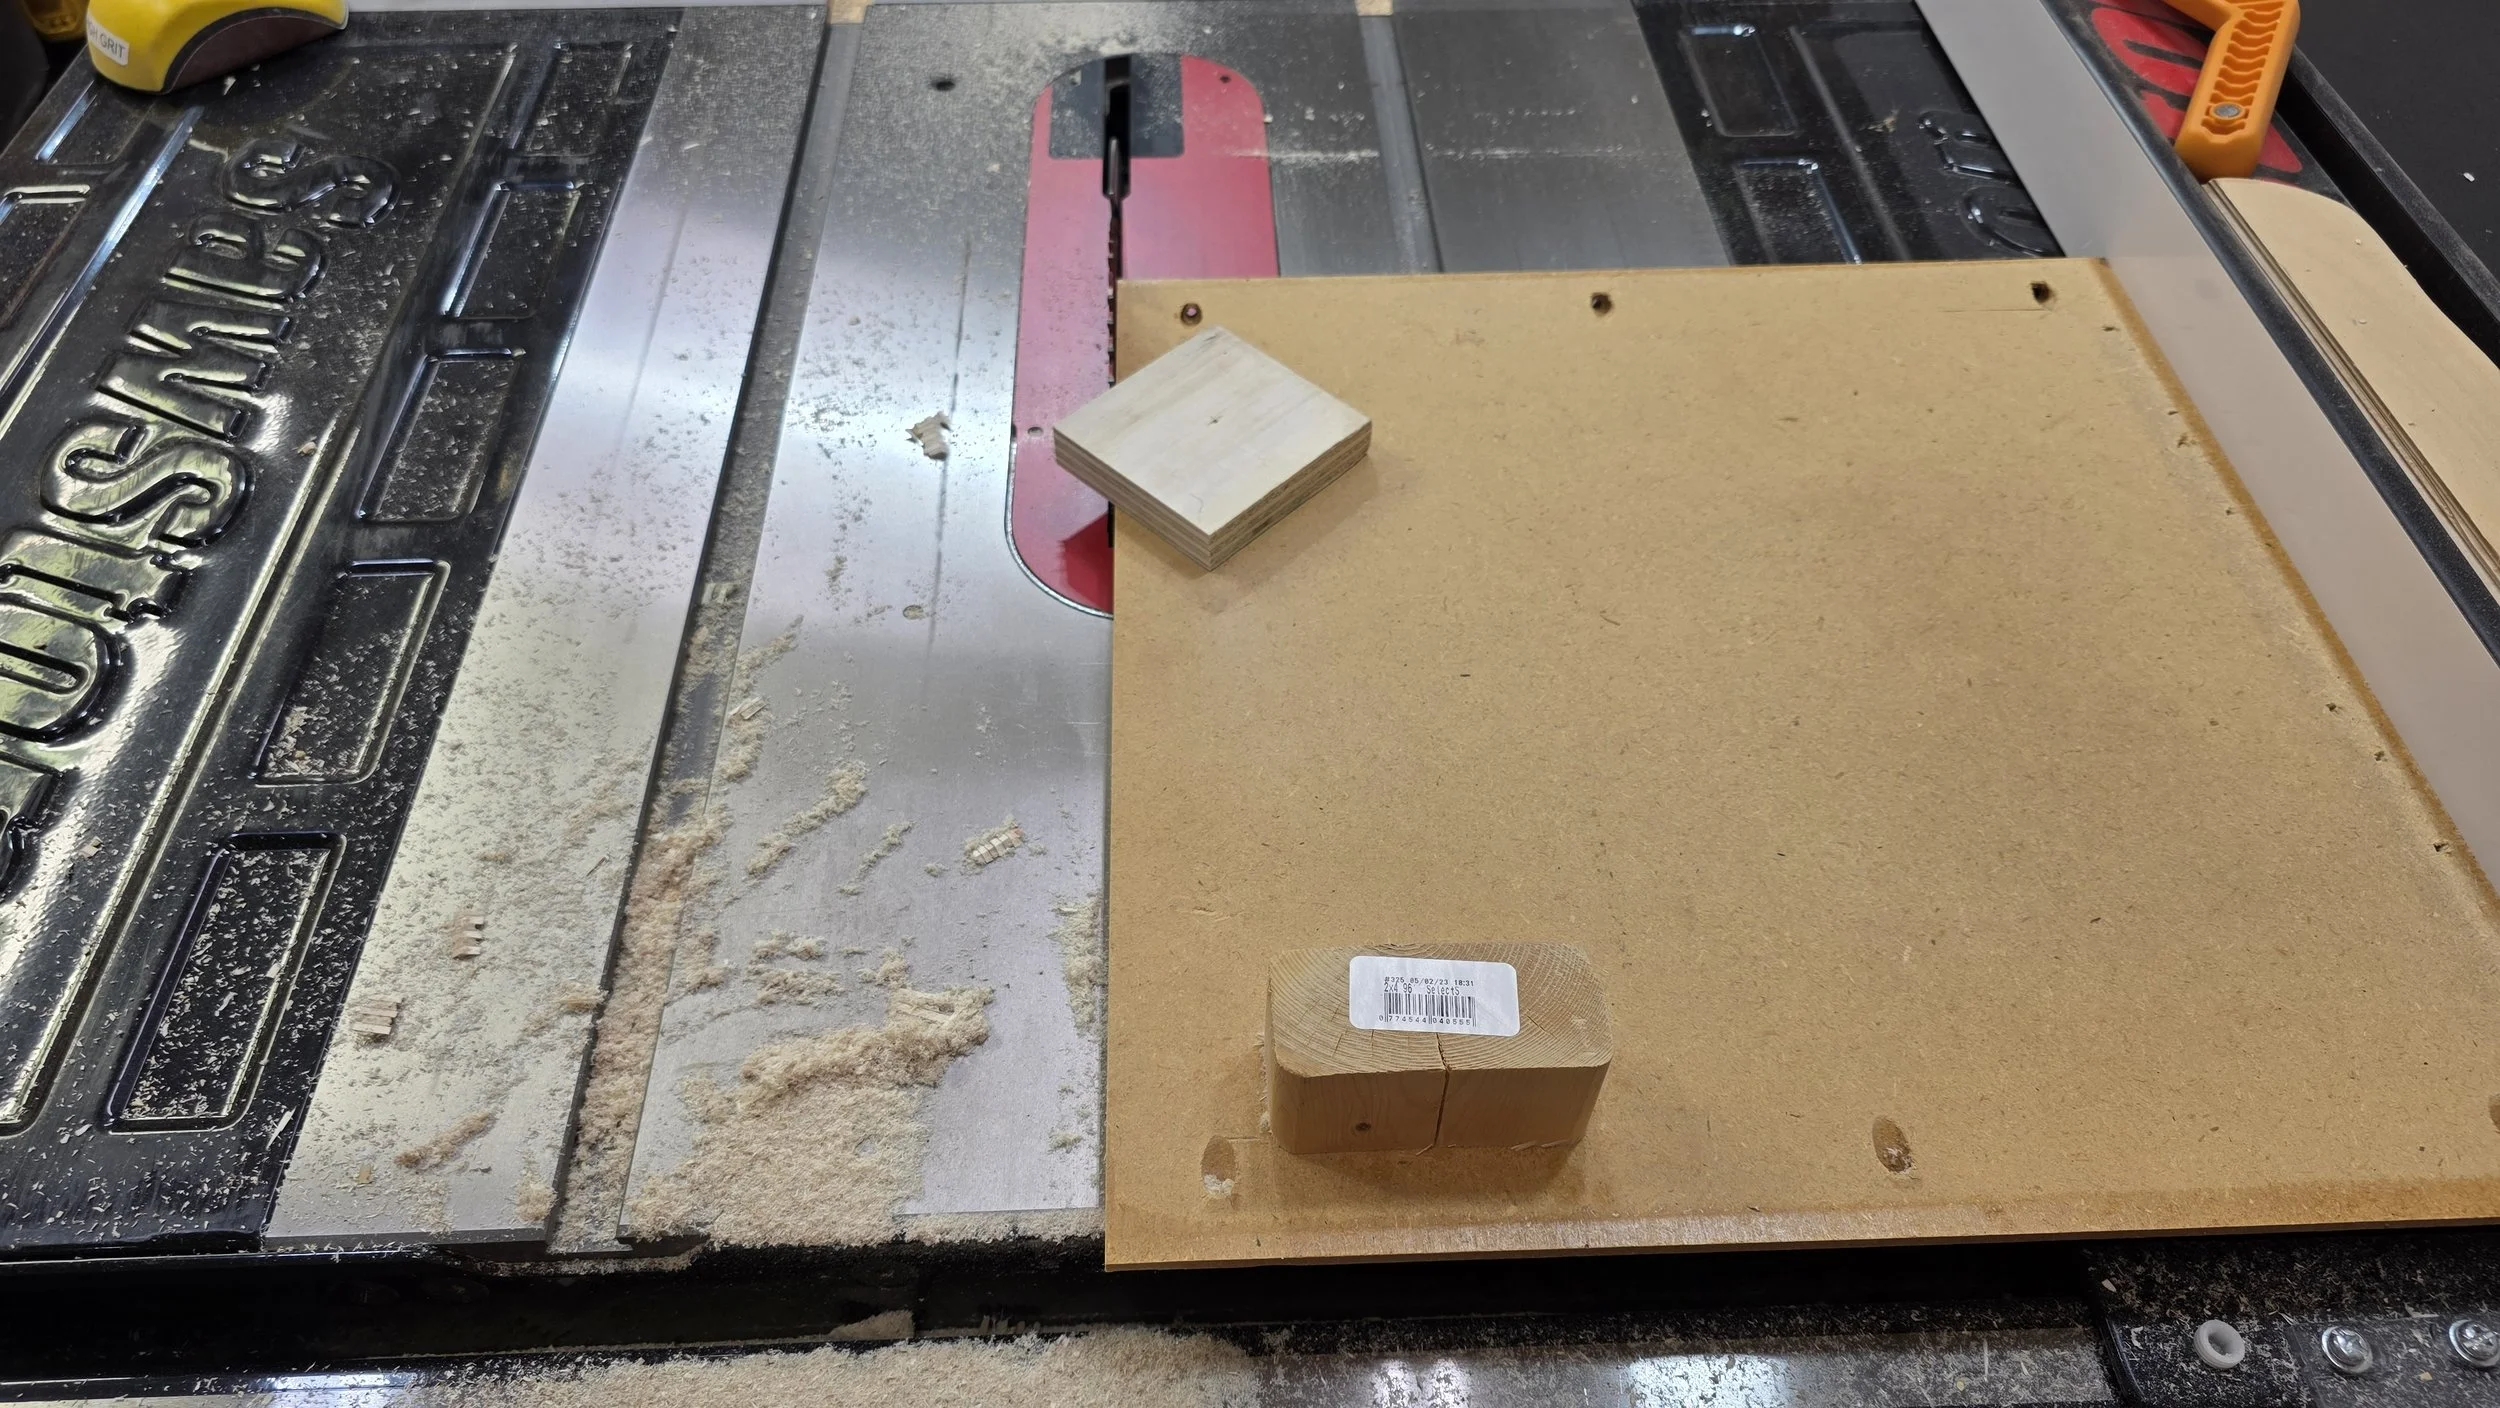
Whether you’re using plywood or pine, the goal is to follow the cut list and reduce your large sheet goods or board into manageable pieces. I used the table saw for the plywood, miter saw for the pine board.
Once broken down, layout lines are drawn on each piece following the dimensions provided in the plans. A center punch is then used to indent the center hole locations for the bases. This small step helps prevent wandering when drilling with a hole saw.

The plugs removed by the hole saw become the base for the tree. Since 3/4" pine is easy to drill, we cut these circles now. I used a hole saw I bought on Amazon. While you can drill these by hand, I used my small drill press for accuracy and stability.
Two circles are removed from the board, but only one base is needed per tree. Keep the best looking one. Drill slow to avoid burning the wood. We will cover the plywood version bases later.
No hole saw? A jigsaw and a steady hand can remove these circles as well.

Cutting the main tree profile is next. For the plywood version, we have left the semicircles intact to optimize the use of the sheet material. The simplest way to handle these repetitive angled cuts is on a crosscut sled. I lined the saw kerf up with the pencil lines and cut, ensuring the rear of the board was supported along the fence.

For the pine boards, I made a simple table saw sled jig using some scrap wood as braces. This method is very quick and repeatable. I made the first angle cut, flipped the board over horizontally, made the second angle cut, and then repeated the process. Keep those cutoffs, they’ll come in handy later!
A jigsaw, bandsaw, track saw, or circular saw would also work here in place of a table saw.

The circular cutouts in the plywood trees are done next. We saved this step until after the main tree profile was cut because hole saws produce much cleaner results on 3/4" plywood when they do not have to cut a full 360 degrees. Cutting through about two-thirds of a circle is easier and places less stress on the material than drilling the entire circle.
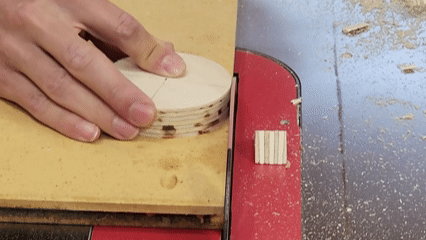
Now we create the circular bases for the plywood trees. Using the strip that was removed from the main sheet during the breakdown process, squares were cut slightly larger than the final diameter of the base.
The easiest way to turn these squares into smooth circles is with a simple jig on the table saw. A nail is driven into the jig, set at the appropriate distance from the blade. You place the square blank onto the nail pivot point, slide the jig forward along the fence, and slowly rotate the square. The spinning blade gradually removes the excess material until the piece is a perfect circle.
This circular cutting process can also be used as an alternative method if you do not own a hole saw.


At this stage, we have all the pieces cut and could call it finished, but the edges could use some softening. A quick sanding to round the edges over works, but since we are batching these out, I chose to use a small chamfer bit in the router table. I raised the bit just under 1/4" to achieve a subtle, defined edge.
I ran the bit on both sides of the main tree shape, as well as the top and bottom edges of the base pieces. This small step makes the trees look more refined before finishing.


With the pieces shaped, the next step is to drill pilot holes for assembly and future decoration.
First, a pilot hole is drilled into the bottom of the tree for attaching the base. I made a quick jig to ensure I was drilling straight and to eliminate any measurement work across the batch.
Next, two small pilot holes are drilled into the tree where the ornament hooks will be placed. These small holes make it easier to twist the hooks into the wood later.


Before any finishing material goes on, every piece received a thorough sanding. After sanding, I gave everything a quick vacuum and a wipe down with a tack cloth to ensure the surface was clean and dust-free.
Painted Finish
For the painted trees, I used some of the cutoffs from the earlier stages and turned them into simple paint stands. I sprayed two coats of primer, followed by two coats of green paint. Using spray cans was much quicker for batching, but I did test one tree with regular acrylic paint and the finish looked just as nice if you prefer brushing.
Stained Finish
For the stained versions and for the bases, I applied a pre-stain conditioner first. I followed that with two coats of an oil-based stain. I liked Minwax Early American best.
I also added two coats of a wipe-on poly to all of the bases. This gives them protection and a nice shine.

The final steps are all about bringing your tree to life. Once the paint or stain is dry, use acrylic paints to decorate the trees.
After decorating, screw the base onto the tree using an 1 1/2" screw. Lastly, screw in the small eye hooks where you drilled the pilot holes earlier, and hang your ornaments.
This instant download PDF includes detailed instructions and diagrams to help you build a 12" wooden Christmas tree. The two-piece design is perfect for batch-building and creates a great canvas for acrylic paint decoration by kids. These trees are an ideal project for making handmade gifts or items for a craft fair.
Important! A YouTube video and full build article are available for this project.
Features:
Two Build Options: Plans include material layouts for both the plywood and 8' pine board versions.
Efficient Batching: Maximize material yield to quickly produce multiple trees from one sheet or board.
Two-Piece Construction: Simple construction (tree and base) for a quick, repeatable build.
Ready-to-Decorate: Provides a clean base that takes paint or stain well, ready for customization.
Ornament Ready: Includes pilot hole placement for adding eye hooks and miniature ornaments.
Plan Set Contents:
Lumber List – Everything needed in one trip to the store.
Hardware & Consumables List – Includes finishing materials and eye hooks.
Tool & Supply List – What was used during the build.
Parts List – Includes ID, quantity, final dimensions, and placement.
Board Layout Diagrams – Helps you cut efficiently and maximize material (including layouts for both Plywood and Pine).
Step-by-Step Diagrams – Clear visuals with labels and assembly notes.
Please contact me if you have any questions before or after purchase!
Note: This purchase is for a digital PDF which will be available as a download. Plans are not mailed.
Tools and item used in this project
Project specific items


Helpful tools and accessories


Consumables


