Golf Rack Housewarming Gift
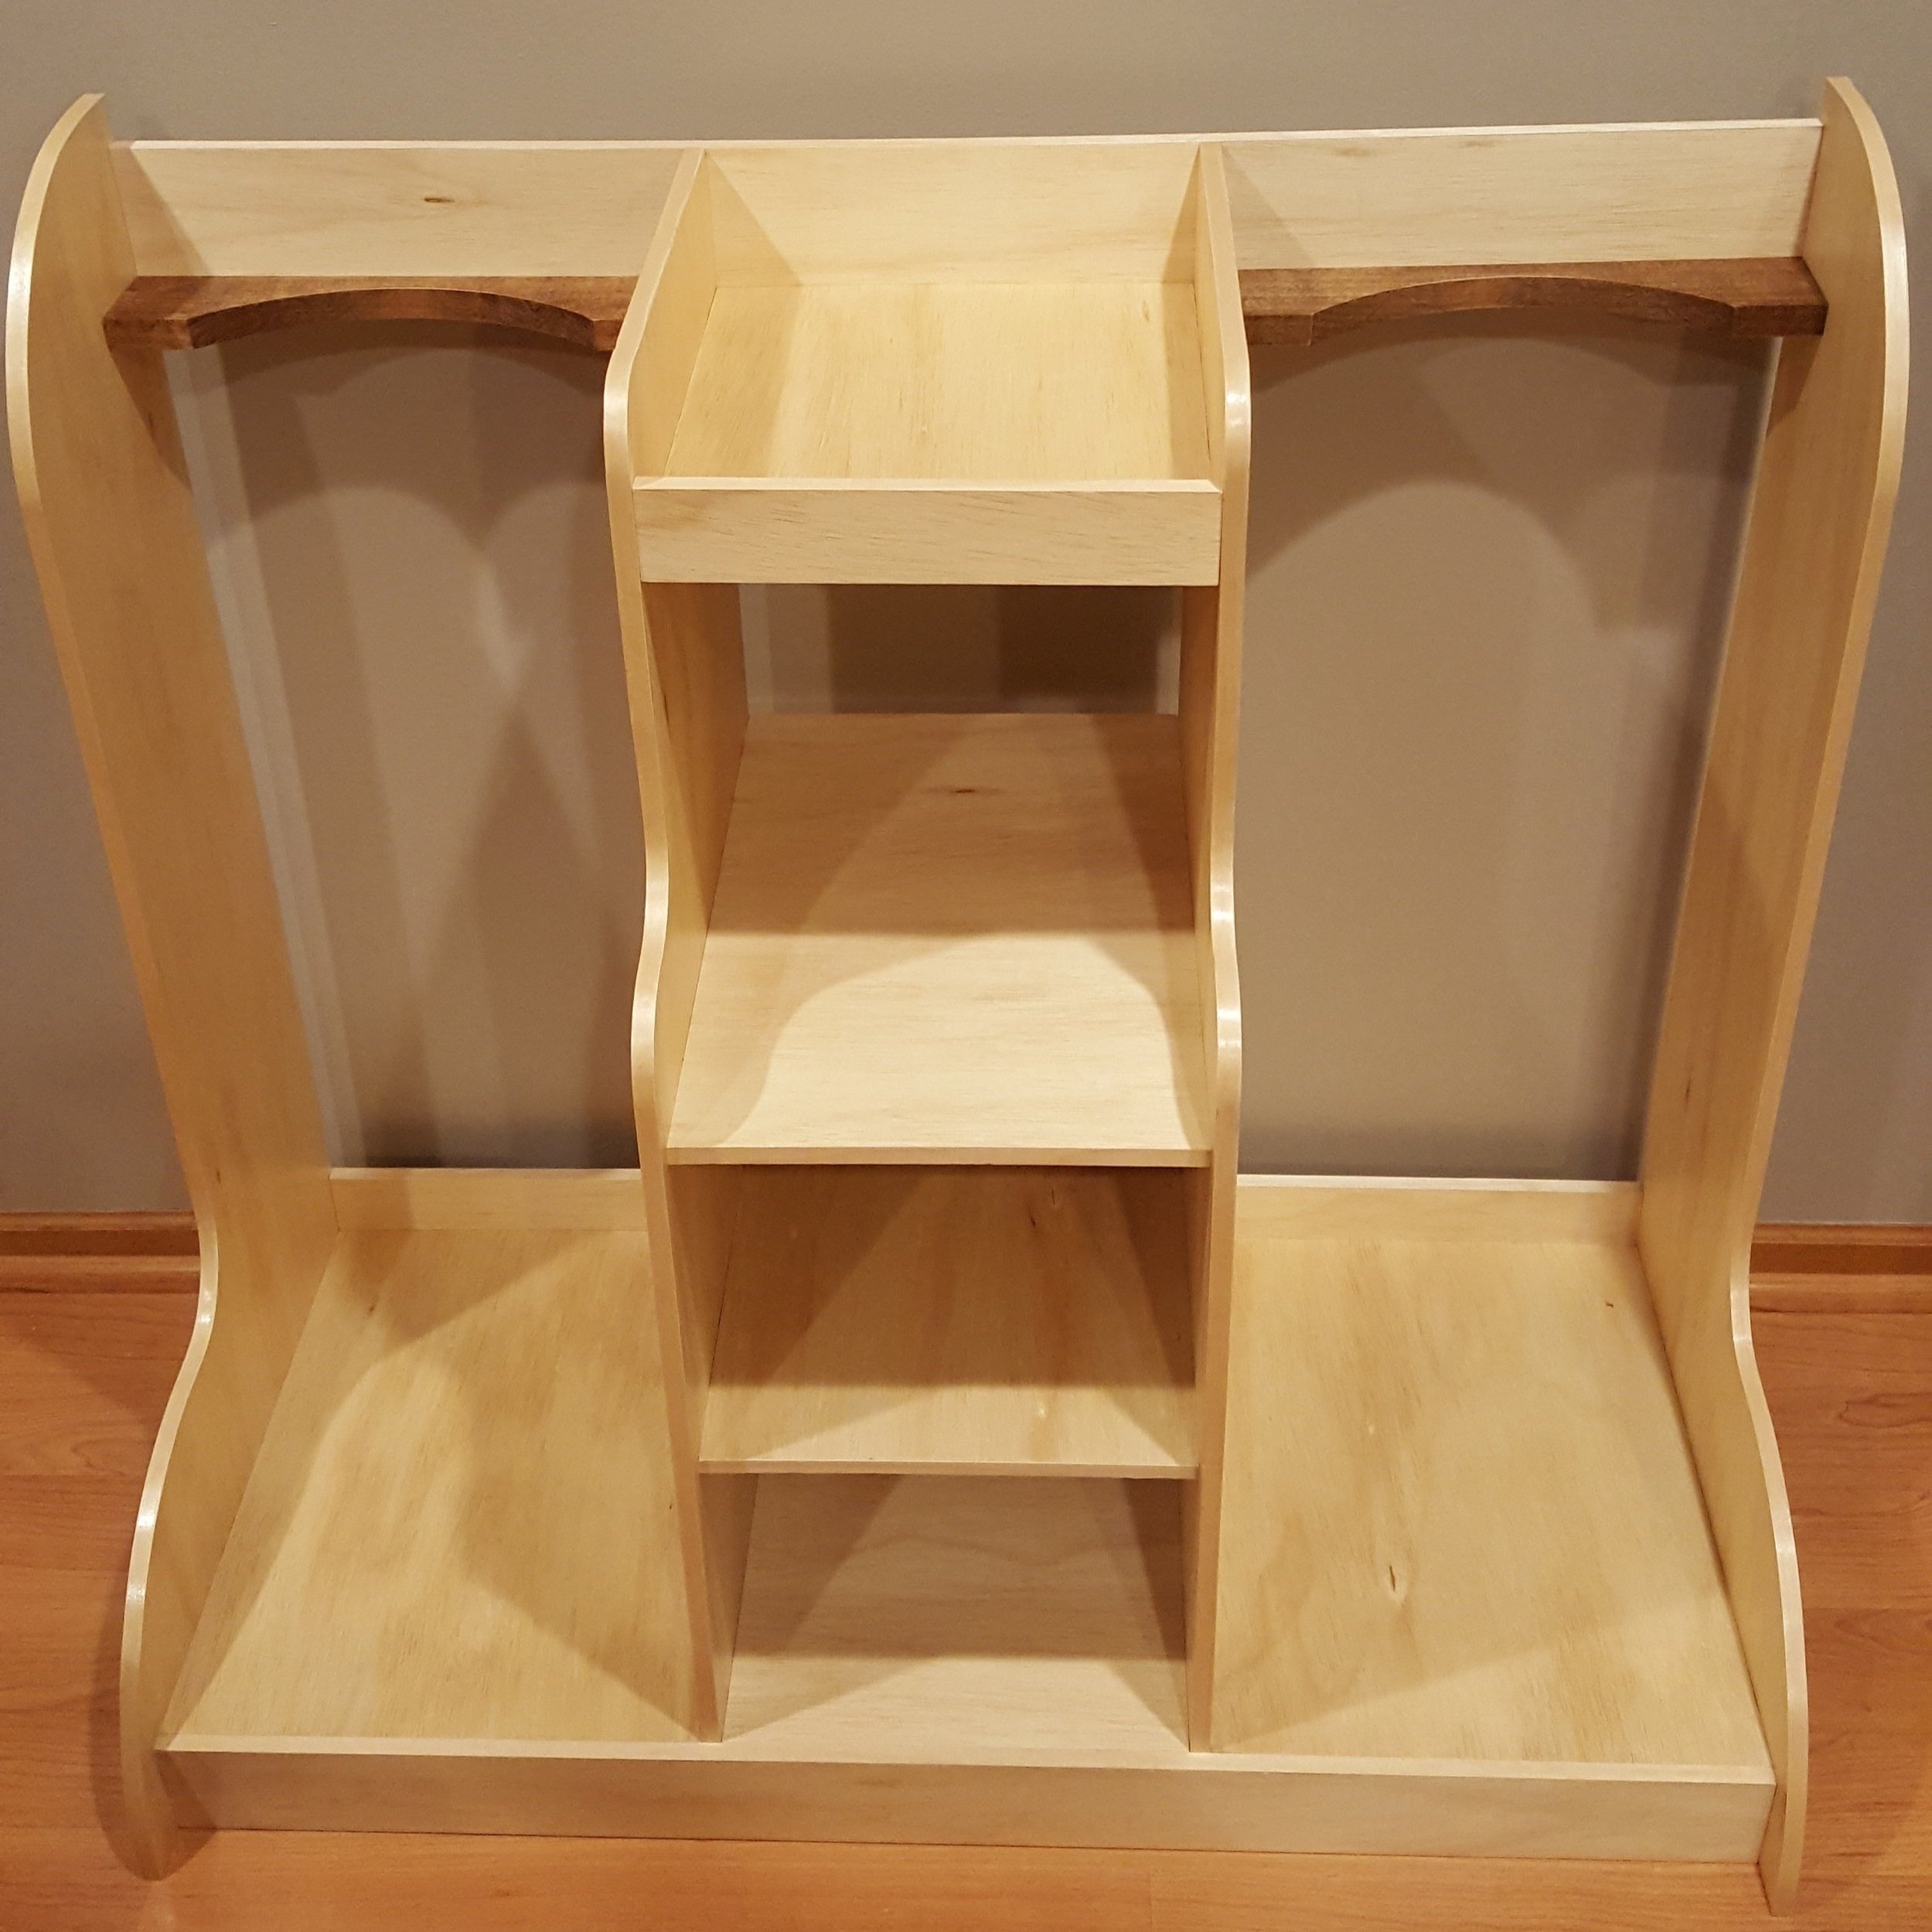
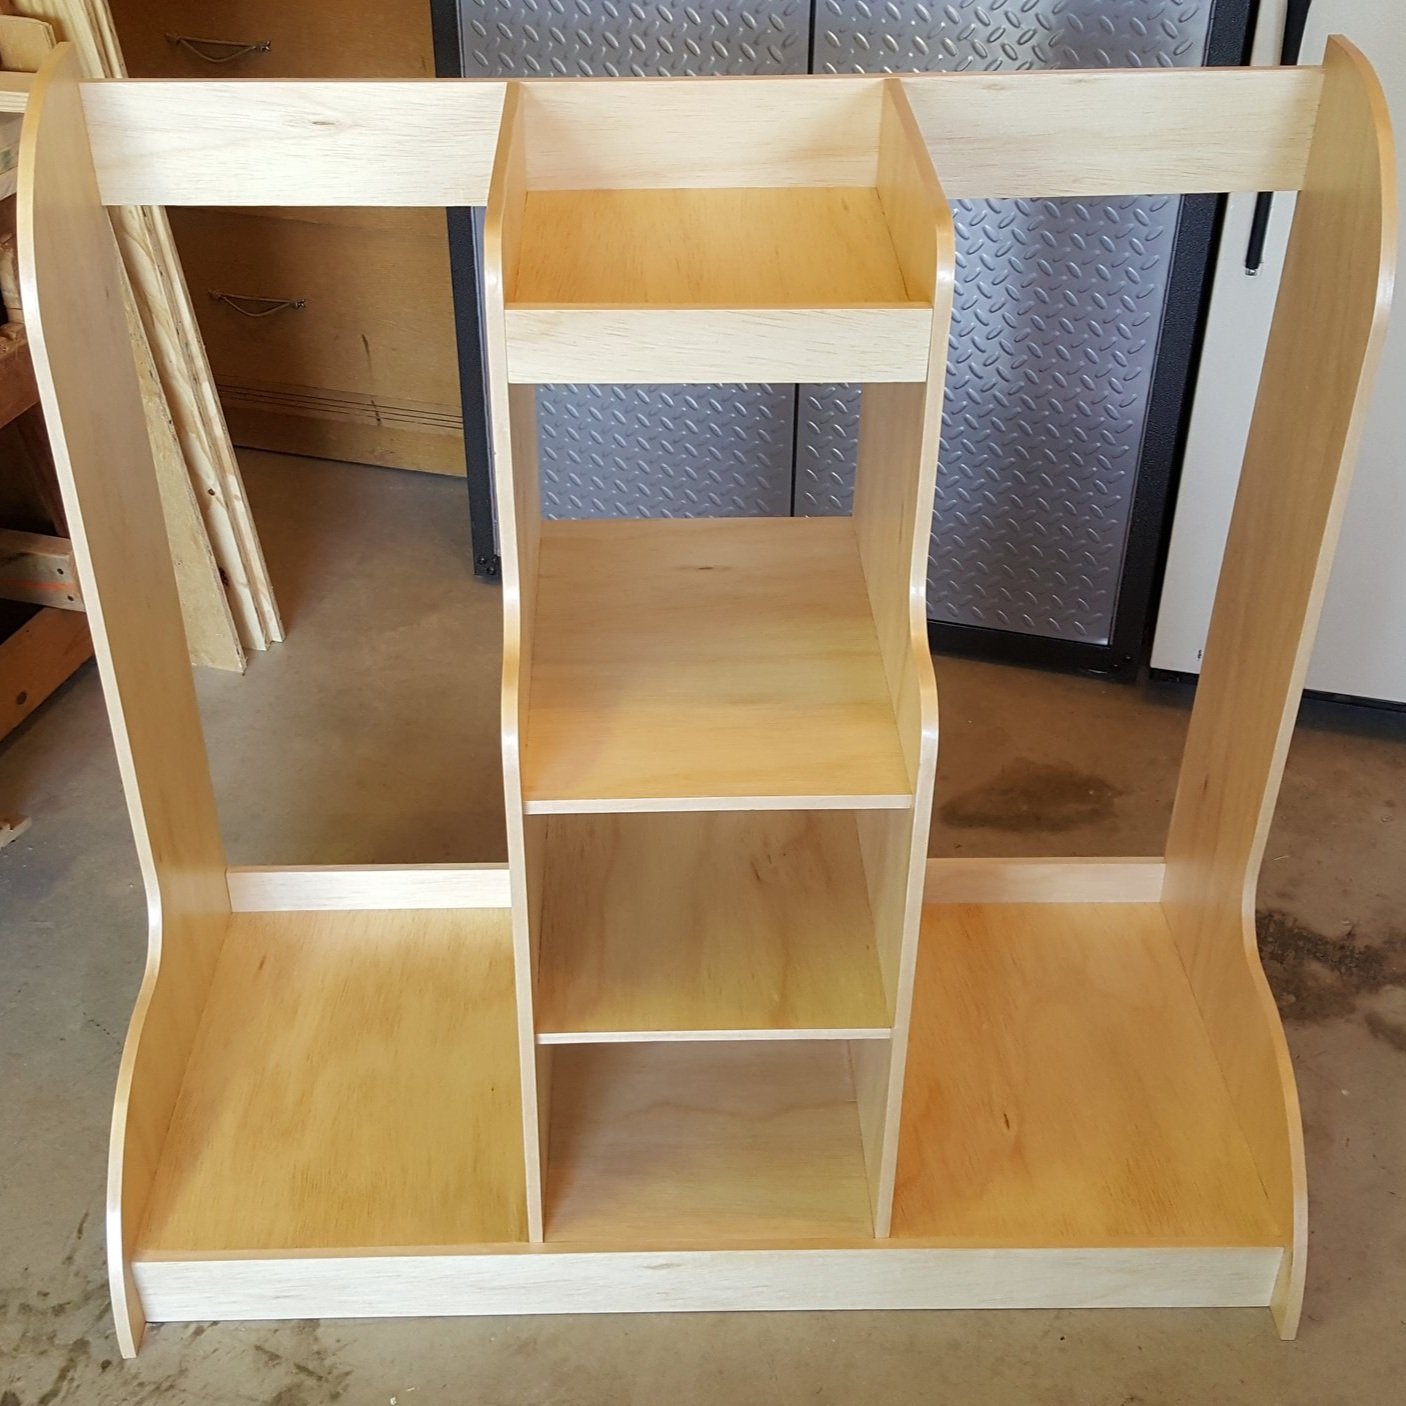
My sister had mentioned awhile ago that she wanted some type of golf rack to hold her two sets of clubs in her new home. With her house warming party coming up I decided to design and build her one. I browsed around online and got some inspiration. Here's what it ended up looking like before being loaded up with bags, shoes, balls, etc.

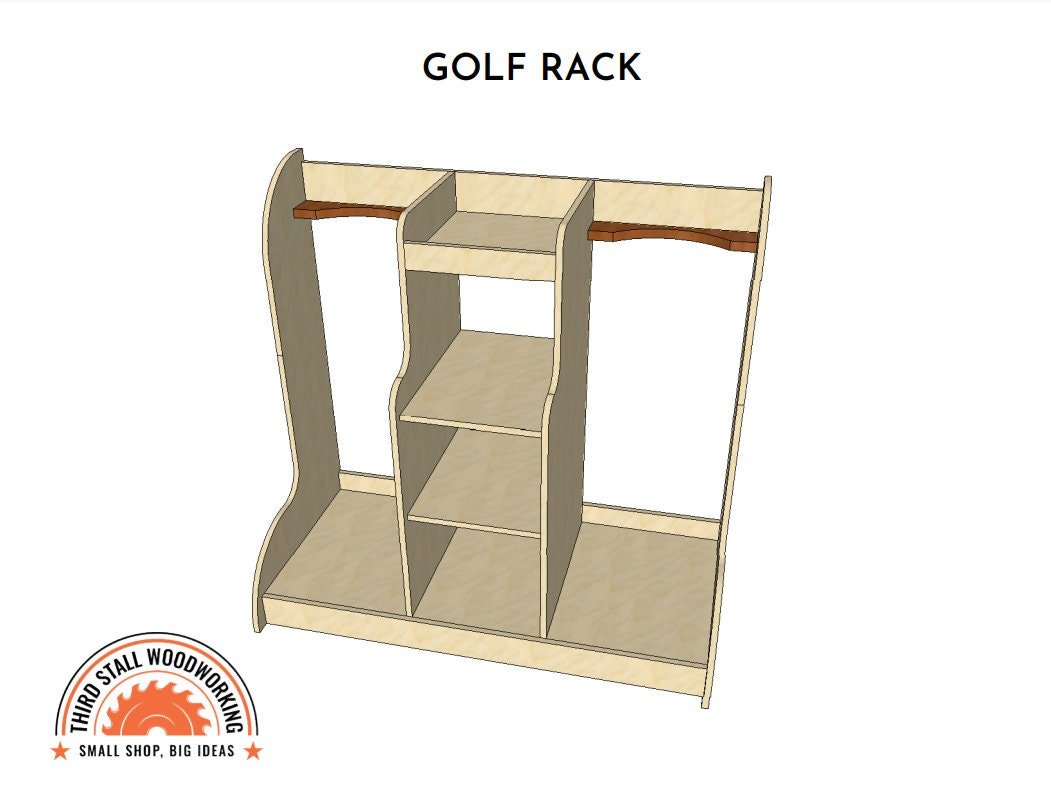
I started the project out by designing the golf rack in SketchUp. I designed it to use one single sheet of 1/2" plywood and a piece of 3/4" maple for the golf bag rests for some contrast.

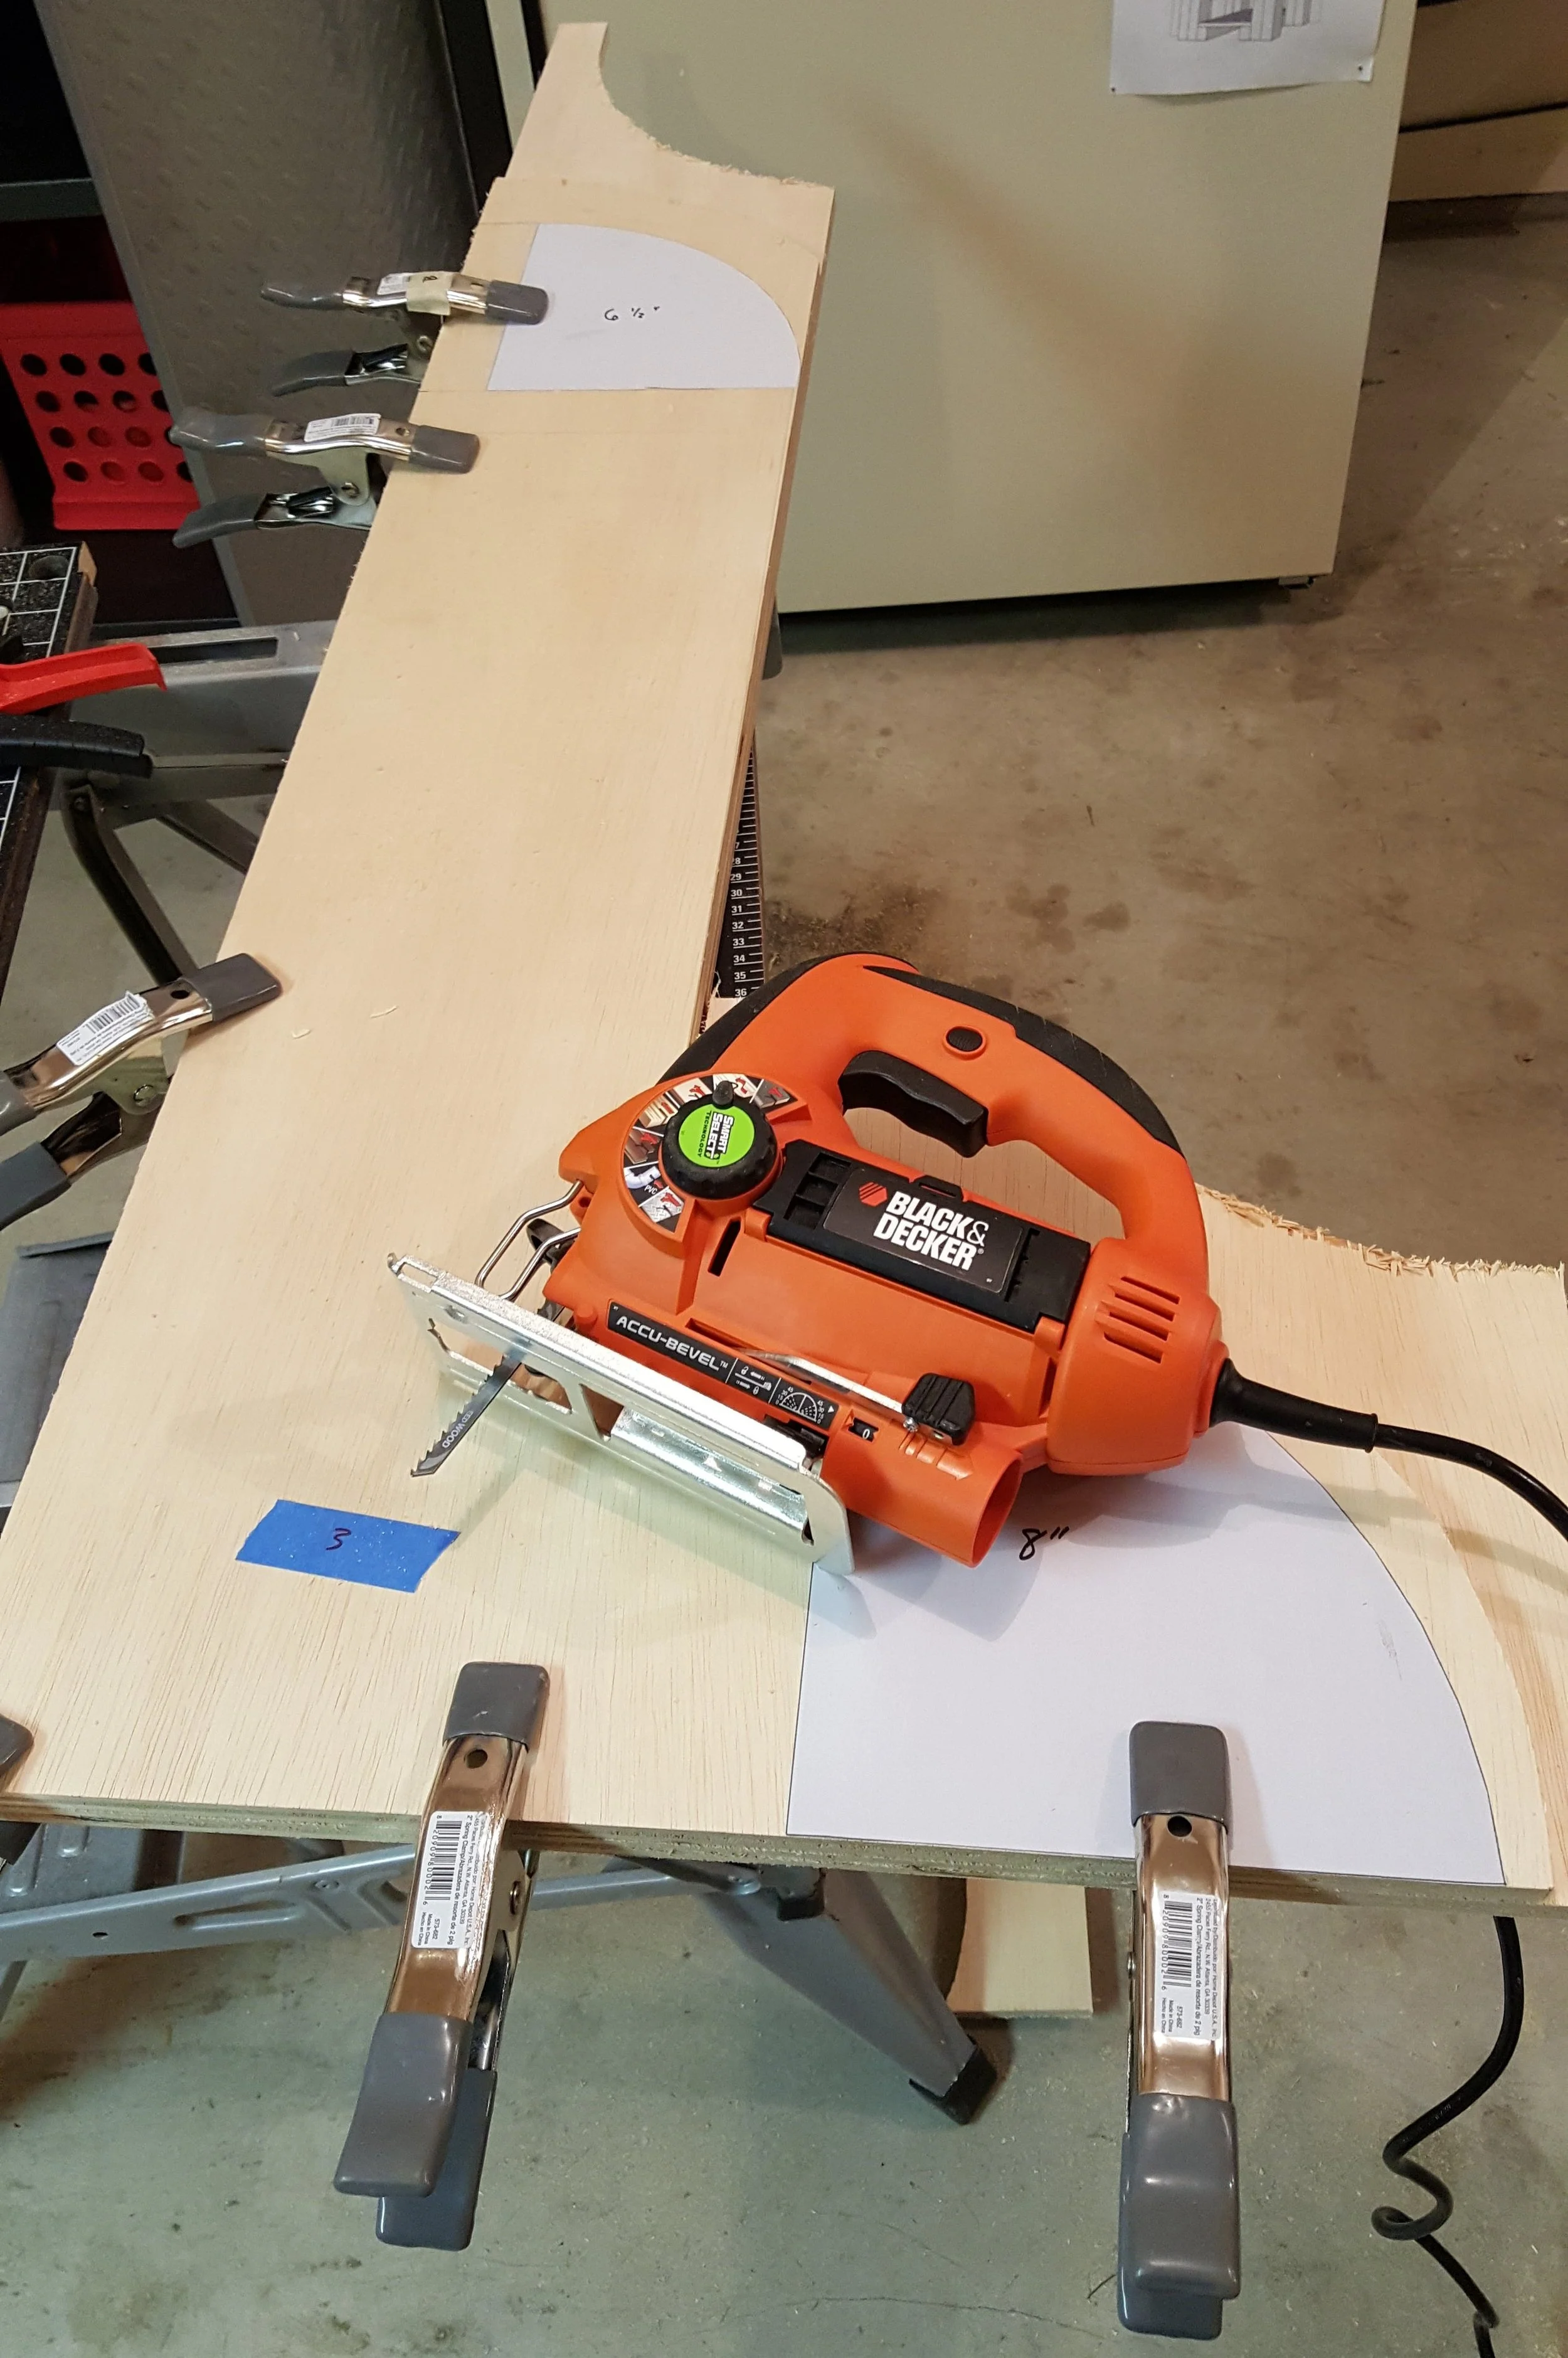
Printed out the design with dimensions, a cut list, and the curves needed for the tall supports, true to size.

I purchased a 4'x8' sheet of plywood and ripped everything to width on the table saw and labeled each piece with painters tape. The lengths were left heavy at this point so they could be adjusted to exact dimensions once things started to come together.

I glued the radius templates to the plywood with a glue stick (I felt like a third grader) and traced a line using a straight edge between points.

I had surprisingly good results, leavings little to be sanded.

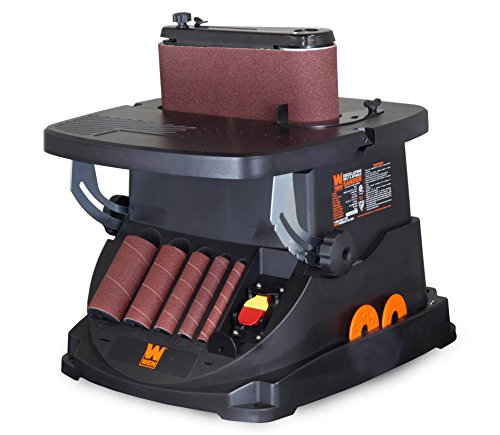
I smoothed out the tight radius with an oscillating spindle sander.

Again, great results for the main pieces which I was pretty nervous about. I've never had great results with a jigsaw but these pieces were just too large for my band saw.

Dry fitting some parts together to make sure I had everything and that they all fit.

The nightmare begins.. I have never edge banded before but have always thought the concept was cool. Edge banding is applying a thin strip of wood with pre applied glue and heating it with an iron to adhere it. Edge banding in general is pretty satisfying once you get the hang of it; I just don't suggest learning to do it on curved edges of wood. It took a lot of patience with these pieces and a lot of care to not burn the inner corners yet make the banding stick. Eventually, I got it right but I was sure I was going to ruin this piece while learning.

I made this little sanding block with a 1/2" gap to fit snugly on the plywood, it made smoothing all the edges easy before applying the edge band.

I found the best way to remove the overhang was to take off the bulk with a razor blade then sand the remainder with 220 grit sandpaper as to not remove the outer layer of plywood on the face.

You can see here I was able to get the round overs to look pretty good. I was really happy with how the edges all looked on the project.

Hard to tell it's not a solid piece of wood!

Every piece is held together with pocket holes and glue. The Kreg Jig is an insanely handy and easy to use tool. It gives a lot of strength with no visible joinery. After drilling out around 75 pocket holes I was really wishing I had the larger Kreg Jig with a built in clamp and fixed base. It's time consuming to set this little one up with a face clamp over the edge of a work bench. Makes for an awkward drilling angle and a sore wrist.
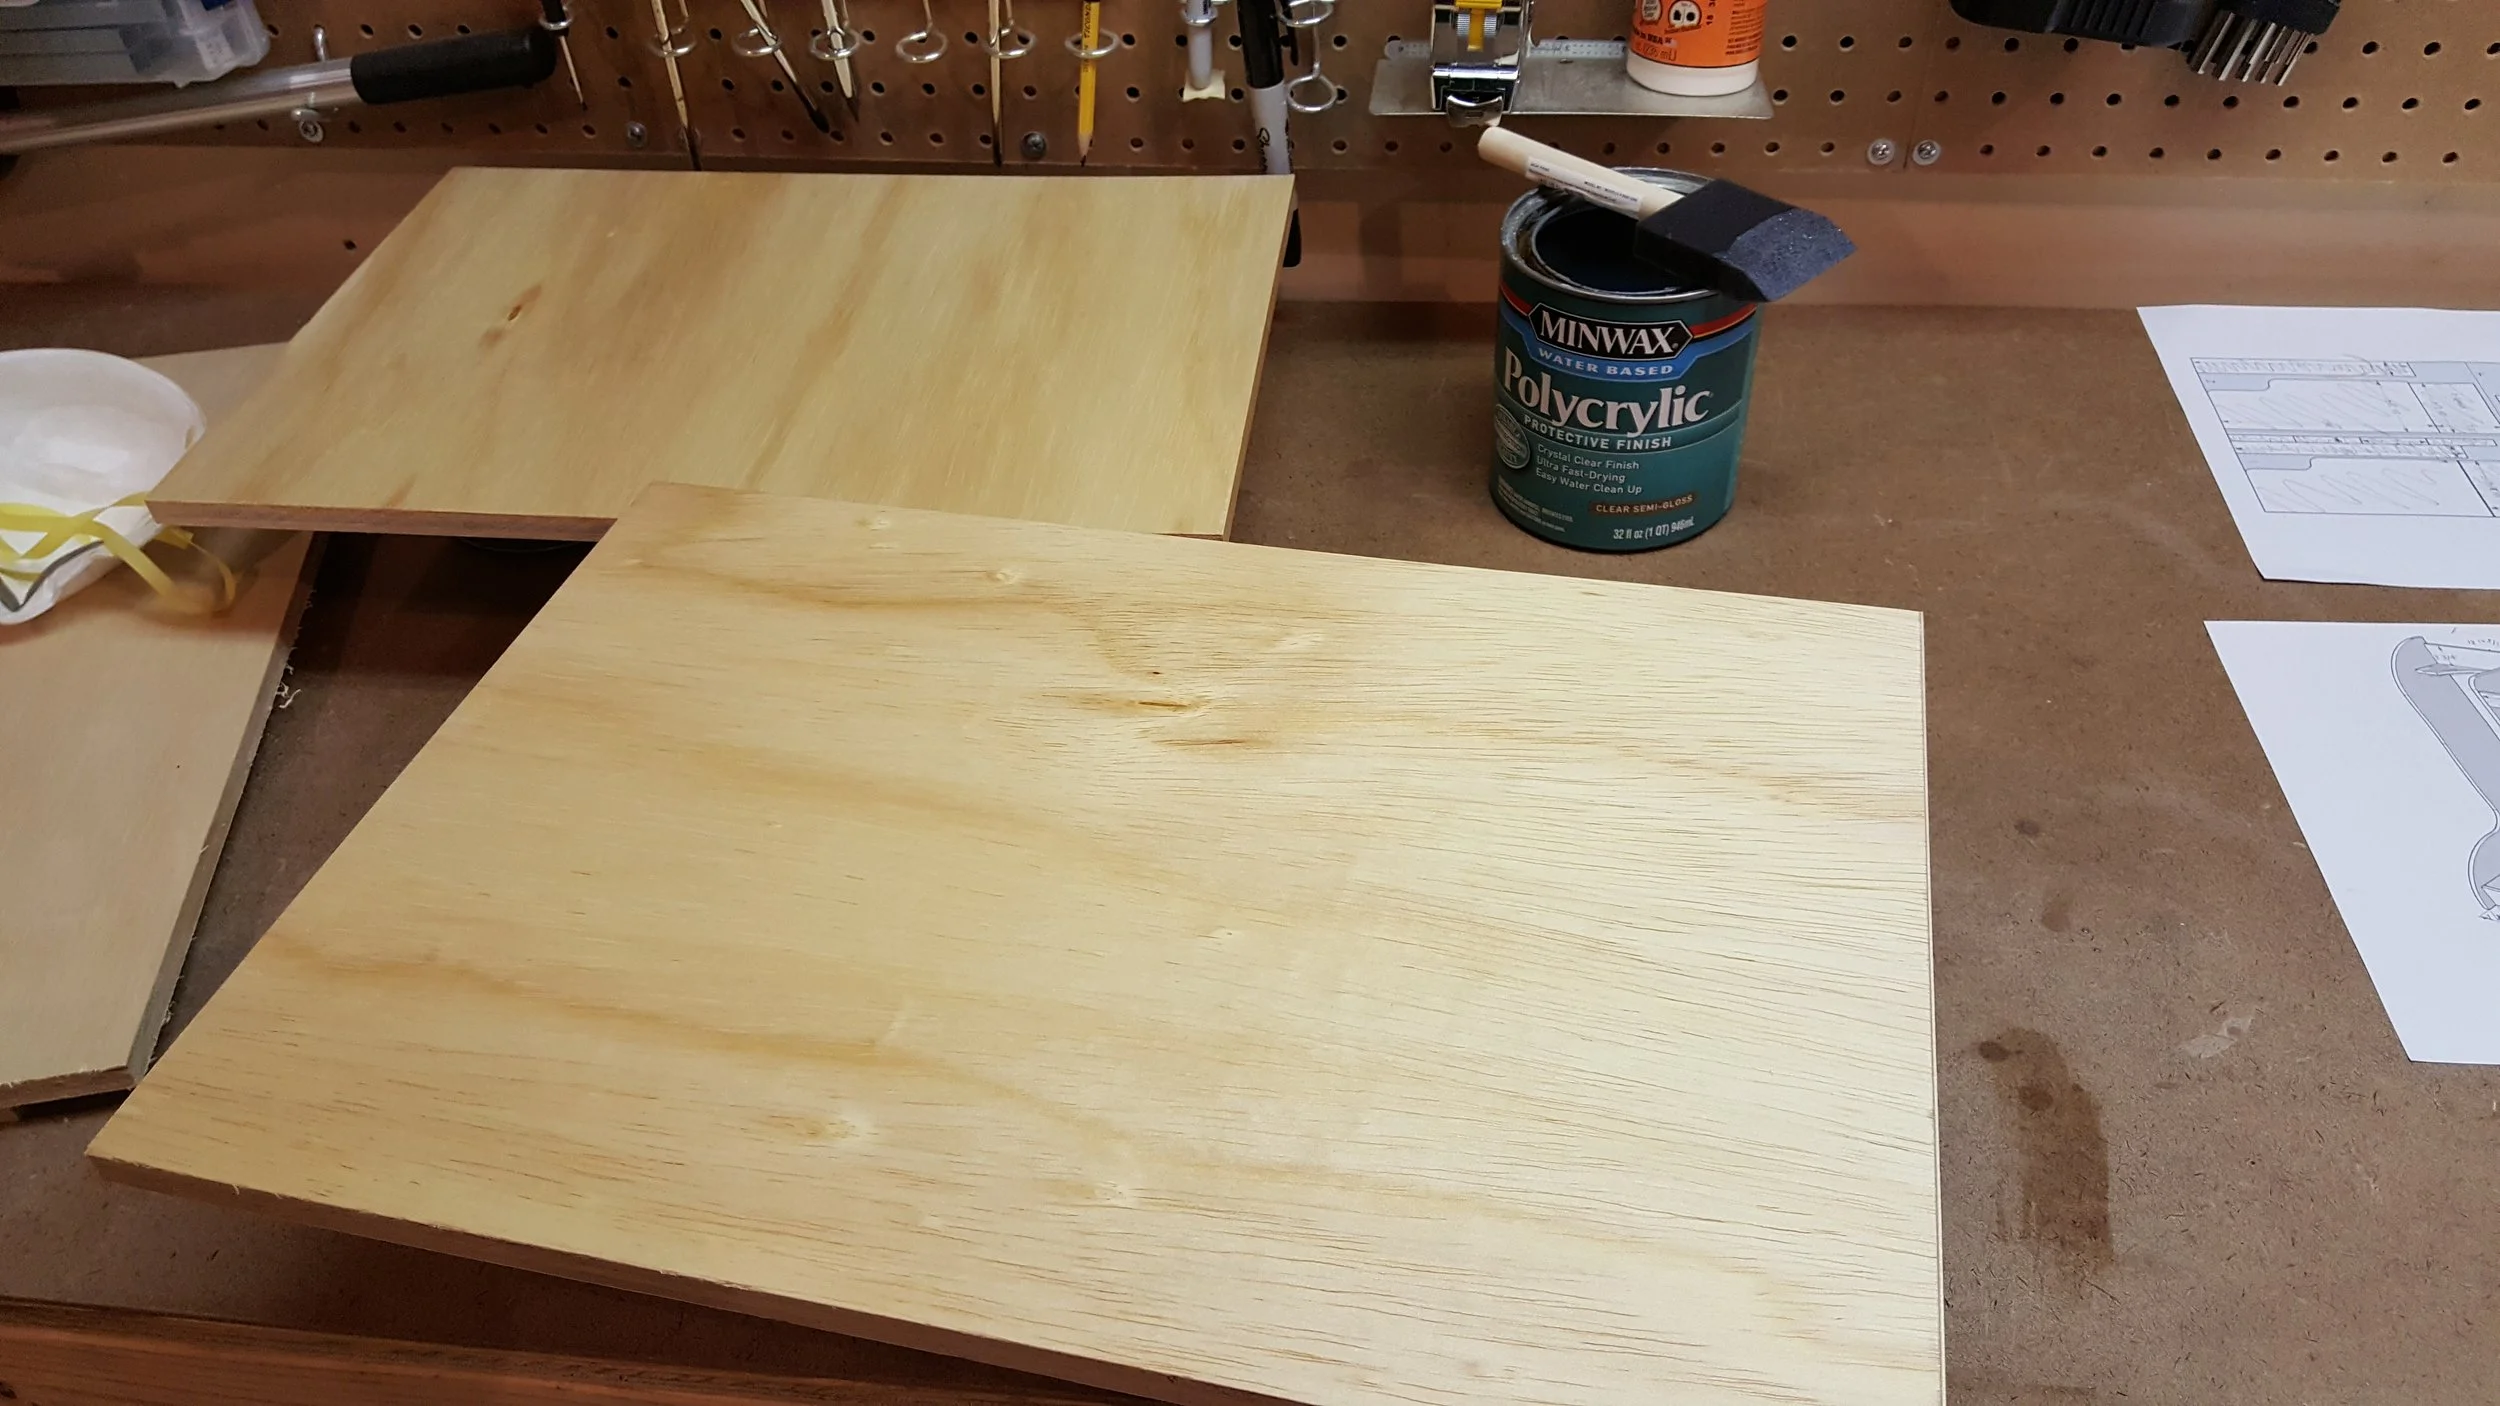
I decided to finish the whole golf rack with Minwax Polycrilic. I find myself using this finish a lot as it's water based, mostly odorless, easy to clean up, and easy to apply.

This is how it looks after two coats. It should protect against shoes and club bags being taken in and out.

I'm glad I labeled all the pieces, many were similar shaped with one side or another edge banded. Using spacer blocks, I ensured everything would be aligned properly and started gluing and screwing, making sure to keep the angles square. You can see I'm using my drill to fasten the pocket screws instead of the impact driver. A few times in the past I have plowed a screw straight through the other side of a project when using the impact driver since it's just so powerful. The drill has a clutch which I can set to a low setting and carefully drive it to the correct depth.

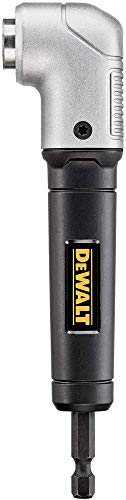
I didn't realize it beforehand, but I wouldn't have been able to assemble a lot of this project without this right angle drill attachment. I knew this thing would pay off some day! Here you can see another spacer I made to ensure the shelves were level and equal distances from one another.

It's finally starting to look like something!

I had to play around with the order of attachment here. With so many pieces it took some thinking and dry fitting to make sure I would have access to the pocket holes and angles when it came time to fasten each piece.

A couple of spacers keep the floor lined up square to the support walls.

I made some temporary stands to support the weight of the shelves at this angle while attaching the outer walls.
Once I had the main frame together I took the measurements of the bag rest areas to the left and right of the shelves.

Using SketchUp again I made a template for the maple bag rest and glued it on. This and all other templates are available in the plan set.

I was able to get a really smooth and accurate cut using the band saw. I left it a little heavy to touch up with sanding but it probably wasn't necessary since the fine tooth blade left a great finish.

Touch-up with the spindle sander.

Dry fitting before tracing the radius onto the second piece and repeating the process.

The final pocket holes, this was a relief!

The maple was stained to give some contrast against the natural colored plywood. I then finished them with two coats of poly to give it a nice shine and protection to protect the whole golf rack from the bags banging in and out.

I drove two screws in each bag rest to pull it against the back for a tight seal as well as the pocket holes on the bottoms.

It really shines in the light. I had debated keeping it simple and leaving all of the edges rough plywood, since this will likely be kept in my sisters basement or garage but it was good opportunity to play around with the concept of edge banding. I'm happy how it turned out, it came out looking like more of a piece of furniture rather than a tacked together storage object.

I loaded the golf rack up with my own clubs and accessories to make sure everything fit like I had planned. I'm now tempted to keep it for myself..
Products used in this build
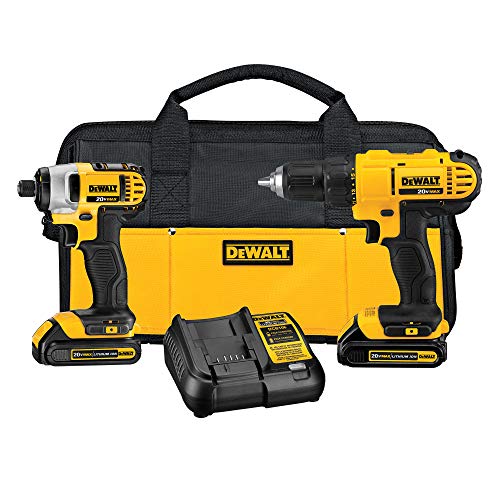
Power tools


Helper items